This guide aims to improve your skills in century combat, turning those meager victories or defeats into heroic victories by routing the enemy forces. For the glory of Rome!
This guide will focus solely on century combat.
Introduction
First a look at which stats are important for century combat.
Secondly we will briefly go into Javelin throwing.
Thirdly we go to Seize the Initiative and the First Clash.
Fourthly we will discuss the commitment and how imbalance affects your decision.
Fifthly we will go into strategy, should you be aggressive or passive.
Lastly we will put it all into practice by looking at a walk-through of the century combat for the first battle of the campaign.
I hope that using this guide you can spread the glory of Rome to Galicia and beyond!
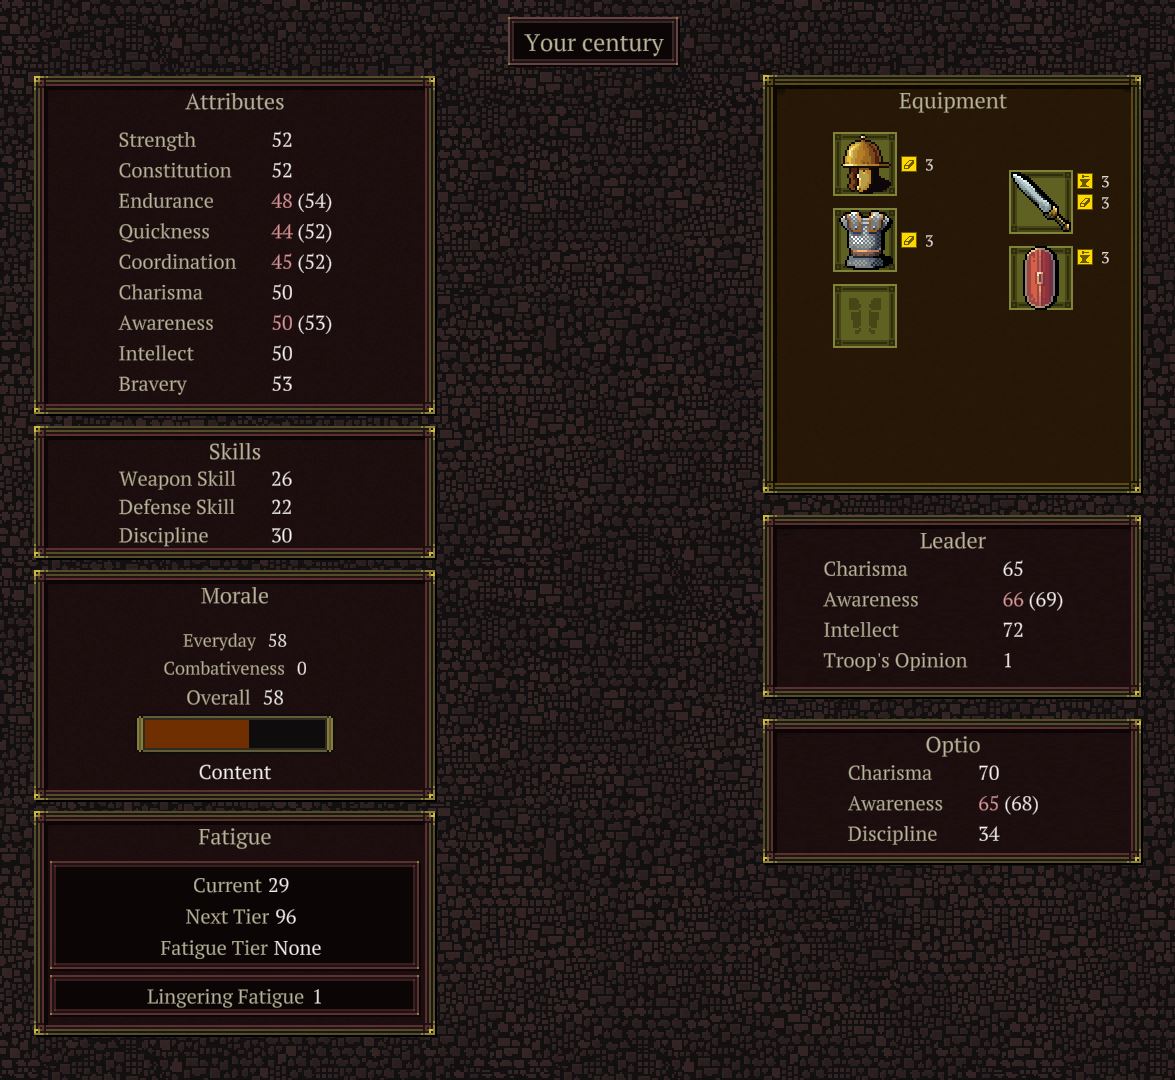
Importance of stats
We will start with your Centurion. Your Centurion stats are only relevant for gaining initiative for both Javelin Act In Advance and Seize the Initiative during the first clash.
The relevant stats are:
- Intellect; used for both.
- Awareness; used for Javelin Act In Advance.
- Charisma; used for Seize the Initiative
- Fatigue modifiers; used for both.
- Morale; used for both.
The stats of your Optio are relevant for when your Determination is lower than the opponents, which will happen quite often, so choose your Optio wisely.
Relevant stats are:
- Charisma
- Awareness (to a lesser extent).
- Discipline (to a lesser extent).
Your Century stats are the most important during Century Combat (who would have guessed).
The most important stat is the Discipline, followed by the Sword and Shield and Javelin skills. Bravery is somewhat useful. Strength and Constition are of minor importance. Quickness has so little influence it’s almost not worth mentioning.
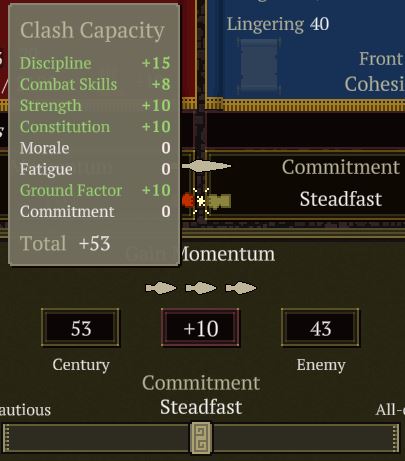
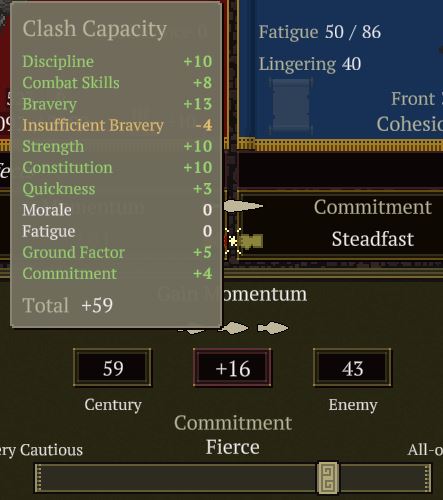
The effect of stats:
- Discipline; 1/2 for Steadfast and lower commitment, 1/3d for Fierce, 1/4 for All-out.
- Sword and Shield are always used for 1/3d of the skill.
- Javelin skill is only used during the Javelin phase, the skill should preferably be at least 1 higher than the opponents ranged defense (meta knowledge required). High ground is added or subtracted for this.
- Bravery; 1/4th for Fierce, 1/3d for All-out (with a penatly on All-out for every lvl lower than 64).
- Strength and Constitution are only used during First Clash for 1/5th of the skill.
- Quickness is only used during First Clash; 1/12th for Fierce, and 1/6th for All-out.
- Endurance determines the fatigue level.
- Morale.
My TLDR on stats for training for the Century is that since Discipline is the best combat stat for Century Combat, it should not be neglected and preferably should be trained with 5 pips until the Discipline potential has been reached.
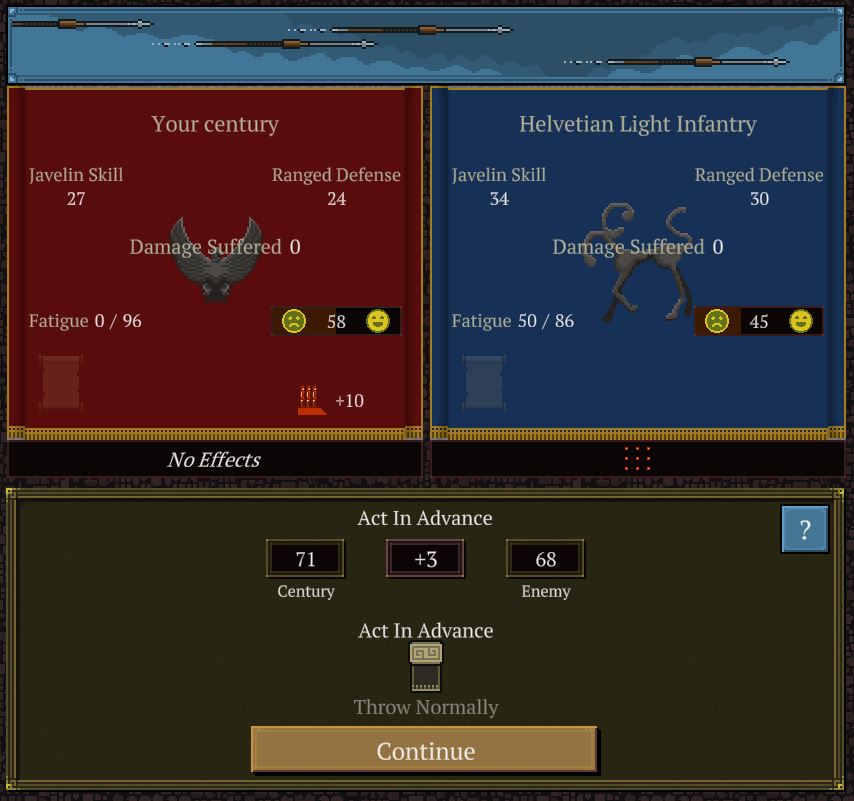
Javelin throwing
The Javelin phase can be very useful for 3 things:
- Damage, if you hit you can deal between 50-100 damage.
- Kills, you can kill up to 2 enemies (200 damage)
- Valor, characters with high javelin skill can get Valor with an excellent throw.
How can you maximize this? Firstly do not neglect the Javelin skill. To have a chance of doing good damage the Javelin skill +/- High Ground bonus should be at least 1 higher than the opponents Ranged Defense. For the final battles in Act X a Javelin skill of is required.
Should you Act In Advance or not? If the number is higher my advice is to Act In Advance, of course a Centurion with good Int, Awa, and high morale will have a better chance to gain initiative.
The Javelin phase is the easiest to reload if you want to maximize your odds.
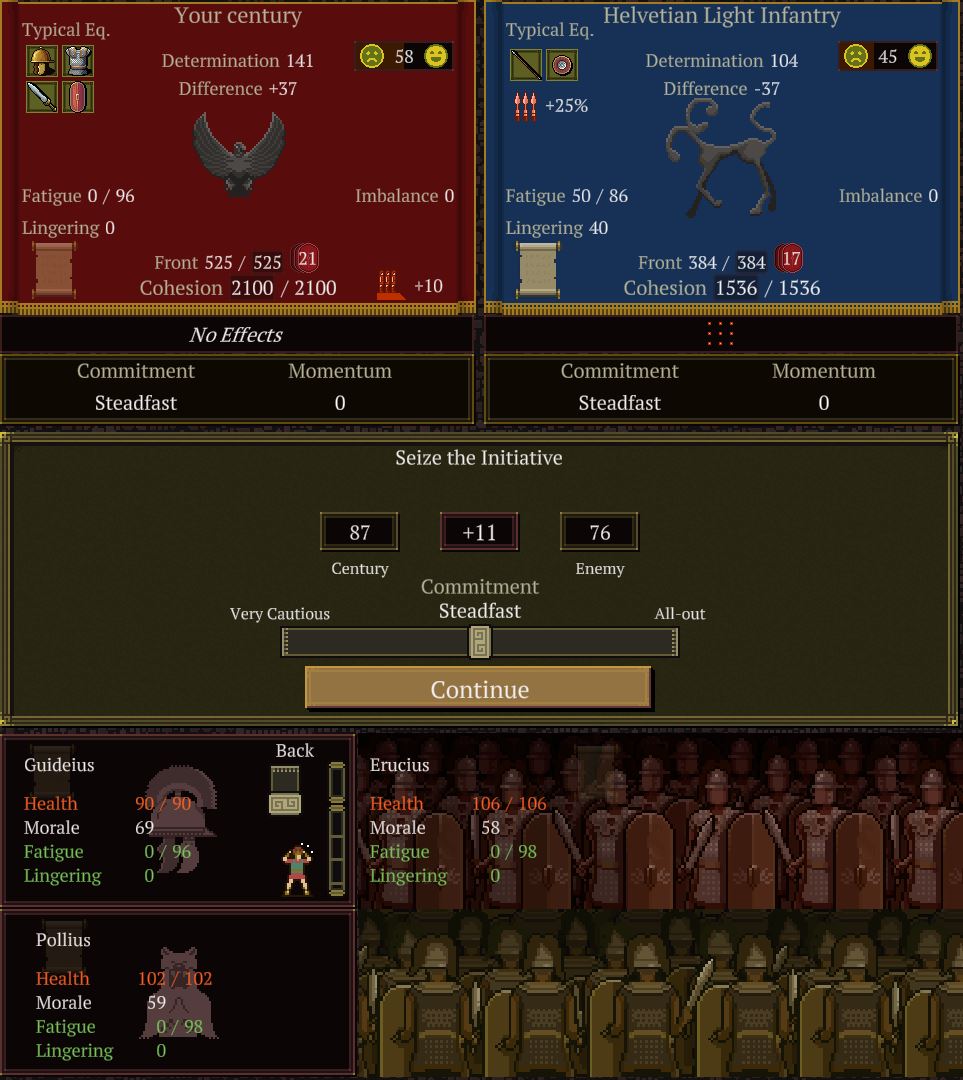
Seize the Initiative and First Clash
Generally picking Steadfast during the Seize the Initiative phase is the best option, it will not leave you vulnerable and it will allow you to go on the attack or the defense depending on whether you gain the initiative.
During the FIrst Clash phase the Determination damage caused by commitment is doubled, normally it is 5 per difference in commitment (e.g when you are at Steadfast and the opponent is at Fierce, you will lose 5 Determination and the opponent will gain 5).
Put your centurion at the back, you can always put him in front again if you gain the initiative.
If you win the initiative, great! Your enemy now has 0 momentum and you will surely gain the momentum and can go on the offensive. In early rounds and earlier acts, going with Steadfast is good enough. Choosing Fierce is an option of the opponent is Very Cautious (to force a clash) or if the opponent is going All-out, since they will take more damage. Remember that you will do double Determination damage (or suffer it if the opponent has a higher commitment) during this First Clash.
If you loose the initiative, well not to worry. The First Clash phase is now over and we can continue to the next chapter 🙂
How to determine Commitment
There are 4 things to look out for when determining what commitment you should pick:
- Your own Imbalance
- Your opponents Imbalance
- Your opponents Commitment
- Your opponents Momentum
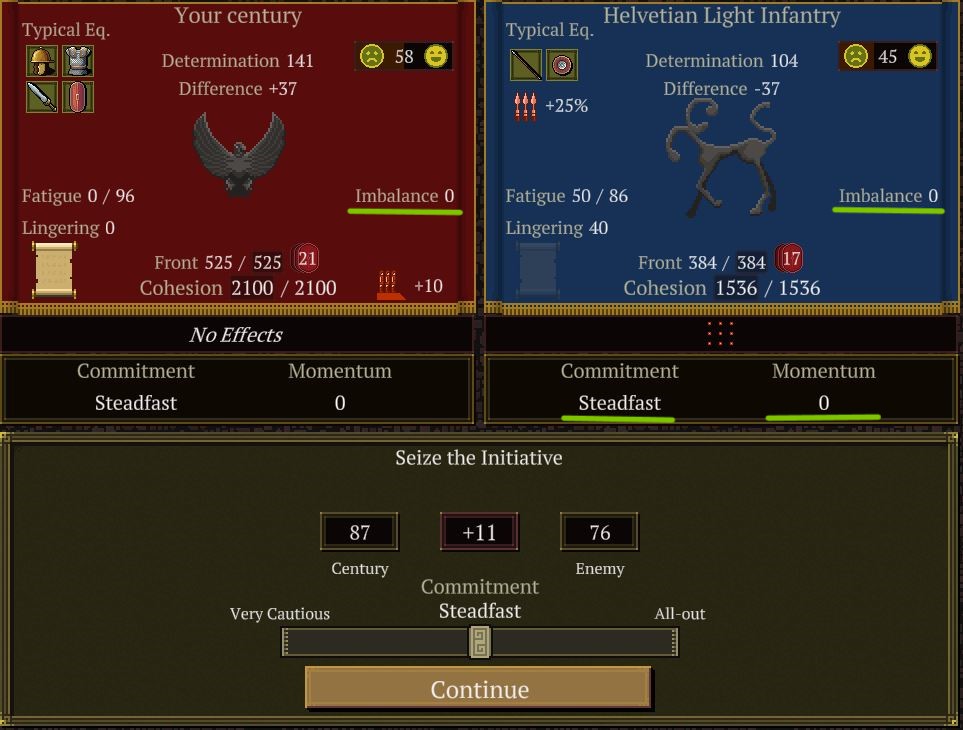
The most important is your imbalance and the opponents imbalance. We do not want our own imbalance to go above 5 or below 5, since it will drastically lower the effectiveness of your current and future clashes. The general rule is, if your commitment is above 5, go Very Cautious. And if your commitment is below 5, go to at least Steadfast.
Keep in mind that if Imbalance is added twice, so if you are at 4 Imbalance, and you select Fierce, you will go to 6 at the end of your turn, and then to 8 at the end of the opponents round.
If there is not a clash Imbalance is not relevant! This means that there a lot of situations you can push your own imbalance beyond the limit to then fall back to Very Cautious and avoid most of the negative effects.
When can you push your Imbalance higher than 5? If the opponents Imbalance is higher than yours, you could potentially be more aggresive. Keep in mind that the opponents Imbalance is added to his as well. For example if you are at +6, and the opponent is at +6 as well, but in All-out stance, it means the opponents imbalance will go to +9 at the end of your turn. So you could pick Fierce! This will force a clash as well when the opponent will (most likely) shift to Very Cautious.
Other moments where you can push the Imbalance beyond 5 are, in the Disengage phase of the round, or when the enemy is about to break and the Formation Combat is almost over.
Shifting directly from (Very) Cautious to Fierce/All-out or vice-versa will put severe penalties on gaining momentum, and on using Advantage Opportunities for your own turn. Try to avoid this if it results in a clash and the momentum of the enemy is at 2 or 3. You can do an extreme shift if it does not result in a Clash (mostly to Very Cautious). Of course if you are very close to routing the enemy you can do it in the later stages of the battle.
Generally the opponent will try to keep the Imbalance between 5 and -5, or at least keep it closer 5 than you. If an opponent is at high Imbalance and on All-out or Fierce commitment, this is a moment to stay on Fierce commitment yourself as well, since if they shift to Very Cautious they will suffer the Extreme shift of Commitment penalty and you will do devastating damage. The next round you can go to Very Cautious yourself.
If the opponents momentum is at 2 or 3, either go to Very Cautious or go to Steadfast and activate Shield Push. If the opponents momentum is at 0, you can go to Steadfast, Fierce, or even All-out if it’s the last round of the combat. If the opponents momentum is at 1, Steadfast is a good option or potentially Fierce later in the round/Formation combat.
If the Fatigue of your Century is higher than the enemy, or if you know there are multiple battles this Act without a chance for rest, try to avoid using Fierce. Only use it if you really must to gain the minimum goal, or to get the rout.
The Centurion has 1 job during Century combat and that is to kill enemies!
Front or back? My very general advice is, do not worry about the first tier of penalties unless your Century morale is just above a threshold (51, 71, 86, 96).
- Put the Centurion at the front when you are not Clashing.
- Put the Centurion at the front on Very Cautious and Cautious.
- Put the Centurion at the front if you are going to clash and the opponents momentum is at 0 or 1.
- Put the Centurion at the front in later rounds (during Disengaging) if the Fatigue is still manageable.
If none of the above is true, you are probably better of putting him at the back, unless you are hitting the 2nd penalty threshold.
If you are going to use Spearhead, my advice is to use it on your best legionary in the later rounds of combat. Only use your centurion if you are in the final round of the final formation combat and you really need that kill to rout the enemy.
Shield Push is best used when the enemies momentum is at 2 or 3 and your chance to gain momentum is low, since it will block personal conflicts. It is mostly used when you start a battle at Very Cautious and you have to go to Steadfast while your Determination is low.
General Strategy
Achieving the minimal goal should always be doable, routing is optional.
You only need to go aggressive if you really want to rout the opponent.
When should you not try to rout the opponent:
- If there are multiple fights in a row, it is difficult to rout one (or even them all), and fatigue will make each subsequent fight harder. For multiple fights, first try to rout the last fight, then if you can manage that you can be more aggressive the next play through (or reload)
- Fights biased against you where you start with higher fatigue or the enemy starts on high ground.
- If you are going to fight for a mural crown after this fight, you might want to keep your Centurion fresher than normal.
- Some fights only have 2 Formation Combat phases, and they are difficult to rout in that time.
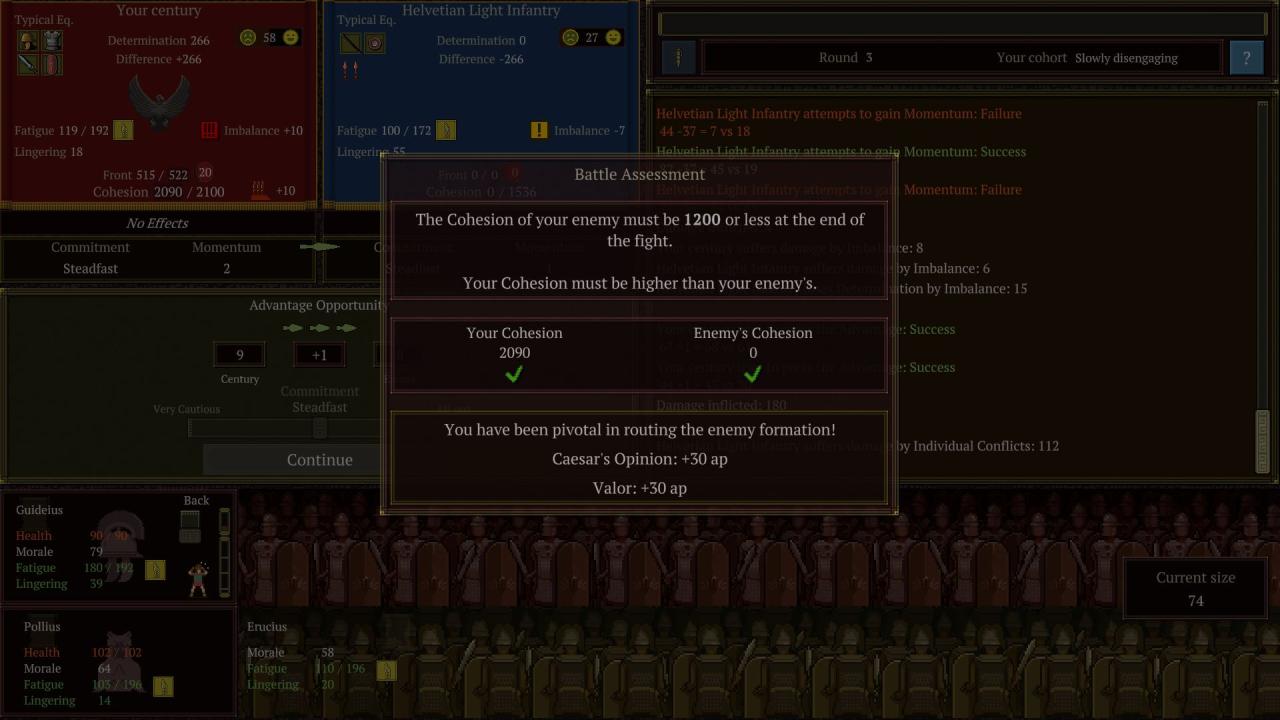
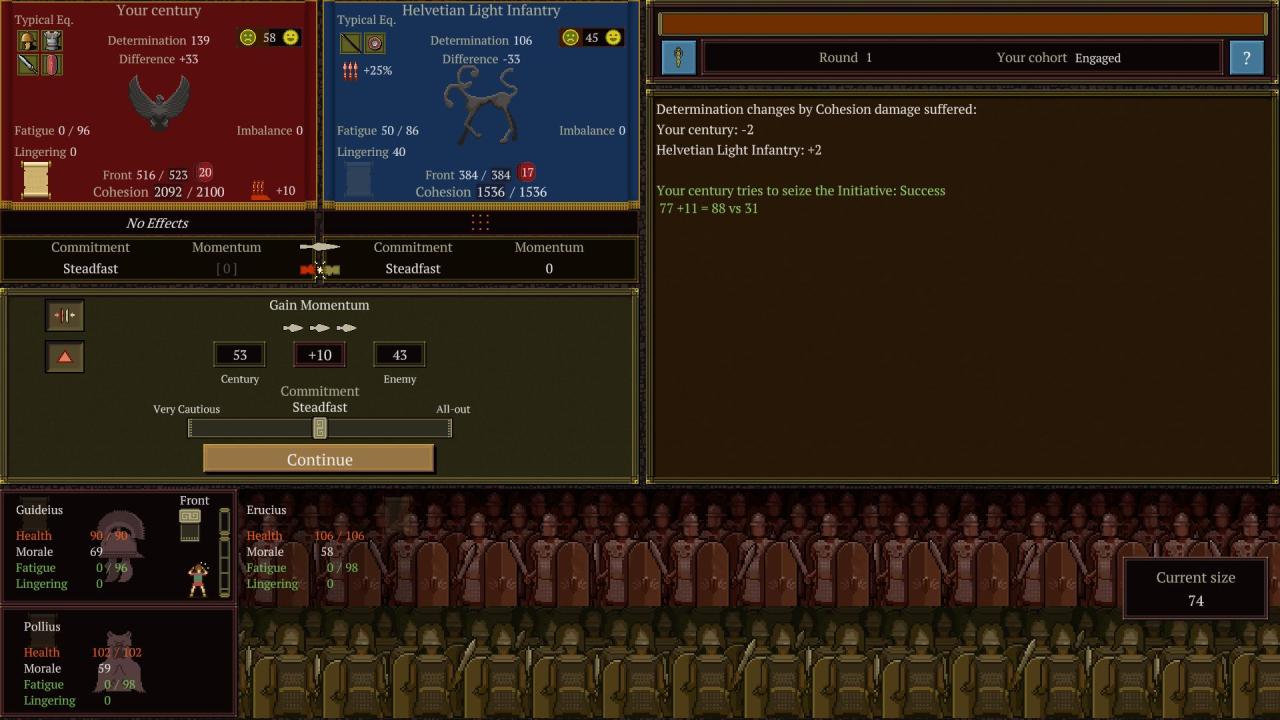
First Battle Walk-through
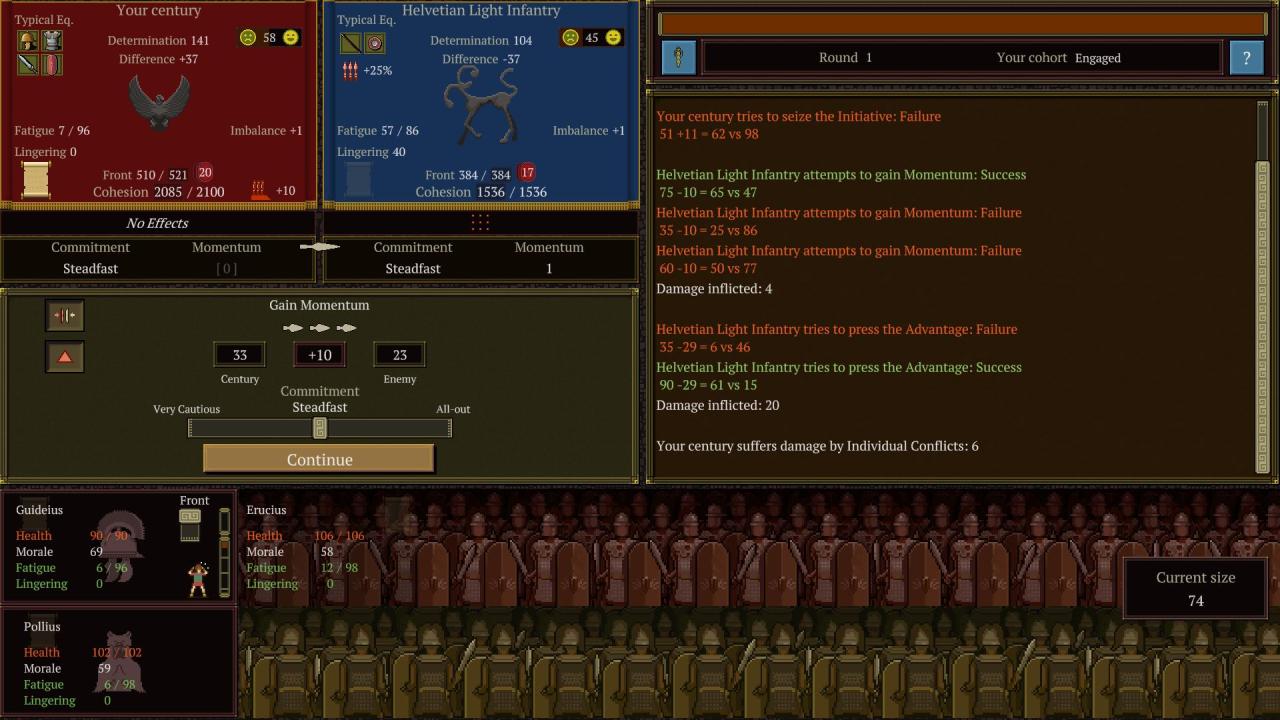
Javelins have been thrown, we put the centurion at the back and we sadly lost initiative. Since enemy momentum is at 1, we can stay at Steadfast. We also put the Centurion at the Front to get a chance for personal combat.
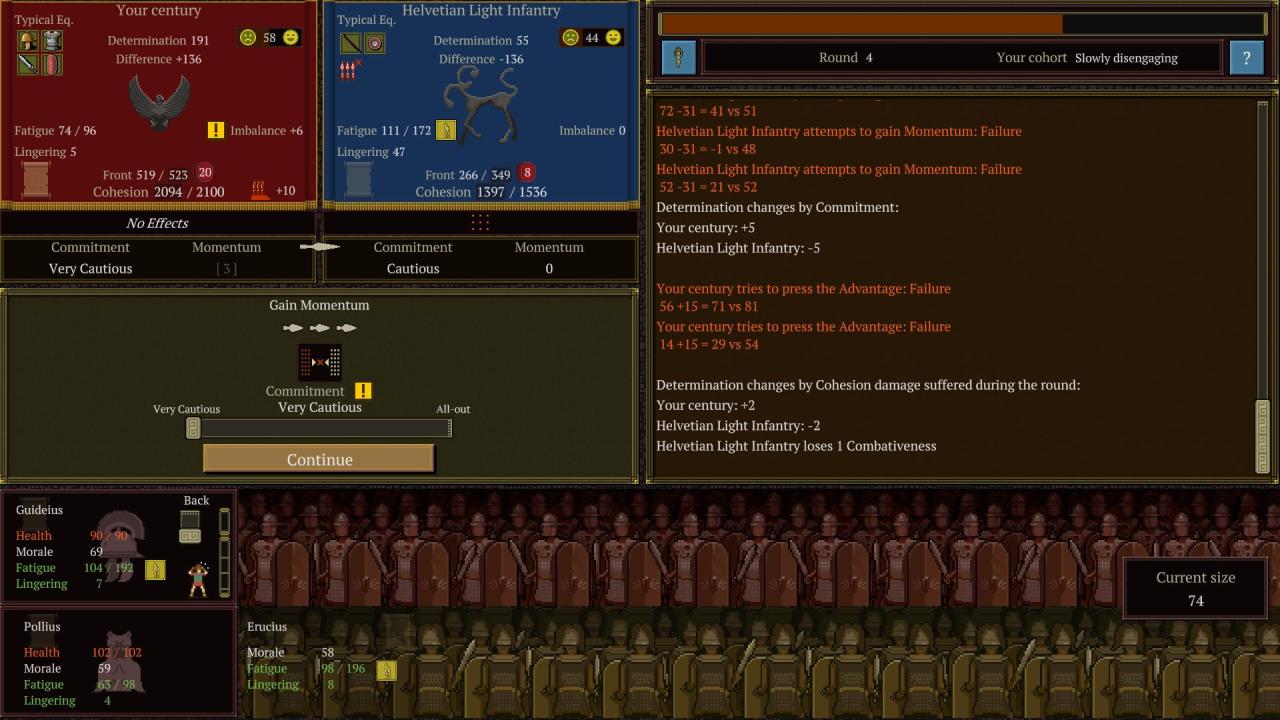
On round 4 we shift to Very Cautious since our Imbalance is at 5.
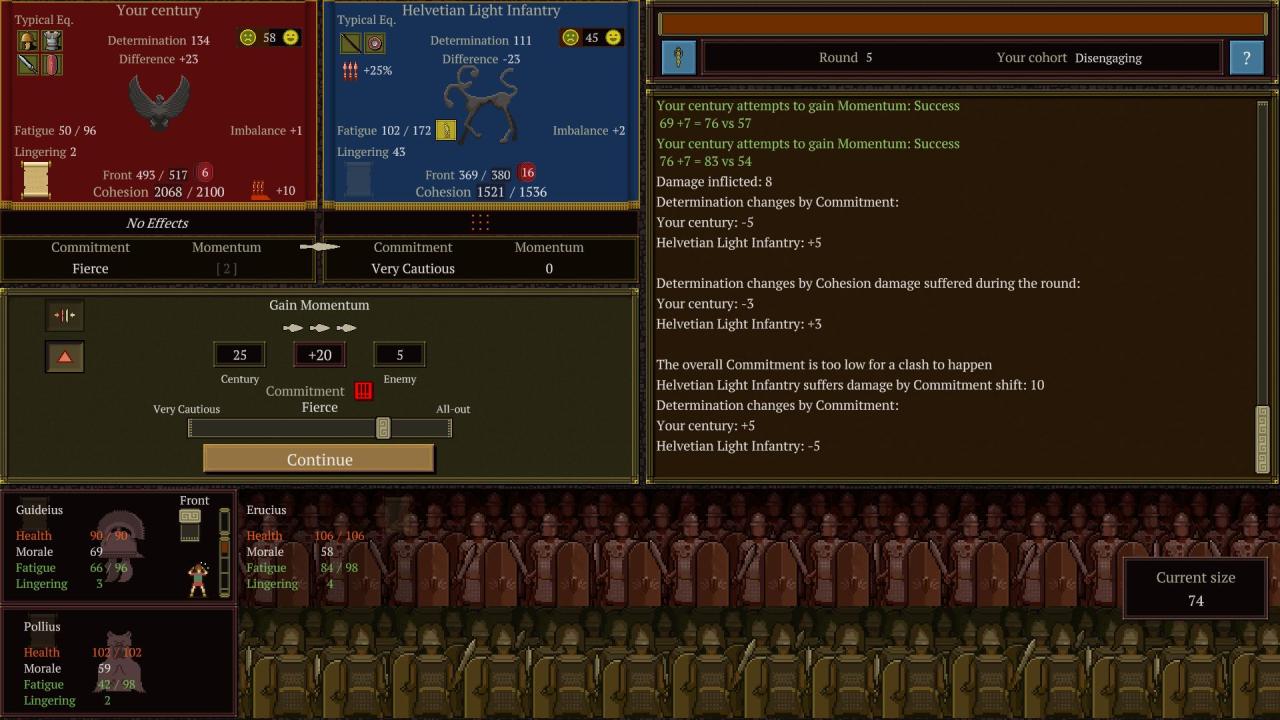
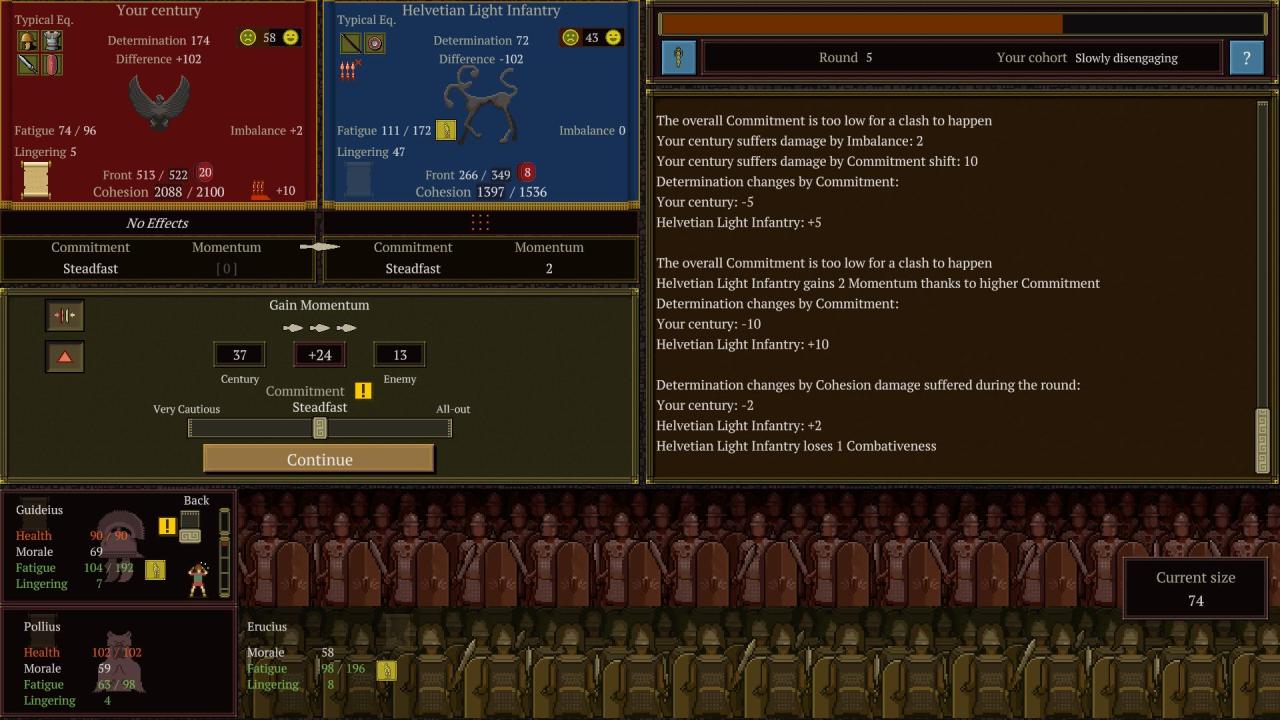
Then in round 5, the opponent goes to Very Cautious and the cohort is Disengaging. Our Imbalance is 1, the enemy has 0 momentum. We try to force the clash, even though shifting from defensive to offensive will make it harder to gain advantage.
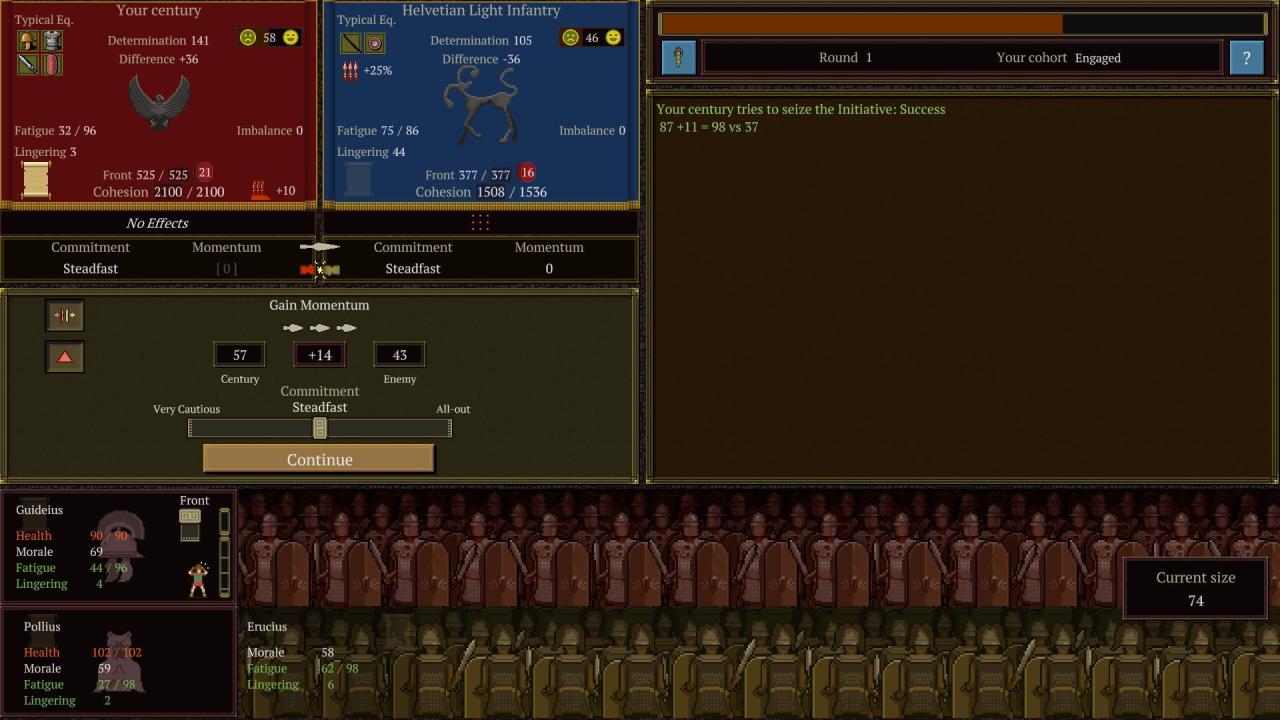
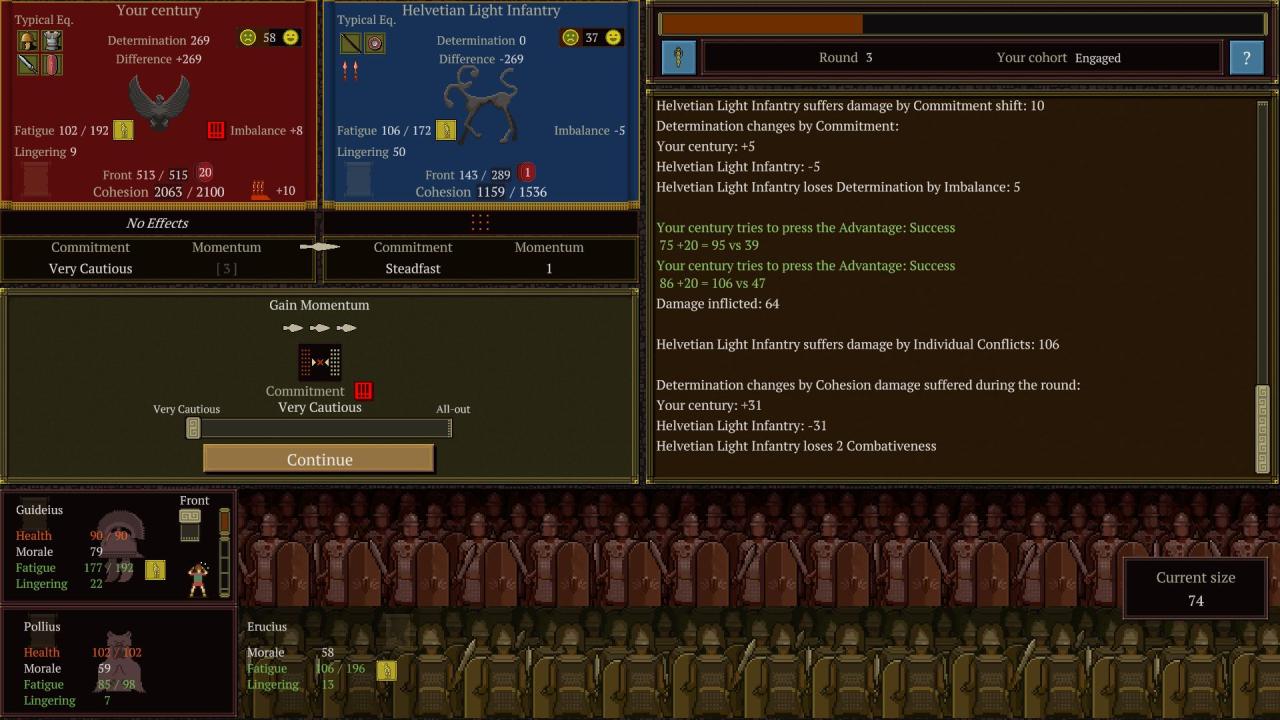
In the second phase we win Initiative. We stay on Steadfast and put the Centurion at the front since the enemies momentum is 0.
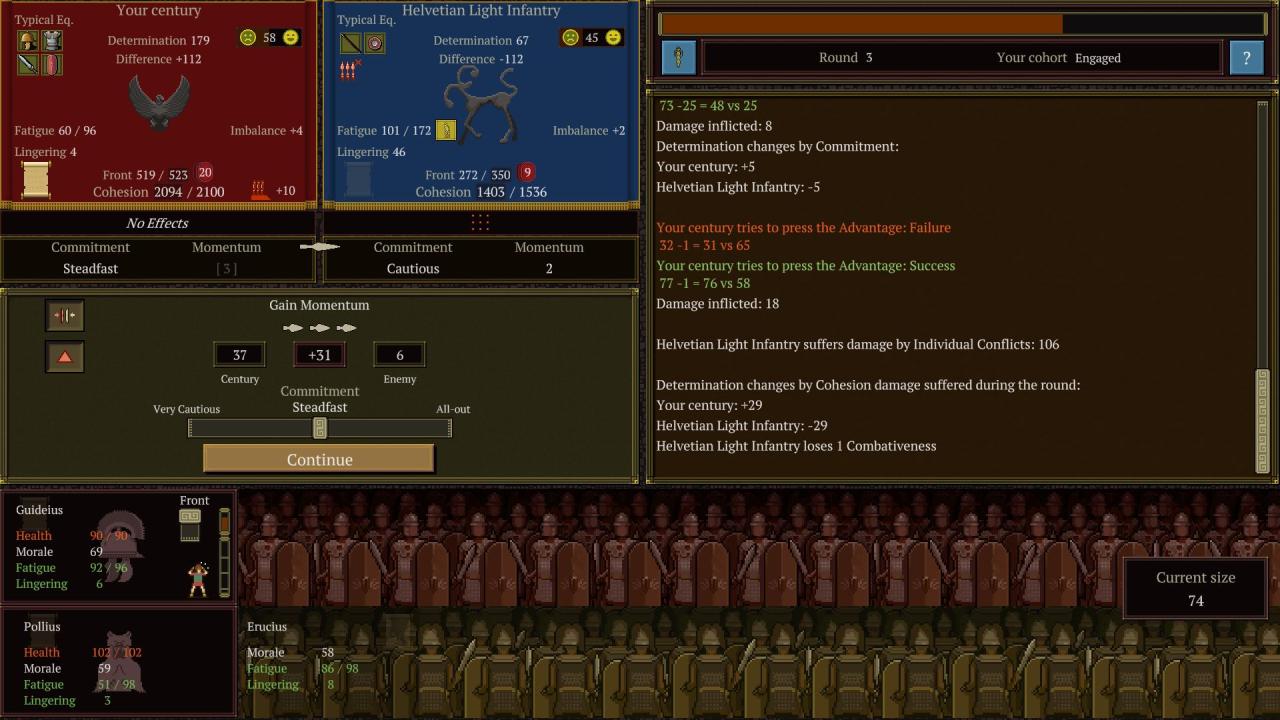
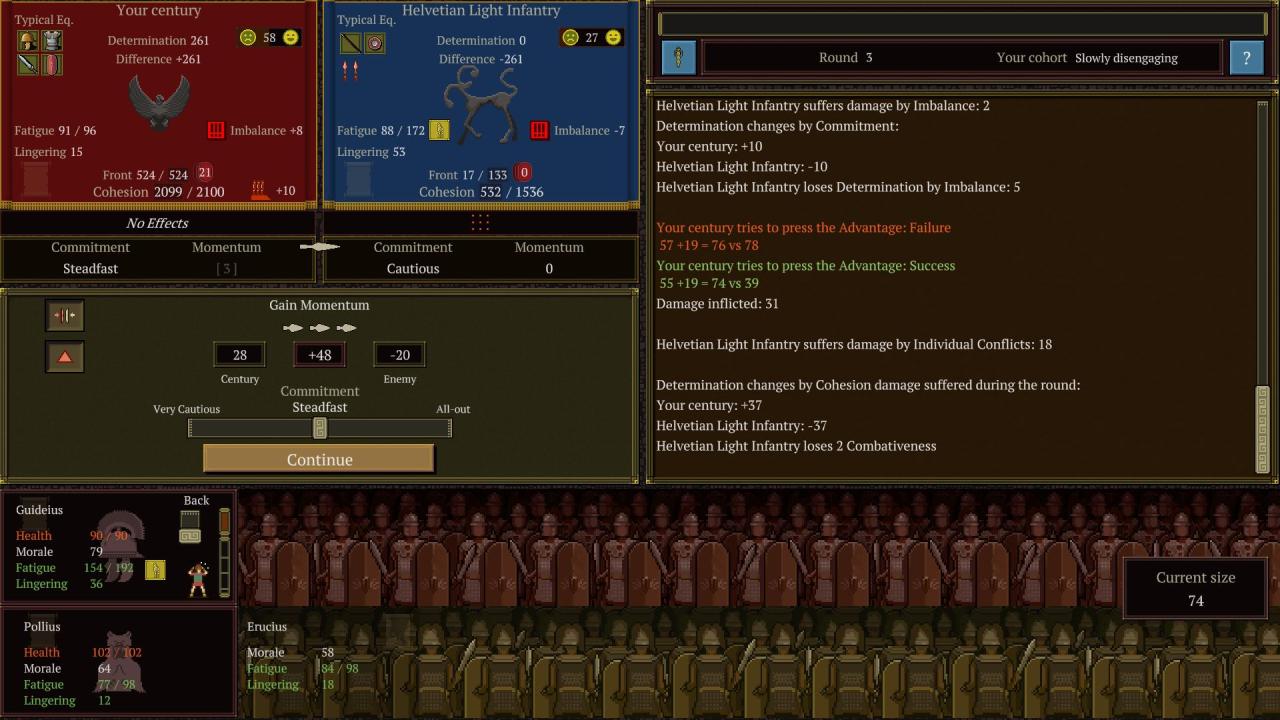
In round 3 we have a decision to make, our Imbalance is already at 4, and the enemies momentum is 2. We could go back to Very Cautious, but staying at Steadfast is an option. Best to put the Centurion at the back though (incorrect in screenshot). This time we stay on Steadfast.
Now in round 4 we really have to go to Very Cautious to lower Imbalance. Put the Centurion at the front (incorrect in screenshot).
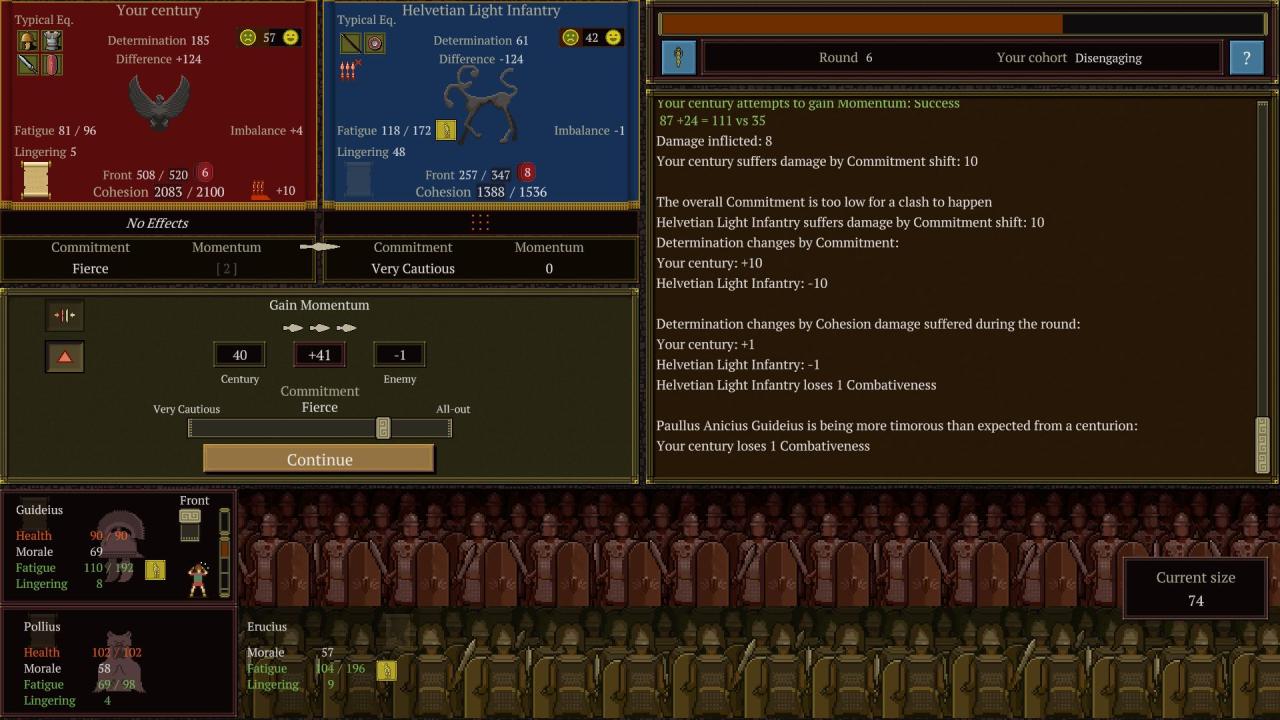
In round 5 we go back to Steadfast, and put our Centurion at the back since the enemies momentum is at 2. We could use Shield Push here to avoid conflicts (in case we do not get 2 momentum), but since our modifier is +24 we have good odds to beat it.
In round 6 the cohort is Disengaging and even though we would end up on 6 Imbalance, we prefer to force a Clash since we know this is the only combat this Act and we can be more aggresive. Put the Centurion at the front to hope for an individual conflict.
The next phase, the enemy starts at Very Cautious. The battle so far went well, our fatigue is better and we have higher determination. The battle is drawing to a close so we can afford to be start at Fierce.
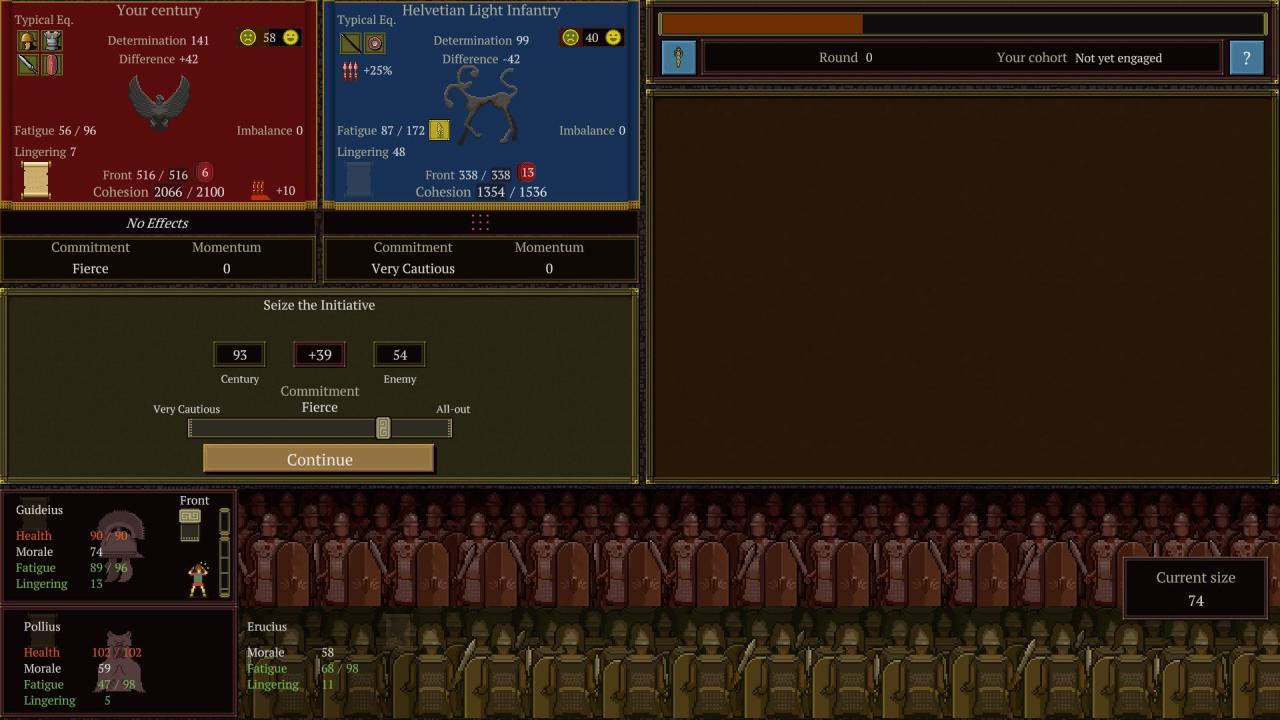
The enemy has 0 momentum, their Imbalance is at -4 and they loose 2 more to go to -6 since they are Very Cautious. This is a moment to press on even though our Imbalance will end op 8 on our turn. However keep in mind that on the enemies turn both Imbalance will be at 6, so we will both suffer the consequences. We press on at fierce and the Centurion stays at the front since there is a good chance for personal conflicts.

In round 3 we have no option other than retreating to Very Cautious, the enemy is not yet close to braking and the penalties will be too severe. The Centurion can stay at the front since there is no clash.
We stay at Very Cautious for 2 full rounds and when our Imbalance is back to 0, we switch back to steadfast. The numbers are still good so we don’t need to use Shield push (although it would be valid option!). The Centurion goes to the back since the enemies momentum is at 0.
The last Melee phase has arrived and if we want to rout the enemy now we have to be aggressive. So far the battle has been going well and we should try to rout them. Again the enemy is at Very Cautious, so we stay at Fierce even though our Imbalance will end up at 8. Look at the opponents Imbalance as well, a similar situation to what we had earlier!

Now this is an interesting round. Our Imbalance is high, but only 1 “higher” than our enemies. They are at Cautious so they will go to -8. If we go to Steadfast we will clash with them and we are so close to routing them. The momentum of the enemy is at 0 as well, we should keep up the pressure. It is very likely that our enemy will shift to Steadfast, since if they go to Very Cautious their Imbalance will worsen more than ours.
After one more round on Steadfast the enemy is routed and we can continue expanding Rome.