How do you get all achievements actually? Get an in-depth explanation on exactly how to achieve some of the more arduous or hidden achievements.
Introduction
First off you need a certain skill level to clear some of the more arduous achievements. If you can’t quite comfortably clear Impossible charts, forget about the 100% until you practice a bit (or a lot) more.
But if you’re just confused about how to obtain some easier achievements, or you’ve got the right skill to get those harder ones but want a couple more tips (that you might or might not already know), then read on, and good luck! And remember, have fun first! Grinding on its own isn’t fun, so make sure you enjoy the game and the process to make the grind at least bearable, if not fun!
Just Play The Game
 Clear your first Rhythm Rift.
Your first step into achievements for Rift!
 Clear any Rhythm Rift with a Full Combo.
Make sure to get all food as well! Missing them won’t break your combo, so you might get tricked into thinking you’re still good to go when in fact you’ve missed some!
 Clear all Dove Rhythm Rifts and the Harmonie Boss Fight.
Get that banshee out of here!
 Clear all Heph & Merlin Rhythm Rifts and the Deep Blues Boss Fight.
Mate in 4 beats.
 Clear all Nocturna Rhythm Rifts and the Matron Boss Fight.
Maybe someone should tell Nocturna that mummies don’t have blood.
 Clear all Suzu Rhythm Rifts and the Reaper Boss Fight.
Poor Chaunter not getting any screen time.
 Clear all NecroDancer Rhythm Rifts and the NecroDancer Boss Fight.
Who’s that suspicious jaywalker?
 Clear Story Mode.
You’re done! Back to Crypt of the Necrodancer now. Wait, what do you mean there are more achievements?
 Clear all Minigames on Medium Difficulty.
Ok, down to some real achievement business now. If you skipped them during story mode, you’ll need to go back and complete them to earn this one.
 Hit 1000 perfects during Rhythm Rifts.
If you’re struggling with this one, make sure your latency is correct! I’ve seen other guides discuss how to correctly set latency, and you’ll definitely need it for other achievements as well!
 Defeat 10000 monsters during Rhythm Rifts.
This one is all about playing more, not much else.
 Clear any Rhythm Rift in Remix Mode or in the Daily Challenge.
Remix mode can be toggled on the track select screen. Just clear any of them, even on the Easy difficulty!
 Clear any custom Rhythm Rift.
Any custom Rhythm Rift will do, worse case scenario you can make your own with a single enemy and you’ll be done! It’s probably faster to open the Steam Workshop and just download any easy song though.
 Clear 32 Rhythm Rifts.
This works even on Easy, so go for it!
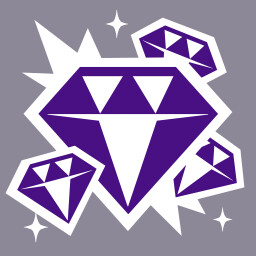
 Acquire 100 Diamonds.
Clearing story mode on easy will already award you with 70 diamonds. You can get some more by clearing remix mode, or going for higher difficulties. (Don’t forget about remix mode, it also gives Diamonds! Even on Easy.)
Need a Little Help with These? I Got You
 Clear any Boss stage and get an S+ grade.
This one is easiest on Medium (for obvious reasons). The only thing that the grade takes into account is the time you take to beat the boss. If you take any damage, a time penalty is added, which usually means that after two hits S+ is out. Don’t waste time on attacks, learn all the patterns, don’t get hit, and you’ll have this one in no time (literally)!
 Defeat any Boss on Hard Difficulty.
You’ll need to learn the patterns of the boss (you can do so on Medium by looking at their animations and the buttons you’re supposed to press, make sure to look at their animations!). Harmonie or Deep Blues are good choices if you’re struggling, Deep Blues in particular is very easy to understand, but likely less easy to execute than Harmonie (those damn Bishops).
 Clear all Minigames on Hard Difficulty.
This one can require a little grind until you understand how the minigames work (or until you get lucky). Remember that you’re allowed to make mistakes (4 in fact)! So if you lose your footing, ignore it and quickly move on.
- Yoga is all about anticipation, especially for double time and once Dove stops doing the poses. Make sure you can quickly recognize the poses the other students are making before you and be ready to press that direction.
- You don’t actually need to remember what burgerman does. Ingredients will appear on your side exactly 1 beat before you need to press that direction. Once you get used to that, it becomes extremely easy. This is essentially a blademaster exercise.
- Pose is likely the easiest of the minigames. Make sure not to mix up close-up/zoom with a simple pose. Close-up/zoom requires you to press two buttons, while pose only one.
- Fortissimole can be quite hard for some. The most annoying command is jump X times. Once you’ve jumped the number of times, you will always go right after, no matter the number of jumps.
- Therapy is easy once you’ve understood how many beats you need to wait for the dove feather and the phone. If you’re struggling with counting the exact number of beats, focus on the animations instead. Dove lifts her finger the beat before the breathe in and out commands as well.
 Clear any Minigame with all perfects.
Do this one in whatever minigame you’re most comfortable with. You can do this one on Medium, so take advantage of that if you’re struggling! If you’re still having a hard time, look at the previous achievement’s advice for clearing Hard minigames which you can probably apply to getting all Perfects.
And make sure your latency is correct!!!
 Clear the same Rhythm Rift 20 times.
I, uh… yeah. You’ve got this!
 Get 50 hits in a row in a single Vibe Power activation.
This is very easy to get on Hard or Impossible since activating a double vibe will usually give you enough hits. Getting this on Easy is technically possible, but it’s only on one song, and it’s on the hardest Easy song. You’ve got less than 100 milliseconds of clearance to activate the vibe in it and can’t miss any monster at all, so I’ll also list some easier Medium options to get the achievement where there’s much more leniency.
In all cases, do not use vibe at all until you need to (this will allow you to get 15 seconds of vibe in total). These are ranked from least lenient to most lenient (and easiest charts to hardest charts):
- Necro Sonatica Easy and Medium: Activate vibe on beat 316 (less than 100 ms for Easy, but basically anywhere around there for Medium) before killing the blue blademaster on its second hit.
- Under the Thunder Medium: Activate vibe on beat 230 before the triple when killing both bats and getting the apple.
- Necropolis Medium: Activate vibe on the first bat of multiple on beat 449.
 Clear any Rhythm Rift on Hard Difficulty and get an S+ grade.
Remember that this doesn’t require a full combo! Given how an S+ grade is awarded, some charts are easier than others. The easiest Hard charts to get an S+ grade are (from most lenient to least lenient, choose the chart you’re most comfortable with):
- Spookhouse Pop: Even without using vibe at all, you can still break combo 3 times and get S+. If you use vibe perfectly, you can break combo a total of 9 times and still get S+!
- Heph’s Mess: 3 combo breaks + more if using vibe.
- Visualise Yourself: 1 combo break + more if using vibe.
- Elusional: If you break combo and don’t use vibe, you’ll be 3000 points away from S+.
If you’re barely missing some points (you’re at S and S+ is so close!) and you’re lazy and don’t want to practice forever (which I am completely in favour of), you can use this spreadsheet[docs.google.com] (by Okami!) to get the best vibe timings for each chart. Simply scroll to the chart you’re playing and memorize or write down the vibe timings!
 Achieve a 500+ combo in any Rhythm Rift.
Not much I can do to help on this one! There are no Easy songs with 500 hits, so go to Medium to find the ones that do, of which there are only two: Suzu’s Quest and Final Fugue. That’s it! Otherwise you’ll need to go to Hard to get this one.
You Probably Came Here for These
 Perform the Red Dragon Dance.
This one requires you to press those 16 keys on the Track Select menu (not the main menu!):
→↑→←
→↓→←
→↑→←
→↓→→.
Careful! Those last two are both →, not →←.
You should hear a dragon sound effect if you’ve done it correctly (you’ll also get the achievement, duh).
 Clear any Rhythm Rift without hitting any food.
It’s very easy to hit food accidentally, so just lock in and don’t eat any food! (And don’t take too much damage, goes without saying. It works on any track! Even Easy!)
 Clear any Rhythm Rift and get an S+ grade without using Vibe Power.
This one is annoying! Or is it? You can actually get this on Easy! Just don’t use vibe or break combo (in fact, you can even break combo, but only once!). Here are the easiest Easy songs to get this achievement on:
- Visualise Yourself
- Heph’s Mess (You cannot break combo on this one)
- Rift Within
- Suzu’s Quest
- Necropolis
 Clear any Rhythm Rift with a score ending in 777.
This is probably the most annoying one. Unless you want to try this randomly (and, let me tell you, that’s a terrible idea given the game’s scoring!), let’s start with some maths!
All scores given in Rift are multiples of 111. A Great gives 333, a Perfect 555, wyrm segments give 333, etc., however, a True Perfect gives a single bonus point, unaffected by your combo multiplier, and a Frame Perfect gives two bonus points, again, unaffected by your combo multiplier.
So, if you want your score to end in 777, you’ll need your last 3 digits to always match. That’s easy, multiples of 111 always have the last 3 digits match! Except when rolling over to the next thousand.
So you go from 111 to 222, 222 to 333, and so on, until 999 which, when adding 111, gives 1110, not 1111. We’re missing a single point! And that happens every 1000 points. That’s where the Perfect bonus comes in. With a single bonus point every thousand point, you’ll maintain your last 3 digits perfectly the same.
Therefore, the strategy we’re using is:
- Break combo every single hit. We never want to build up a combo because that would mean we rollover on a thousand points way more often.
- Every thousand point, you’ll need a bonus point from a Perfect to keep up. Make sure your latency is good to go for this. If you start lagging behind on bonus points (for example your score is showing 215 instead of 222, in which case you’re missing 7 bonus points) don’t panic! Don’t forget to break combo, and try to catch up with some Frame Perfects (which give 2 bonus points).
- Build up a few bonus points if you’re far from the end of the song (so a score of 339 instead of 333 for example) to give yourself some leeway to miss some bonus points later.
- If you are near the end of the song or have some bonus points built up, try to hit as many OKs and Goods as possible. These will only increase your score by 111 and 222 respectively, which means you’ll rollover less often, and it’s much easier to reach 777.
- Never hold wyrms! Those will make you rollover way more often. (You still need to hit their head! We want to keep our health for the end of the song.)
- Don’t use vibe until the end! Just ignore it until…
- Use your vibe at the end of the song once you’ve reached 777! Once you’ve reached 777 (and you’re far enough in the song), activate vibe, and don’t touch the game anymore. If vibe ends, you can still tank up to 9 hits and make it to the end of the song.
- If you missed 777 or died just at the end, time to try again! It might take a couple of tries, but you’ll get it!
- If you’re not hitting enough Perfect bonuses, adjust your latency and try again.
- And, to simplify things further, obviously choose an Easy song with the smallest number of hits possible, Heph’s Mess is a good candidate for this.
You can do this! This is very dependent on the hits you get, so you could get this on your first try or it could take you quite a few. So persevere!
Now It’s Getting Hard
 Clear 32 Rhythm Rifts with a full combo.
You can do this one on Easy. No need for any fancy Medium or Hard if that’s not your cup of tea.
 Clear any Rhythm Rift on Impossible Difficulty and get an S+ grade.
Here are the easiest Impossible difficulty charts to get S+ on (from easiest to hardest):
- Spookhouse Pop: You can break combo 4 times.
- Visualize Yourself: You can break combo 2 times.
- Heph’s Mess: You can break combo 2 times.
- Progenitor: You can break combo 5 times.
- Brave the Harvester: You can break combo 2 times.
On all of these, you can break combo more often if you have good vibes! (See what I did there?)
I’ve already linked it previously, but if you’re just missing a few points and don’t want to practice forever, you can use this spreadsheet[docs.google.com] to find all the vibe timings for all official charts! (Made by Okami)
 Clear 32 Rhythm Rifts on Impossible Difficulty.
This is just a clear, so spam your way through difficult sections if you need to. Don’t forget that you can’t lose any health when using a vibe, so if you’re struggling with a particular part, that’s when you’ll probably need to use vibe!
 Acquire 392 Diamonds.
While 392 Diamonds was the total number of Diamonds in the game at launch, a few more official tracks have since made their way into the game. So you can skip a few Diamonds for this achievement (namely shopkeeper challenges or an Impossible track you’re struggling with).
You can earn Diamonds in:
- Impossible Charts (or Hard Charts, but those only give 4 Diamonds, you’ll still need to clear a few Impossibles, but if you clear enough of the other stuff, you might be able to skip some Impossible Charts or even Impossible Remix Charts).
- Impossible Remix Charts (or, again, Hard Remix Charts). Don’t forget about Remix mode! These tracks will give you the bulk of the remaining Diamonds you need.
- Shopkeeper Challenges (one per challenge for a total of 32)
- Minigames (2 per minigame per difficulty for a total of 20)
- Boss Battles (2 per boss per difficulty for a total of 20)
 Clear any Rhythm Rift with the CODA modifier equipped.
This one is all about the grind. You can do this on an easy song. Again, Heph’s Mess (on Easy) is easiest because it has the least number of notes. You’ll absolutely need the best latency calibration now. You only have about 100 ms for each note (for Heph’s Mess, for other faster songs it’s even less). So while it’s not the tightest window, it’s still only a tenth of a second, for just a little more than 120 hits. And a single fail means you restart the whole thing over! Get to grinding!
 Clear 32 Shopkeeper Challenges.
This is the easiest of the “final 3”. There’s just a couple of the Impossible Shopkeeper Challenges which are particularly hard. They never mix 1 Health with only Perfects (which would make it Coda mode), so take advantage of that! If you’re on a 1 Health challenge, you can just barely hit at the end and get an OK and that’ll still work (but breaking combo will kill you!). If you’re on an Only Perfect challenge, you can take damage on the most difficult enemies and still make it out. The challenges are short, so 10 health can be a lot! Make sure you understand all enemy patterns (you can play the original chart at those beats if you don’t understand a specific pattern) and good luck on the grind!
 Clear 32 Rhythm Rifts on Impossible Difficulty with a full combo.
No advice here, get to grinding!
 Clear any Rhythm Rift in Remix mode on Impossible difficulty with the CODA modifier equipped.
If you’ve made it this far, your calibration is probably perfect, but just in case: your calibration needs to be perfect!!!
The 2 easiest (“easiest”) tracks to get this achievement on are Hallow Queen and She Banned. Heph’s Mess might also be doable. More are also probably possible, but for now it’s those ones!
If you’ve managed to get all the other achievements, this one is just a question of time before you get it, I believe in you!
Now Go Get Them!
If you’ve got any feedback or additional tips for certain achievements, be sure to leave them below!
Thank you Okami (liaokami) for providing a bunch of data to help me figure out the easiest tracks to get some achievements! (And for making the optimal vibes spreadsheet!)