My in-progress guide to help you fight every boss in Black Myth: Wukong.
Introduction
I’ve pulled together a list of every boss I’ve tracked down, complete with their nearest shrine so you can hunt them down with ease. Whether you’re looking to test your skills or just want to make sure you’ve battled every boss in sight, this guide has got your back. My in-progress guide will keep updating as I track down more bosses, so stay tuned. Let’s get boss-hunting!
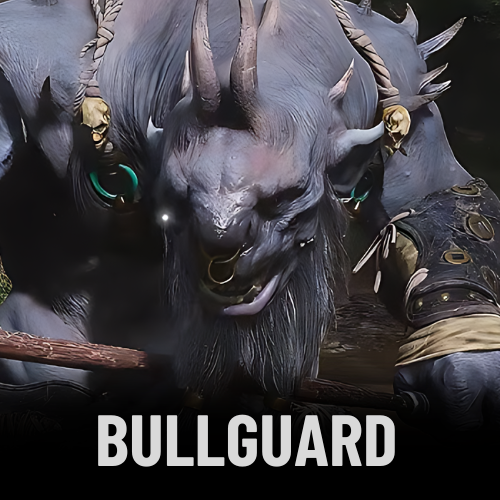
Bullguard
Location: Forest Of Wolves.
Starting Point: Begin at the “Front Hills” Keeper’s Shrine.
Path:
- Cross the bridge.
- Follow the path as it curves right around the rock.
Final Destination: Approach a gate with Bullguard standing guard in front.
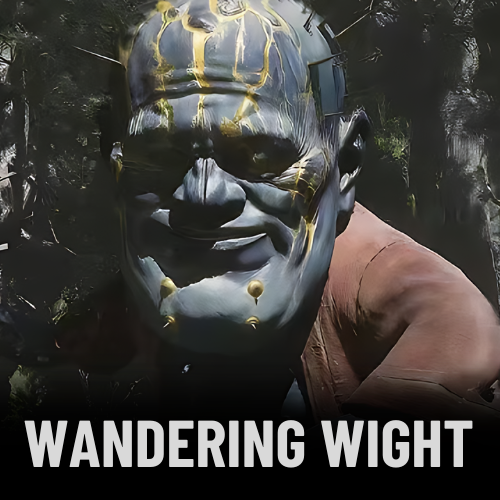
Wandering Wight
Boss Name: Wandering Wight
Location: Beyond the “Outside The Forest” Shrine.
Starting Point: Start at the “Outside The Forest” Shrine.
Path:
- Cross the bridge on the most direct path forward from the Shrine.
- Proceed to the clearing where the Wandering Wight is found.
Final Destination: Clearing where the Wandering Wight is located.
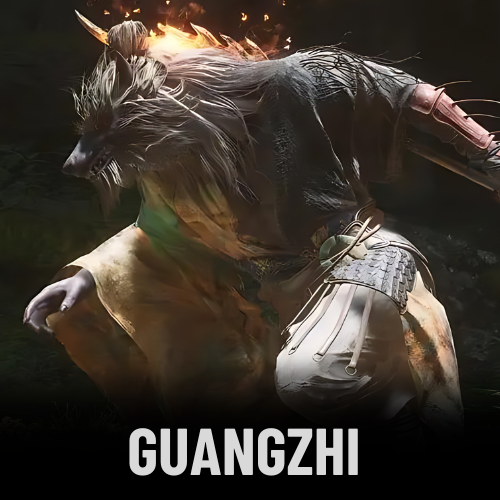
Guangzhi
Location: Opposite side of the “Outside The Forest” region from the Wandering Wight.
Starting Point: Begin at the region’s Shrine.
Path:
- Take the left-hand path from the Shrine.
- Pass by the chest (open it if you haven’t already).
- Cross the bridge guarded by the Wolf Archer.
- Follow the path curving left to reach the clearing.
Final Destination: Clearing where you can fight Guangzhi.
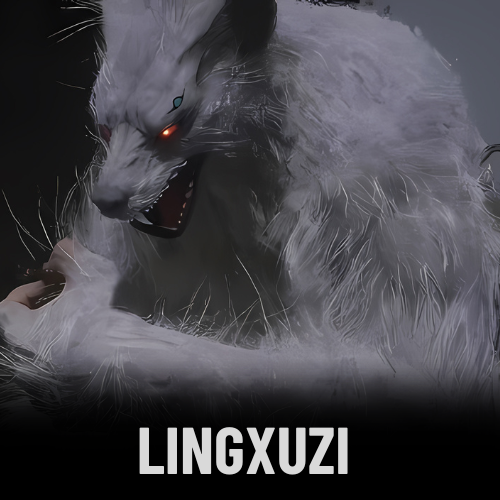
Lingxuzi
Location: Inside Guanyin Temple, at the end of the Forest of Wolves.
Starting Point: Begin from the area beyond the Wandering Wight.
Path:
- Follow the linear path through the Forest of Wolves.
- Proceed towards Guanyin Temple.
Final Destination: Inside Guanyin Temple where you encounter Lingxuzi.
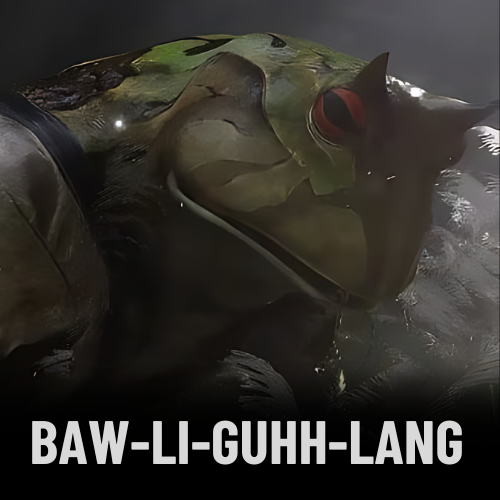
Baw-Li-Guhh-Lang
Boss Name: Baw-Li-Guhh-Lang
Location: River in the Bamboo Grove.
Starting Point: Begin at the “Snake Trail” Shrine.
Path:
- Head up the stairs from the Shrine.
- Cross the bridge and follow the path.
- Descend the wooden sloped platform to the right.
- Land in the river and turn around.
- Head into the larger area of the river to find the boss.
Final Destination: In the larger area of the river where you can fight Baw-Li-Guhh-Lang.
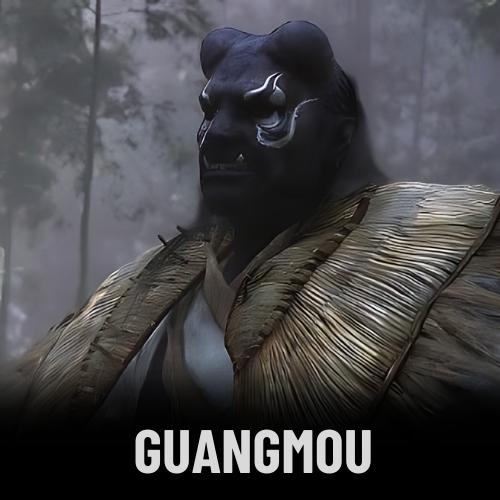
Guangmou
Location: “Snake Trail” area of the Bamboo Grove.
Starting Point: Follow the main story path.
Path:
- Follow the main path out to the large area with Skeletal Snakes.
- Guangmou’s arena is directly adjoining this area.
Final Destination: Arena directly adjoining the large area with Skeletal Snakes.
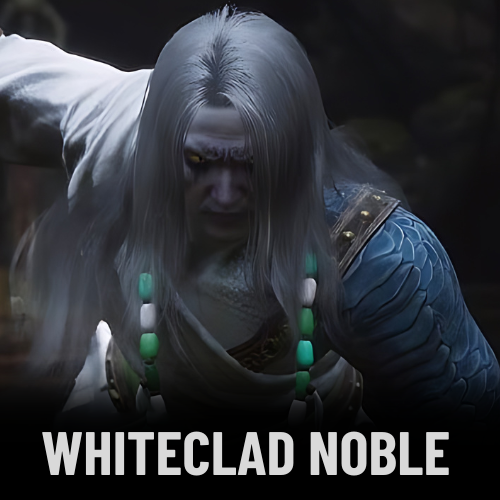
Whiteclad Noble
Boss Name: Whiteclad Noble
Location: Bottom of the “Marsh Of White Mist” region.
Starting Point: Follow the main path in the region.
Path:
- Continue along the main path.
- Reach the bottom of the “Marsh Of White Mist” region.
Final Destination: Watery arena containing the Whiteclad Noble.
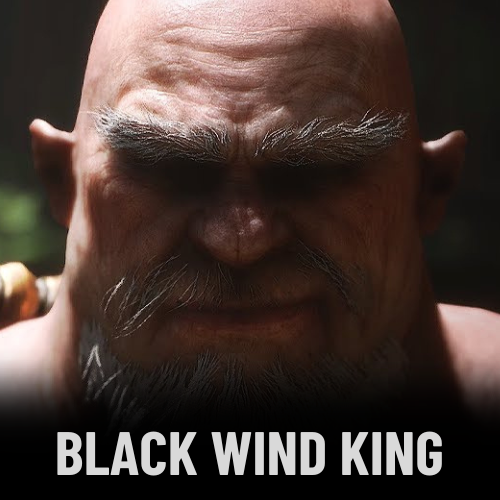
Black Wind King
Boss Name: Black Wind King
Location: Inside the Black Wind Cave.
Starting Point: Beyond the “Marsh Of White Mist” area.
Path:
- Follow the linear path from the “Marsh Of White Mist” area.
- Continue into the Black Wind Cave.
- The Black Wind King is located just beyond the double doors next to the “Cave Interior” Shrine.
Final Destination: Black Wind King waiting just beyond the double doors.
Black Bear Guai
Boss Name: Black Bear Guai
Location: Outside the other end of Black Wind Cave, at Bodhi Peak.
Starting Point: End of Black Wind Cave.
Path:
- Follow the linear path from the Black Wind Cave.
- Ascend the stairs-heavy path up to Bodhi Peak.
Final Destination: Bodhi Peak at the top of the mountain.
Elder Jinchi (secret boss)
Boss Name: Elder Jinchi (Secret Boss)
Location: Secret area in Chapter 1.
Unlocking Method: Find and ring all three Bells scattered across Chapter 1.
Bells Locations:
- Inside the Guangzhi arena (Forest Of Wolves / Outside The Forest).
- Up the stairs from the Guangmou arena (Bamboo Grove / Snake Trail).
- Take the left path from the Whiteclad Noble arena (Bamboo Grove / Marsh Of White Mist).
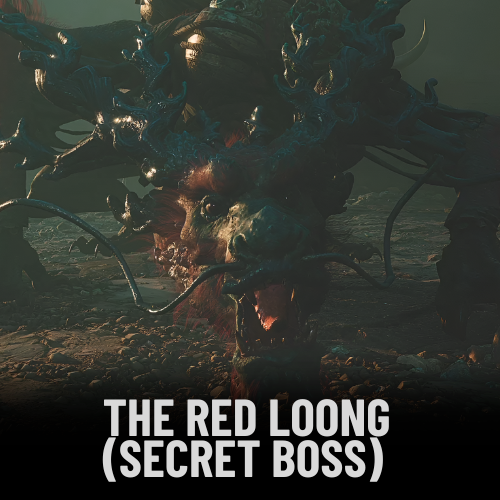
The Red Loong (secret boss)
Boss Name: The Red Loong (Secret Boss)
Location: “Outside The Forest” area, Forest Of Wolves in Chapter 1.
Unlocking Method: Obtain the Loong Scale from Chapter 2 and interact with the waterfall in Chapter 1.
How to Get the Loong Scale:
Progress through the first region of Chapter 2, defeating the Rat King and the Second Rat Prince.
Head down the left-hand path and face the First Rat Prince in the cave.
On the left side of the First Rat Prince arena, break the clay wall by:
- Getting the First Rat Prince to attack the wall.
- Using the Wandering Wight Spirit’s attack on the wall.
- Using the Azure Dust form’s slam attack on the wall (obtained by completing the Man-In-Stone questline).
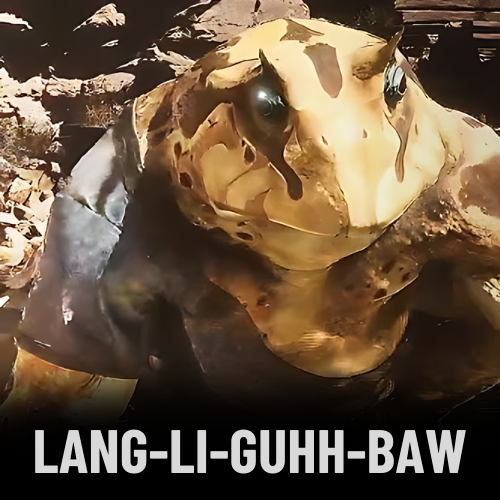
Lang-Li-Guhh-Baw
Boss Name: Lang-Li-Guhh-Baw
Location: Sandgate Village, Chapter 2.
Starting Point: Drop down to the right of the “Village Entrance” Keeper’s Shrine.
Path:
- Drop down to the right of the “Village Entrance” Keeper’s Shrine.
- Follow the path into the nearby cave.
- Find Xu Dog, a wolfish NPC in a blue cloak.
- Proceed to the clearing just ahead on the lower platform to encounter Lang-Li-Guhh-Baw.
Earth Wolf
Location: Fright Cliff, Chapter 2.
Starting Point: “Village Entrance” Shrine.
Path:
- Turn left in the cave where Xu Dog resides.
- Follow the path into the larger area patrolled by the two-headed Rat Captains.
- Hug the left-hand wall until you find an entryway through.
- Enter the area on the other side of the gate to find the Earth Wolf patrolling.
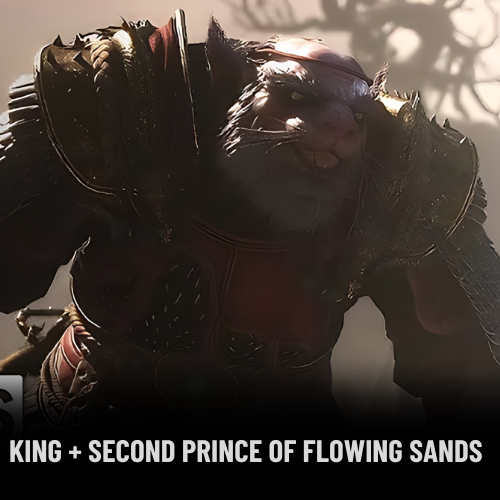
King + Second Prince Of Flowing Sands
Boss Name: King + Second Prince Of Flowing Sands
Location: Sandgate Village, Chapter 2.
Starting Point: Beyond the double doors in the area with the two-headed Rat Captains.
Path:
- Find the double doors in the area where the two-headed Rat Captains patrol.
- Enter the arena for a lengthy cutscene.
- Prepare for a two-pronged fight with both the King and the Second Prince.
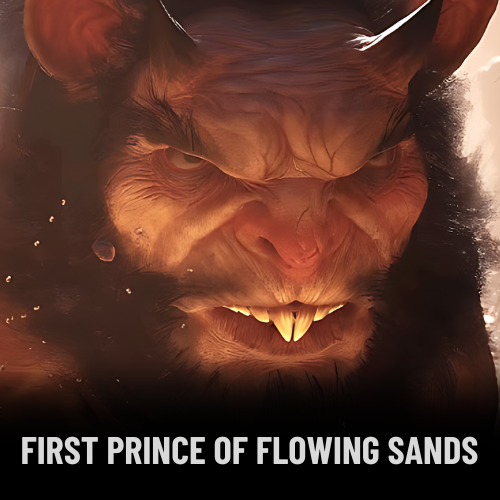
First Prince Of Flowing Sands
Boss Name: First Prince Of Flowing Sands
Location: Valley Of Despair, Chapter 2.
Starting Point: Short walk down the left-hand path from the Valley Of Despair arena.
Path:
- Head down the left-hand path from the Valley Of Despair.
- If the King is alive, he will make a blood offering to awaken the First Prince, only to be killed and eaten by him.
Tiger Vanguard
Boss Name: Tiger Vanguard
Location: Crouching Tiger Temple, Chapter 2.
Starting Point: Cave beyond the Valley Of Despair where the First Prince was fought.
Path:
- Head through the cave that houses the First Prince.
- Cross the small, slanted bridge at the far end of the cave.
- Squeeze through the gap shortly beyond the bridge.
- Take the path to the right in the next room to reach the “Temple Entrance” Shrine outside the Crouching Tiger Temple.
- Trek straight up the temple steps to reach the Tiger Vanguard.
Tiger’s Acolyte
Boss Name: Tiger’s Acolyte
Location: Yellow Wind Formation, Chapter 2.
Starting Point: Beyond the Crouching Tiger Temple.
Path:
- Continue through the Yellow Wind Formation region.
- This region is linear, so keep moving forward.
- Find the bridge just beyond the “Windrest Hamlet” Shrine.
- The Tiger’s Acolyte is on the bridge.
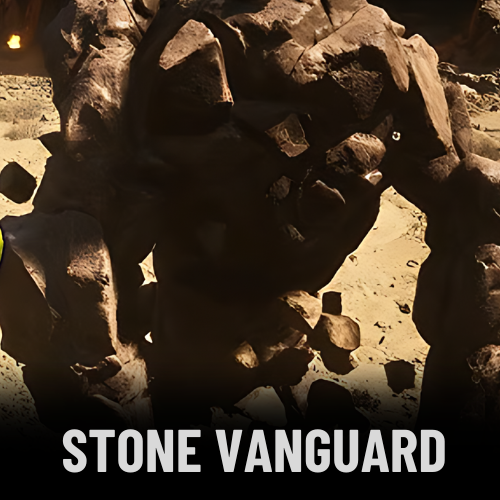
Stone Vanguard
Boss Name: Stone Vanguard
Location: Fright Cliff, Chapter 2.
Starting Point: Intersection between two region paths.
Path:
- Continue beyond the Tiger’s Acolyte and through the entire Yellow Wind Formation.
- At the very end, drop down from the ledge into the Stone Vanguard arena.
- Alternatively, from the Valley Of Despair (King + Second Prince arena), head right through the Fright Cliff region.
- Follow this path all the way to the end to reach the Stone Vanguard arena.
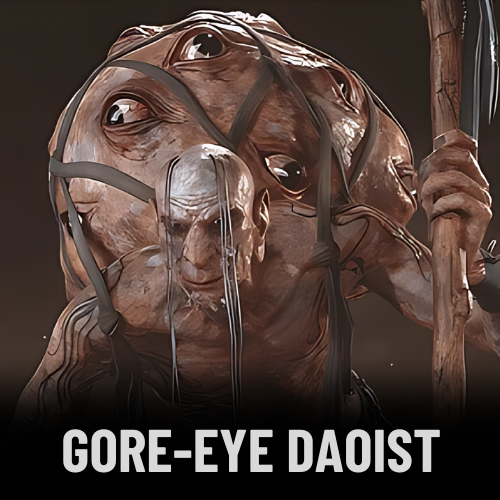
Gore-Eye Daoist
Boss Name: Gore-Eye Daoist
Location: Chapter 2, Fright Cliff.
Starting Point: Two possible routes to reach him.
Path:
- Open the main door near the “Valley Of Despair” Shrine (after defeating both Vanguard bosses) and follow the path across the bridge.
- Alternatively, from the Stone Vanguard arena, pass the “Rock Clash Platform” Shrine, turn right at the end of the path, and take the sand slide down to the “Windseal Gate” Shrine. From there, cross the bridge and head up the hill.
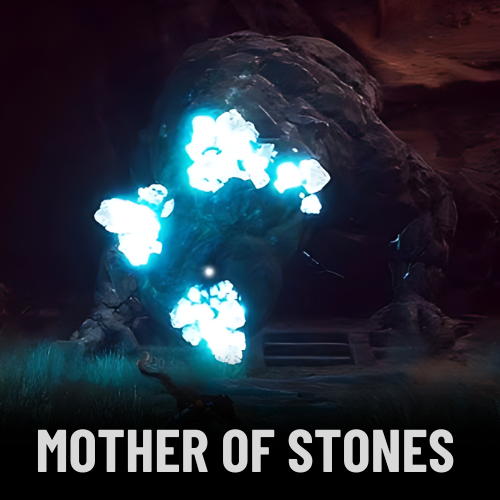
Mother Of Stones
Boss Name: Mother Of Stones
Location: Chapter 2, Fright Cliff.
Starting Point: Central cave in Fright Cliff.
Path:
- Enter the cave in the center of the Fright Cliff region.
- Take a left turn just before exiting out of the cave.
- This path leads to an upper level where you’ll find the Mother Of Stones.
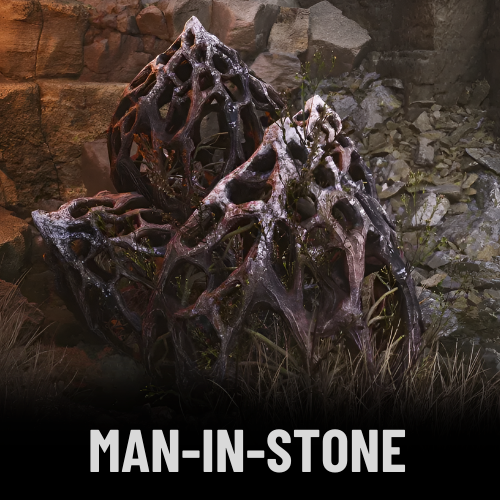
Man-In-Stone
Location: Chapter 2, Fright Cliff.
Starting Point: “Squall Hideout” Shrine.
Path:
- Take the lower route through the rock on the right-hand side of the “Squall Hideout” Shrine.
- Man-In-Stone is trapped inside a rock and will ask you to deal with the Mother Of Stones to free him.
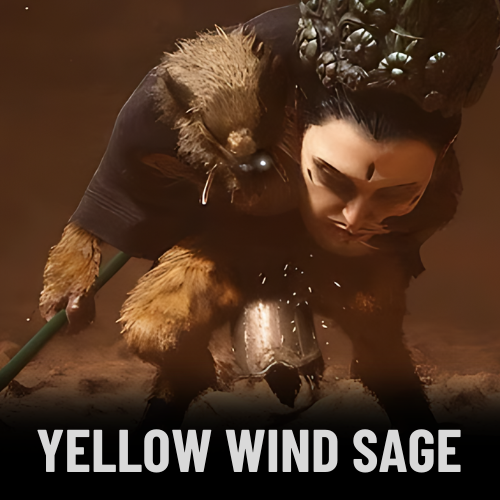
Yellow Wind Sage
Boss Name: Yellow Wind Sage
Location: Chapter 2, Yellow Wind Formation.
Description: The final main story boss of Chapter 2, and one of the toughest Yaoguai you’ll face in this chapter. Be well-prepared for this fight.
Paths to Reach:
- Interact with the Tally in the Tiger Vanguard arena (after obtaining both Keeness Of Tiger and Sterness Of Stone), and descend into the Cellar region.
- Progress to the “Windseal Gate” Shrine beyond the Stone Vanguard or the Gore-Eye Daoist, and go through the large double doors.
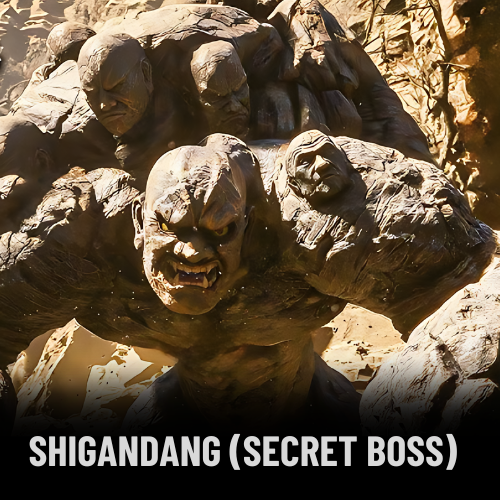
Shigandang (secret boss)
Boss Name: Shigandang (Secret Boss)
Location: Chapter 2, Fright Cliff, same arena as Stone Vanguard.
Description: Shigandang is a secret boss that requires collecting all six Buddha’s Eyeballs scattered throughout Fright Cliff. Each eyeball is found on a giant Buddha head statue and must be placed in a boulder to unlock the boss fight.
Buddha’s Eyeball Locations:
- At the start of Fright Cliff, just before the “Squall Hideout” Shrine.
- In the cave on the left path from the “Squall Hideout” Shrine.
- On the wooden platforms overlooking the Man-In-Stone path.
- On the upper path left of the Man-In-Stone path.
- On the balcony to the right of the Mother Of Stones boss arena.
- Left of the “Rockrest Flat” Shrine.
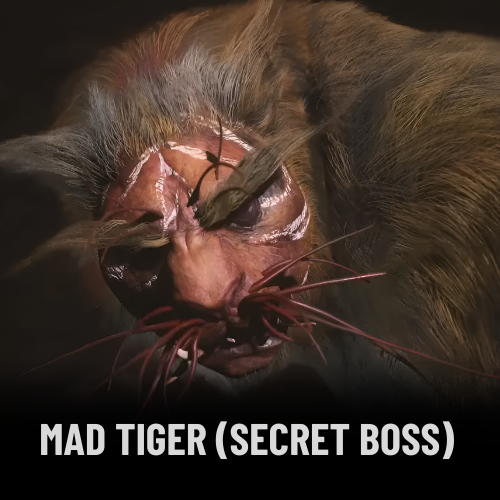
Mad Tiger (secret boss)
Boss Name: Mad Tiger (Secret Boss)
Location: “Bottom Of The Well,” accessed by completing the Old Rattle-Drum questline.
Description: The Mad Tiger is a Yaoguai Chief that can only be unlocked by completing the Old Rattle-Drum questline. After defeating the Tiger’s Acolyte, you’ll receive the Old Rattle-Drum item. You need to visit three specific locations in sequence to summon the spirit of a child, who will lead you to the secret Mad Tiger boss fight.
Old Rattle-Drum Locations:
- In the right-hand area with lots of corpses inside Windrest Hamlet.
- On the right-hand side just beyond the main doors you unlock in the Valley Of Despair.
- By the well in the far end of the Earth Wolf arena.
Boss Fight: After playing the Old Rattle-Drum at all three locations, a child will appear next to the well, jump inside, and invite you to follow. Interact with the well to jump down into the “Bottom Of The Well” area, where you can fight the Mad Tiger.
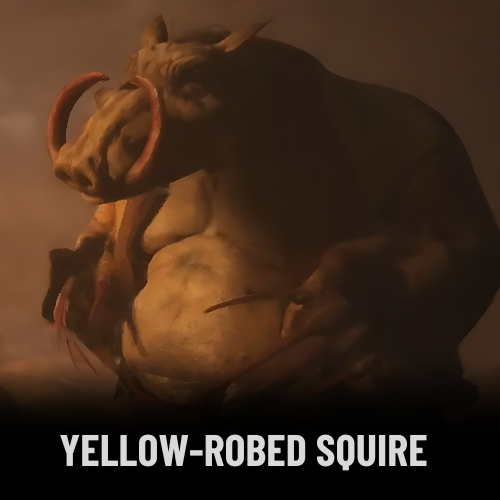
Yellow-Robed Squire (secret boss)
Boss Name: Yellow-Robed Squire (Secret Boss)
Location: Rockrest Flat, initially a passive NPC.
Description: The Yellow-Robed Squire starts as a passive NPC found resting in a clearing at the far end of Rockrest Flat, too drunk to get up. Completing his questline unlocks the ability to fight three new bosses, including the Yellow-Robed Squire himself.
Questline Steps:
- Obtain a Sobering Stone from Windrest Hamlet or the Man-In-Stone’s shop.
- Deliver the Sobering Stone to the Yellow-Robed Squire at Rockrest Flat.
- Travel to the Crouching Tiger Temple and speak to the Squire there.
- Deliver a Jade Lotus to the Squire at the Temple.
- Return to Rockrest Flat where you first saw the Squire, and approach him while he’s pacing nearby.
Tiger Vanguard (secret boss)
Boss Name: Tiger Vanguard (Secret Boss)
Location: Secret area unlocked via the Yellow-Robed Squire’s questline.
Description: The “Tiger Vanguard” encountered here is a variant of the original Tiger Vanguard. To face this boss, you need to complete the Yellow-Robed Squire’s questline. For details on unlocking this secret boss, refer to the instructions provided earlier.
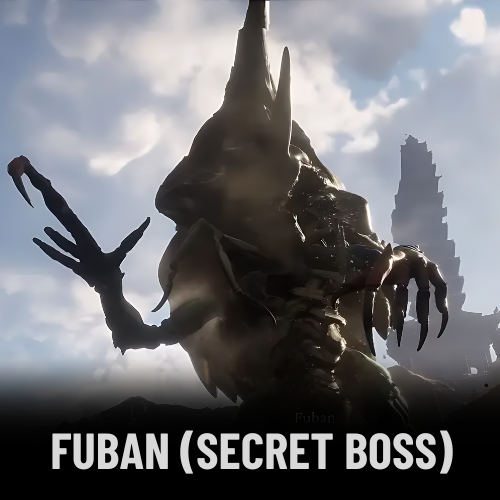
Fuban (secret boss)
Boss Name: Fuban (Secret Boss)
Location: Secret region unlocked via the Yellow-Robed Squire questline. Located past the “Tiger Vanguard” arena.
Description: Fuban is a gigantic sand beetle and the main boss of this secret region. In this memory realm, you will join the Yellow Wind Sage in battling Fuban. To find him, proceed to the hill where the Yellow Wind Sage awaits next to a giant drum.
Black Loong (secret boss)
Boss Name: Black Loong (Secret Boss)
Location: Behind the “sand waterfall” to the right of the Rockrest Flat Shrine. Requires the Loong Scale to access.
Description: Black Loong is a hidden Yaoguai King found behind a sand waterfall. You must first obtain the Loong Scale, the same item used to unlock the Red Loong boss in Chapter 1. To find Black Loong, head to the Rockrest Flat Shrine and locate the sand waterfall to the right. Use the Loong Scale to gain access and engage in battle.
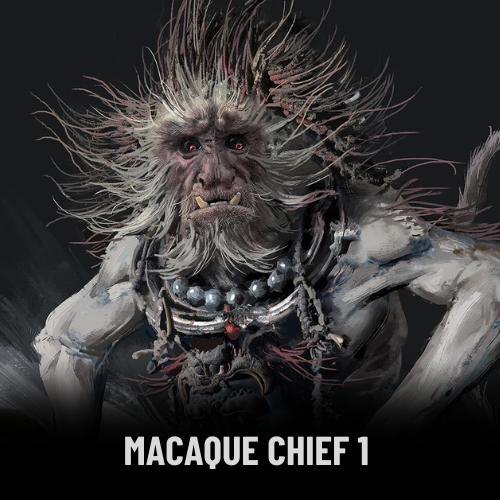
Macaque Chief 1
Boss Name: Macaque Chief 1
Location: Follow the path beyond the Frost-Clad Path Keeper’s Shrine, the level’s first checkpoint.
Description: The Macaque Chief is encountered three times in the New West, with the first encounter taking place as you continue along the path after the Frost-Clad Path Keeper’s Shrine. Be prepared for a challenging battle as you progress through this frosty terrain.
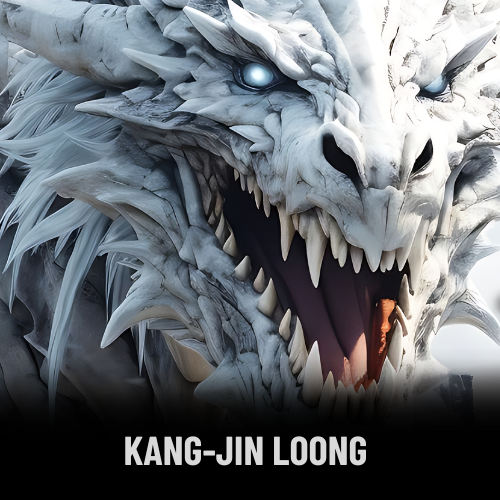
Kang-Jin Loong
Boss Name: Kang-Jin Loong
Location: On a frozen lake beyond the Mirrormere Keeper’s Shrine.
Description: Kang-Jin Loong is found on a treacherous frozen lake just beyond the Mirrormere Keeper’s Shrine. The icy terrain adds a layer of difficulty to the fight, requiring careful movement and precise timing to avoid slipping and falling prey to this powerful Yaoguai King.
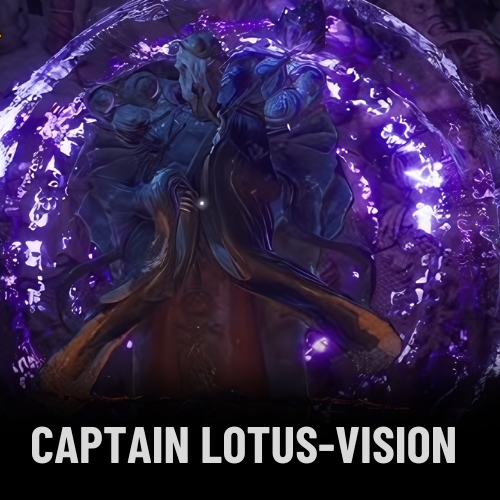
Captain Lotus-Vision
Boss Name: Captain Lotus-Vision
Location: Below the Upper Pagoda Keeper’s Shrine. Fall through the hole in the floor after activating the Shrine to reach the arena.
Description: Captain Lotus-Vision is located directly beneath the Upper Pagoda Keeper’s Shrine. After activating the Shrine, turn around and fall through the hole in the floor to access the arena where this formidable foe awaits. The fight is intense and will test your reflexes and strategy as you battle in this confined space.
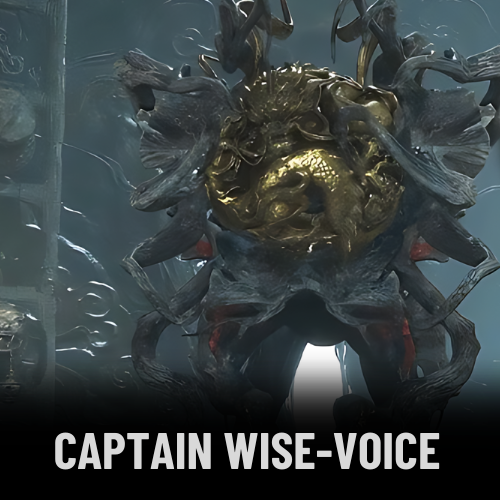
Captain Wise-Voice
Boss Name: Captain Wise-Voice
Location: Inside the large spinning vessel at the center of the Pagoda Realm. Enter via the ramp near the Mani Wheel Keeper’s Shrine.
Description: Captain Wise-Voice is found within the large spinning vessel at the heart of the Pagoda Realm. To reach this boss, start from the Mani Wheel Keeper’s Shrine and locate the ramp that leads into the vessel. Once inside, prepare for a challenging encounter in a dynamic environment as the vessel spins around you during the fight.
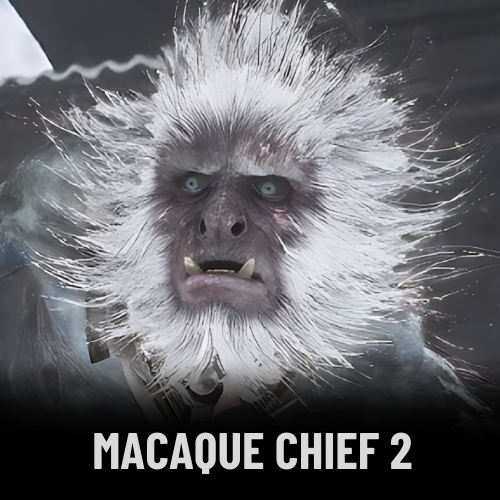
Macaque Chief 2
Boss Name: Macaque Chief 2
Location: After passing the Warding Temple Keeper’s Shrine in the New West.
Description: The second encounter with the Macaque Chief takes place after you pass the Warding Temple Keeper’s Shrine. This fight will test your skills as you face the Macaque Chief again, challenging you with new tactics and potentially more difficult combat conditions compared to the first encounter.
Kang-Jin Star
Location: In an arena past the Turtle Island Keeper’s Shrine.
Description: Kang-Jin Star awaits in an arena beyond the Turtle Island Keeper’s Shrine. This boss presents a formidable challenge and requires careful preparation to overcome. Ensure you are well-equipped and ready for a tough fight as you proceed to this encounter.
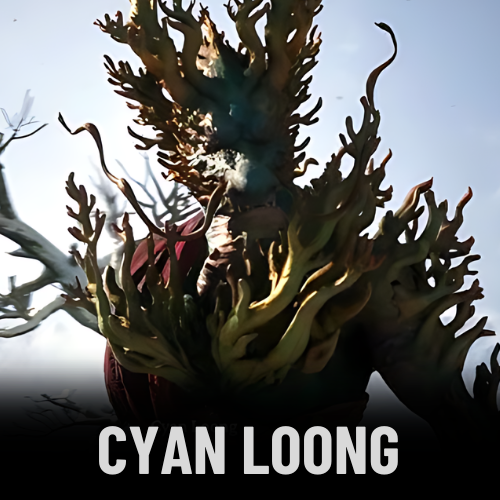
Cyan Loong
Location: At the edge of a cliff overlooking the ocean, accessible after obtaining the Loong Scales.
Description: To challenge Cyan Loong, you first need to obtain the Loong Scales. Follow these steps to find them:
1. Progress to the Windseal Gate Keeper’s Shrine in Yellow Wind Ridge.
2. Proceed beyond the Shrine to an arena with a decorated wall, where you fought the First Prince of Flowing Sands.
3. Equip the Wandering Wight Spirit and use its ability to break through the decorated wall to access the hidden chest containing the Loong Scales.
After obtaining the Loong Scales, go to the Turtle Island Keeper’s Shrine at Brittle Lake and walk towards the ocean. Cyan Loong will be located at the edge of a cliff overlooking the water.
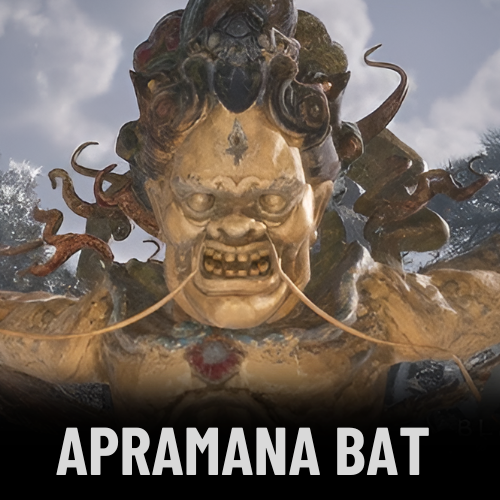
Apramana Bat
Location: Near the North Shore of the Bitter Lake Keeper’s Shrine.
Description: To find the Apramana Bat, head to the North Shore of the Bitter Lake Keeper’s Shrine. From the checkpoint, position yourself so that the ocean is on your right and follow the coast into the area filled with large skeletons. The Apramana Bat will be located in this area.
Chen Loong
Character Name: Chen Loong
Location: North Shore of the Bitter Lake Keeper’s Shrine.
Description: To find Chen Loong, visit the North Shore of the Bitter Lake Keeper’s Shrine. Position yourself so that the ocean is on your left and follow the coast. Chen Loong will be located in this area.
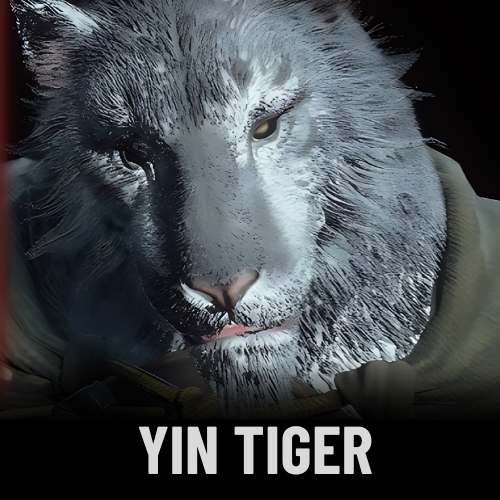
Yin Tiger
Location: In a secret area accessible after helping Chen Loong with medicine.
Description: After defeating Chen Loong, help him by teleporting to the Crouching Tiger Temple – Cellar, talking to Xu Dog, and obtaining the Special-made Bone-Strengthening Pellet. Deliver it to Chen Loong to be teleported to a secret area. In this area, follow the path beyond the Village Entrance Keeper’s Shrine, speak with Yin Tiger at his stand, and select the “Challenge” option to initiate the fight. Defeating Yin Tiger will reward you with the Ebon Flow transformation spell. Take time to explore Zodiac Village, interact with Chen Loong for seed cultivation, and Chen Tiger for armor upgrades before continuing your adventures.
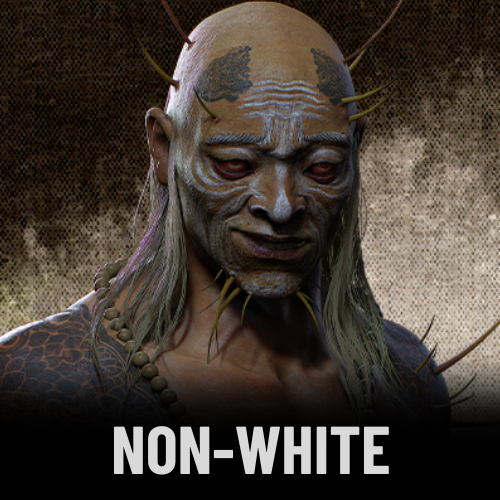
Non-White
Location: Beyond the Mindfulness Cliff Keeper’s Shrine.
Description: To find Non-White, follow the path that leads out from the Mindfulness Cliff Keeper’s Shrine. Continue along this path to reach the boss’s arena.
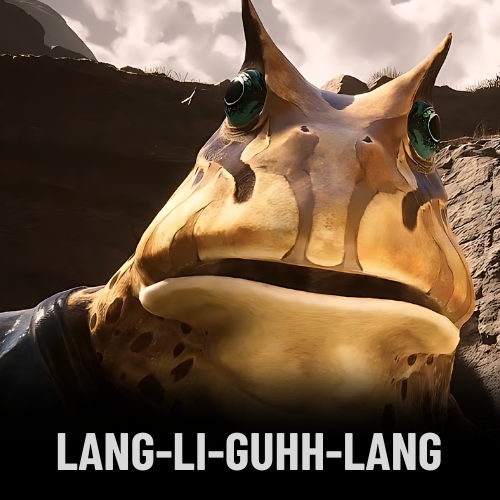
Lang-Li-Guhh-Lang
Boss Name: Lang-Li-Guhh-Lang
Location: Disengage from the Forest of Felicity Keeper’s Shrine, turn 90° to the right, and walk a few paces forward. Pass through the rock corridor on the right to reach Lang-Li-Guhh-Lang’s frozen arena.
Description: To find Lang-Li-Guhh-Lang, turn right after leaving the Forest of Felicity Keeper’s Shrine, walk forward a bit, and go through the rock corridor. Continue following the path to reach the boss’s frozen arena.
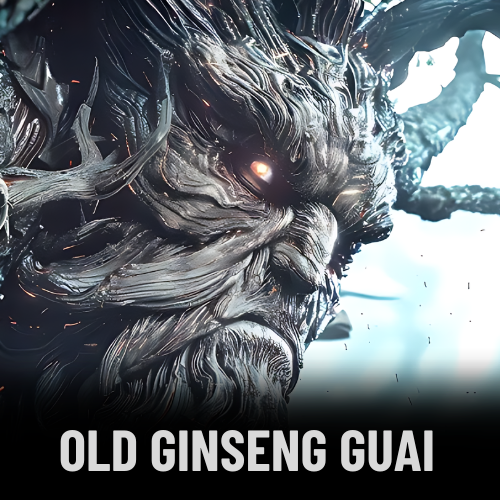
Old Ginseng Guai
Boss Name: Old Ginseng Guai
Location: Follow the path that travels under the wooden gate near the Forest of Felicity Keeper’s Shrine. Continue past a second wooden gate and stop in front of a third wooden gate. Turn left, descend the slope, and pass under a fourth wooden gate. Beyond this gate, stairs lead down to the Towers of Karma Keeper’s Shrine. Proceed forward to the stone obelisk with the Jade Essence Drink behind it. Interacting with the plants in front of the obelisk will trigger the fight with Old Ginseng Guai.
Description: To reach Old Ginseng Guai, follow the path under the wooden gates starting near the Forest of Felicity Keeper’s Shrine. After passing the fourth wooden gate and reaching the Towers of Karma Keeper’s Shrine, locate the stone obelisk with the Jade Essence Drink. Interact with the plants in front of the obelisk to start the battle with Old Ginseng Guai.
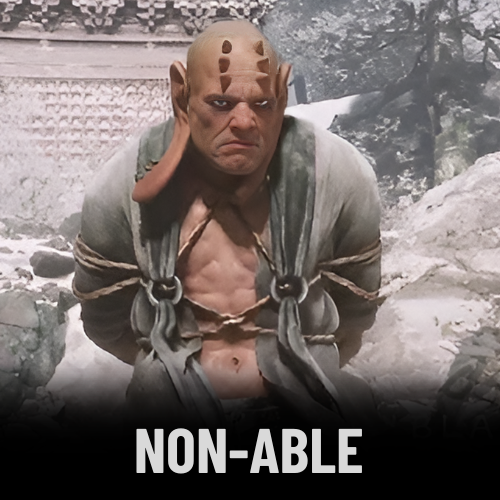
Non-Able
Location: Walk towards the wooden gate near the Forest of Felicity Keeper’s Shrine. Veer right before reaching the gate and follow the downward slope. Turn left where the slope meets a large pillar, descend the stairs, and cross the bridge to the right. Activate the Brook of Bliss Keeper’s Shrine. After disengaging from the shrine, climb the stairs on the right, then follow the path left at the top to a small stone obelisk. Proceed along the right side of the obelisk to reach Non-Able’s arena.
Description: To find Non-Able, navigate towards the wooden gate near the Forest of Felicity Keeper’s Shrine and veer right. Descend the slope, turn left at the pillar, and cross the bridge. Activate the Brook of Bliss Keeper’s Shrine, then climb the stairs and follow the path to a small stone obelisk. The arena is accessible by continuing along the right side of the obelisk.
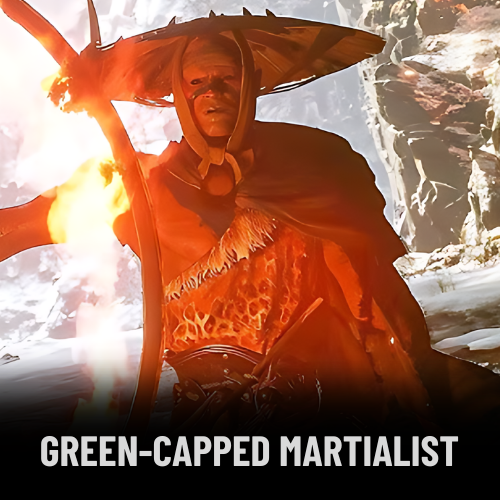
Green-Capped Martialist
Boss Name: Green-Capped Martialist
Location: Near the Melon Field Keeper’s Shrine. Complete the treasure hunter’s quest as detailed in this
GUIDE[gamerant.com] to access the fight.
Description: To fight the Green-Capped Martialist, you must first complete the treasure hunter’s quest. The boss will be available near the Melon Field Keeper’s Shrine after following the steps outlined in the linked guide.
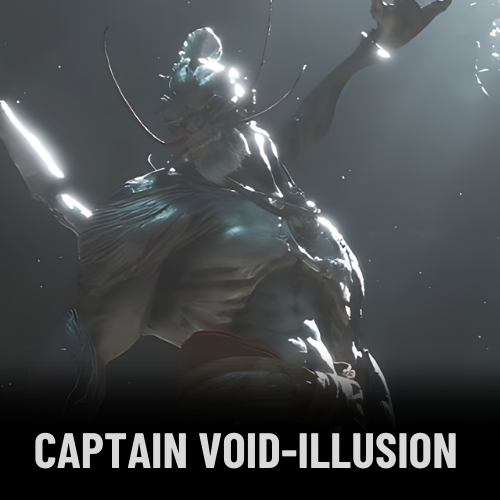
Captain Void-Illusion
Boss Name: Captain Void-Illusion
Location: Visit the Longevity Road Keeper’s Shrine. Walk forward until you encounter the large body of Captain Void-Illusion and then interact with it.
Description: To find Captain Void-Illusion, head to the Longevity Road Keeper’s Shrine. Move forward until you come across the large body of Captain Void-Illusion. Interact with it to initiate the fight.
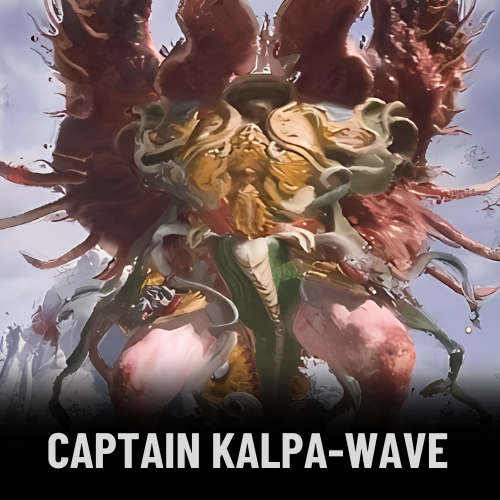
Captain Kalpa-Wave
Boss Name: Captain Kalpa-Wave
Location: Enter the open area filled with frozen bodies just beyond the Longevity Road Keeper’s Shrine. Use the path in the back-right corner of this area to reach a large temple. Captain Kalpa-Wave is directly in front of this structure.
Description: To find Captain Kalpa-Wave, start from the Longevity Road Keeper’s Shrine and head into the open area with frozen bodies. Navigate to the path in the back-right corner to access a large temple. Captain Kalpa-Wave will be directly in front of the temple.
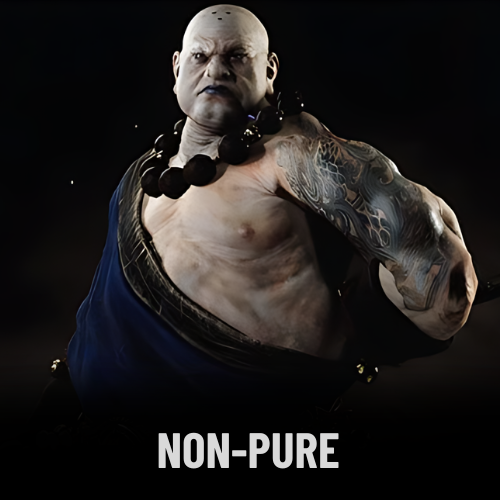
Non-Pure
Location: Non-Pure can be found by starting at the Temple Entrance Keeper’s Shrine. Descend the slope next to the Shrine, pass through the building, and use the stairs that travel up and to the left. Turn right at the top of the stairs and proceed forward to reach an area with two large staircases flanked by two large enemies. Enter the building on the right side of this area.
Description: Non-Pure is encountered after following the path from the Temple Entrance Keeper’s Shrine. Descend the slope, pass through the building, and take the stairs to the left. Turn right at the top and move forward to the area with the two large staircases. Enter the building on the right to find Non-Pure.
Non-Void
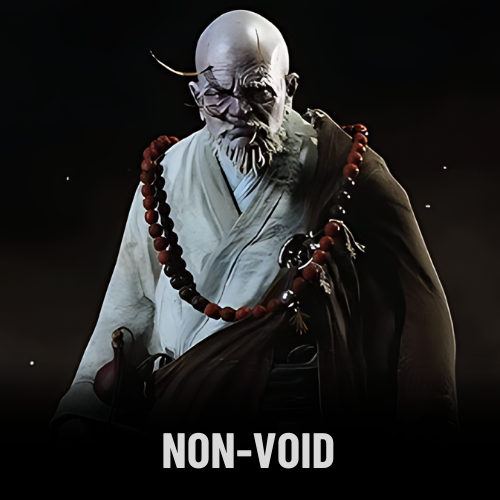
Location: The first step toward fighting Non-Void is obtaining the Snow Fox Brush. This Special Item is earned by interacting with the frozen body near the Forest of Felicity Keeper’s Shrine in the Valley of Ecstasy. With the Snow Fox Brush in hand, you should make your way to the Temple Entrance Keeper’s Shrine and follow these steps:
1. Descend the slope next to the Temple Entrance Keeper’s Shrine.
2. Pass through the building and use the stairs that travel up and to the left.
3. Turn right at the top of the stairs, go forward, and descend the stairs on the left.
4. Enter the building at the bottom and climb the stairs in the back-right corner.
5. Upon reaching the balcony, turn right and pass through the opening on the right.
6. Climb the stairs to enter a building with a gold statue.
7. Use the Snow Fox Brush near the statue.
Description: The frozen body near the Forest of Felicity Keeper’s Shrine marks the starting point for acquiring the Snow Fox Brush, a crucial item for facing Non-Void. Follow the detailed path from the Temple Entrance Keeper’s Shrine to reach the location where the Snow Fox Brush is used to summon Non-Void.
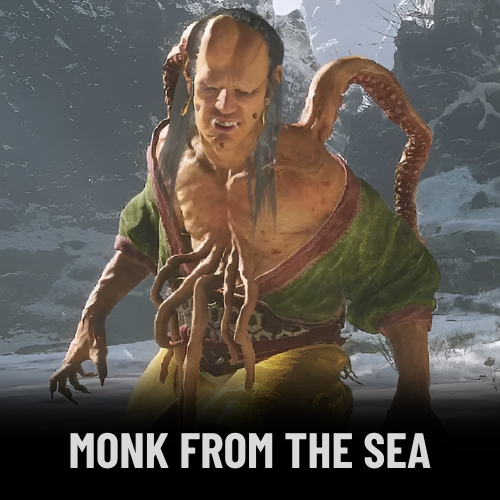
Monk From The Sea
Boss Name: Monk From The Sea
Location: Start at the Temple Entrance Keeper’s Shrine. Disengage from the Temple Entrance Keeper’s Shrine, turn to the right, and pass through the opening in the wall that is ahead. Climb the slope and stairs to the left. Go left at the top of the stairs and pass through the opening in the wall to access the Monk from the Sea’s arena.
Description: The Monk From The Sea can be found by starting at the Temple Entrance Keeper’s Shrine. Head right from the Shrine, pass through the wall opening, and then climb the slope and stairs to your left. Continue left at the top, and you’ll find the arena after passing through another wall opening.
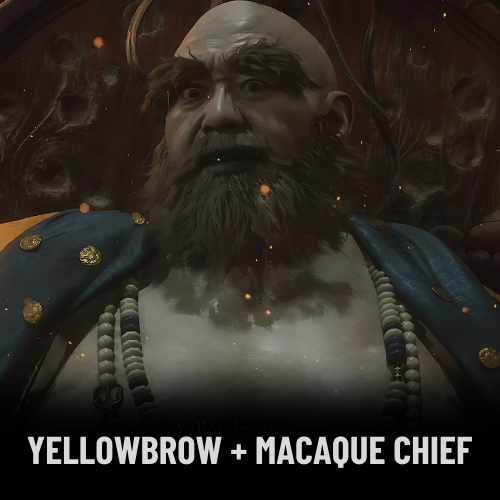
Yellowbrow + Macaque Chief
Boss Name: Yellowbrow + Macaque Chief
Location: The final bosses in the third chapter are located near the Temple Entrance Keeper’s Shrine. Start by descending the slope next to the Shrine. Pass through the building and use the stairs that travel up and to the left. Turn right at the top of the stairs and proceed forward to reach an area with two large staircases flanked by two large enemies. Climb those stairs to reach the bosses.
Description: Yellowbrow and Macaque Chief, the final bosses of the third chapter, can be found by following the path from the Temple Entrance Keeper’s Shrine. Descend the slope, move through the building, and climb the stairs to the left. After turning right at the top, continue forward to the area with two large staircases. Ascend these stairs to encounter the bosses.
The Second Sister
Boss Name: The Second Sister
Location: After activating the Estate of the Zhu Keeper’s Shrine, head up the stairs on the right. Pass through the gate on the left to trigger the encounter with the Second Sister.
Description: The Second Sister is located near the Estate of the Zhu Keeper’s Shrine. Once you’ve activated the shrine, ascend the stairs on the right and proceed through the gate on the left to initiate the battle.
Elder Amourworm
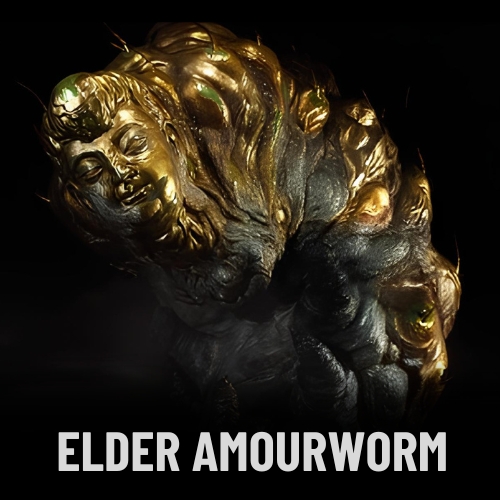
Boss Name: Elder Amourworm
Location: Begin your journey at the Verdure Bridge Keeper’s Shrine. To reach this checkpoint from the Pool of Shattered Jade Keeper’s Shrine, follow this path: Leave the Pool of Shattered Jade Keeper’s Shrine, cross the wooden bridges, and drop down from the wooden platform at the end. Continue descending from one wooden platform to the next until you reach the Keeper’s Shrine. Once you’ve activated the Verdure Bridge Keeper’s Shrine, cross the bridge to the left of the checkpoint, and follow the left path. Continue along this route until you come across a wooden gate. Pass through it, loot the chests, and proceed forward to enter the Elder Amourworm’s arena.
Description: Elder Amourworm can be found after reaching the Verdure Bridge Keeper’s Shrine. Start at the Pool of Shattered Jade Keeper’s Shrine, crossing wooden bridges, and descending platforms to arrive at the checkpoint. After activating the shrine, take the bridge on the left and follow the left path. As you go, you’ll encounter a wooden gate; pass through it, collect the chests, and continue forward to face the Elder Amourworm in its arena.
Venom Daoist 1
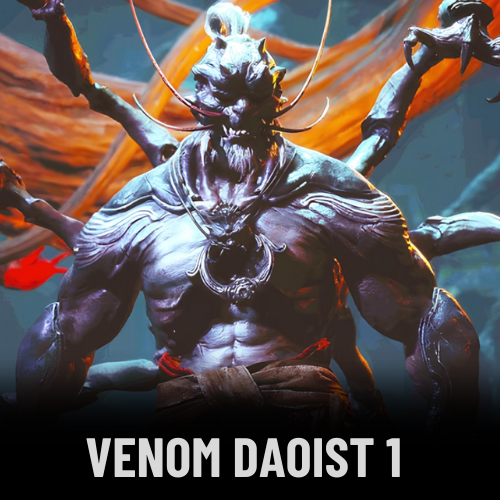
Boss Name: Venom Daoist (First Encounter)
Location: Although not classified as a traditional boss, the Venom Daoist has a boss-like health bar and is encountered twice in Chapter 4. The first encounter takes place near the Pool of Shattered Jade Keeper’s Shrine. If you haven’t discovered this shrine, start from the Upper Hollow Keeper’s Shrine by following this path: Ascend the stairs on the left of the Upper Hollow Keeper’s Shrine, turn left at the top, and continue along the path. After descending a short flight of stairs, take a right, then drop down from the wooden platform on the left. Drop down again and follow the path through a room filled with hanging cocoons. Keep going, passing through another room of cocoons, and continue up a ramp to reach the Pool of Shattered Jade Keeper’s Shrine.
Description: After activating the Pool of Shattered Jade Keeper’s Shrine, turn right and proceed through the room filled with cocoons. Beyond this room, you’ll find a large cocoon hanging from a tree, with the Venom Daoist waiting behind it.
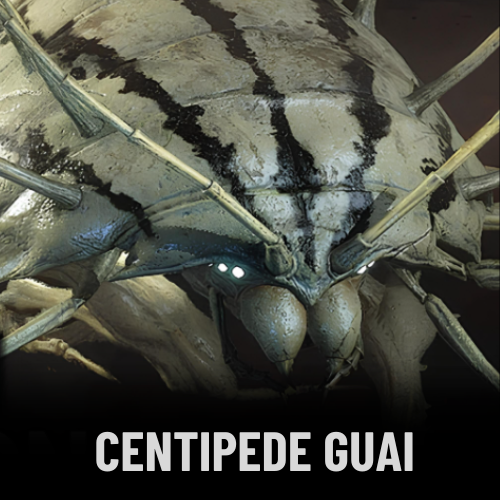
Centipede Guai
Boss Name: Centipede Guai
Location: This boss is located near the Bonevault Keeper’s Shrine. To reach this checkpoint from the Verdure Bridge Keeper’s Shrine, cross the bridge on the left and follow the path to the right. This will lead you to a series of wooden platforms. Descend from these platforms, then turn right at the bottom. Continue along the path through the egg-filled area to arrive at the Bonevault Keeper’s Shrine.
Description: Once you’ve activated the Bonevault Keeper’s Shrine, take the path to the left and drop down into Centipede Guai’s arena to initiate the battle.
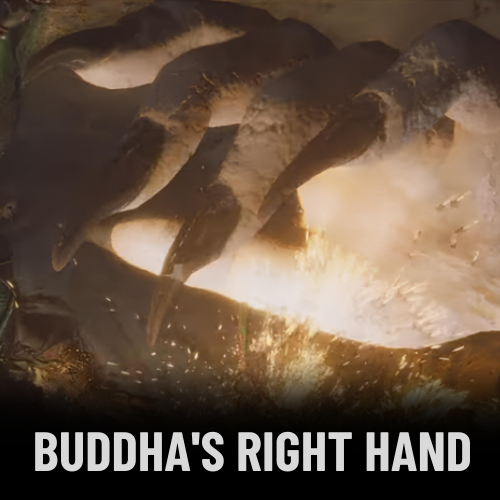
Buddha’s Right Hand
Boss Name: Buddha’s Right Hand
Location: Buddha’s Right Hand is located in a corridor to the left of the Cliff of Oblivion Keeper’s Shrine. To reach this checkpoint, simply follow the path that leads out of Centipede Guai’s arena.
Description: After defeating Centipede Guai, proceed along the path leading out of its arena to arrive at the Cliff of Oblivion Keeper’s Shrine. Buddha’s Right Hand can be found in a corridor to the left of the shrine.
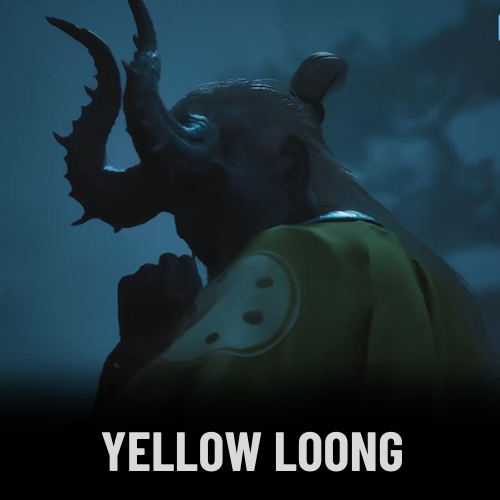
Yellow Loong
Location: Yellow Loong can be found near the Relief of the Fallen Loong Keeper’s Shrine. To reach this location, progress along the critical path until you arrive at the Cliff of Oblivion Keeper’s Shrine in Webbed Hollow. This shrine is directly next to the corridor where you’ll encounter Buddha’s Right Hand.
Description: From the Cliff of Oblivion Keeper’s Shrine, head left and pass through the corridor where the Buddha’s Right Hand battle took place. Cross the inert arm, drop down from the wooden platform beyond it, then turn right. Continue along the path to a wooden platform overlooking a rope bridge, and drop down. Cross the rope bridge, follow the path to a narrow metal beam, and use Cloud Step to cross it easily. Continue along the path to reach the Relief of the Fallen Loong Keeper’s Shrine, where Yellow Loong awaits.
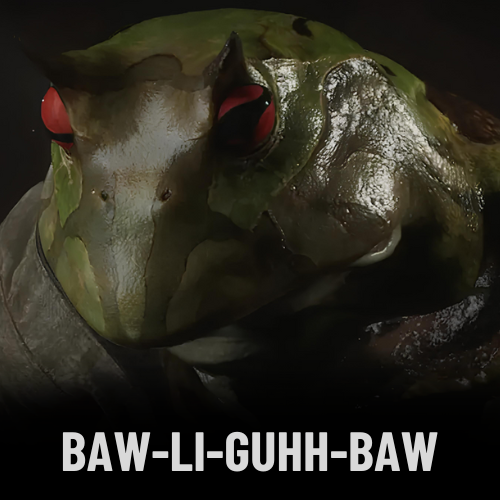
Baw-Li-Guhh-Baw
Boss Name: Baw-Li-Guhh-Baw
Location: To find Baw-Li-Guhh-Baw, follow the path beyond the corridor where you fought Buddha’s Right Hand to reach the Lower Hollow Keeper’s Shrine. Disengage from the Keeper’s Shrine, turn left, and move through the area filled with hanging cocoons.
Description: After passing through the cocoons, look for a gap in the left wall and pass through it. Continue along the path, enter the opening on the left, and follow the route to reach Baw-Li-Guhh-Baw’s watery arena.
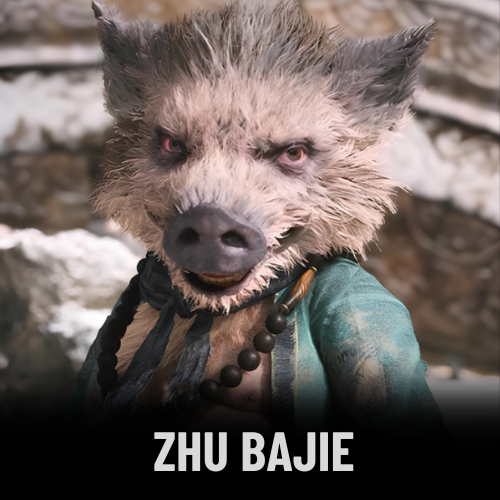
Zhu Bajie
Location: Zhu Bajie has a boss-style health bar and is encountered twice near the Hut of Immortality Keeper’s Shrine. This checkpoint can be reached by following the path beyond the Lower Hollow Keeper’s Shrine.
Description: The first encounter with Zhu Bajie takes place in an arena to the right of the Hut of Immortality Keeper’s Shrine. The second encounter occurs as you follow the path to the left of the Hut of Immortality Keeper’s Shrine.
Violet Spider
Location: After defeating Zhu Bajie for the second time, continue along the path to reach the Gathering Cave Keeper’s Shrine. The Violet Spider awaits in an arena just beyond this checkpoint.
Description: Once you’ve reached the Gathering Cave Keeper’s Shrine, proceed a bit further to find the Violet Spider in an arena located just past the shrine.
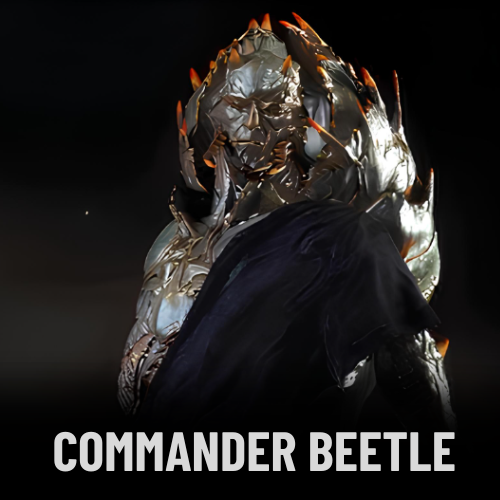
Commander Beetle
Boss Name: Commander Beetle
Location: After activating the Forest of Ferocity Keeper’s Shrine, follow these steps to initiate the battle with Commander Beetle: Exit from the Keeper’s Shrine and head to the right. When you reach a forced turn, take another right and follow the path to climb up into a courtyard where Daoists are training. Move past the Daoists to encounter Commander Beetle.
Description: To find Commander Beetle, start from the Forest of Ferocity Keeper’s Shrine, turn right, and follow the path until you reach a courtyard with training Daoists. Continue through the courtyard to face Commander Beetle.
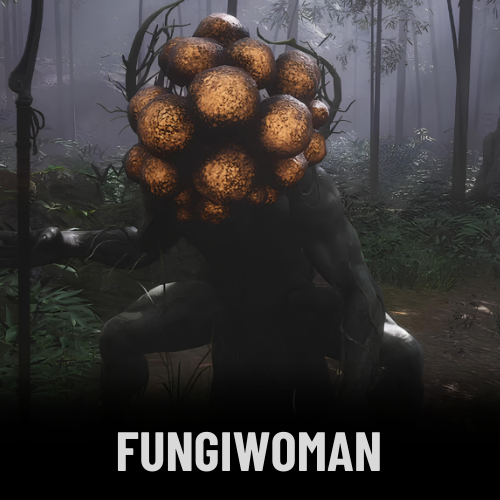
Fungi Woman
Location: Fungiwoman, who also has a boss-style health bar, can be encountered near the Court of Illumination Keeper’s Shrine. To fight her, start at this shrine and follow these steps: Exit from the Keeper’s Shrine and proceed through the gate in front of you. Continue straight, passing through a wooden building and ascending several small staircases. At the fork, stay to the right to reach an area with a wooden structure and the Sunset of the Nine Skies Drink. Collect the mushrooms in this area to trigger the battle with Fungiwoman.
Description: To engage Fungiwoman, start from the Court of Illumination Keeper’s Shrine, head through the nearby gate, and move forward. Navigate through a wooden building, climb the small stairs, and take the right path at the fork. In the area with the wooden structure and Sunset of the Nine Skies Drink, gather the mushrooms to initiate the fight.
Venom Daoist 2
Boss Name: Venom Daoist (Second Encounter)
Location: The second battle with the Venom Daoist takes place near the Court of Illumination Keeper’s Shrine. To reach this boss, start from the Keeper’s Shrine and proceed through the gate directly ahead. Move forward, pass through a wooden building, and climb several small staircases. At the fork, turn left to descend into the arena where the Venom Daoist awaits.
Description: After disengaging from the Court of Illumination Keeper’s Shrine, follow the path through the gate, navigate through the wooden building, and ascend the small stairs. At the fork, head left to find the arena for the second encounter with Venom Daoist.
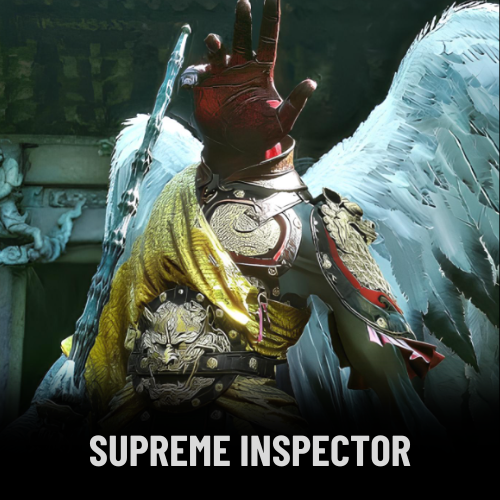
Supreme Inspector
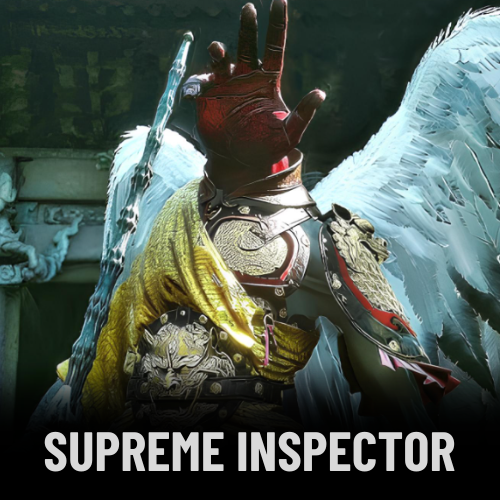
Boss Name: Supreme Inspector
Location: To challenge the Supreme Inspector, you need to collect talismans from four different locations. The battle will take place in an arena just beyond the Court of Illumination Keeper’s Shrine, after acquiring the final talisman.
Talisman 1: Begin at the Verdure Bridge Keeper’s Shrine in Webbed Hollow. Cross the bridge to the left of the checkpoint and follow the left path. Proceed past the wooden gate and continue on the left path, moving through hanging cocoons. At the fork, turn left and continue up the staircases as they appear. At the top of the last staircase, cross the bridge to the right and head to the obelisk with the first talisman.
Talisman 2: Go to the Cliff of Oblivion Keeper’s Shrine in Webbed Hollow. The second talisman is located at an obelisk in the pool of water to the right of the checkpoint.
Talisman 3: Travel to the Relief of the Fallen Loong Keeper’s Shrine in Webbed Hollow. Follow the path to the left of the checkpoint until you reach the edge of a cliff. Navigate around the cliff and follow the slope up to the obelisk with the third talisman.
Hundred-Eyed Daoist Master
Boss Name: Hundred-Eyed Daoist Master
Location: To face Hundred-Eyed Daoist Master, the final boss of Chapter 4, go through the gate to the right of the Court of Illumination Keeper’s Shrine. This will lead you into the arena where the boss awaits.
Description: From the Court of Illumination Keeper’s Shrine, proceed through the gate on the right side to enter the arena and engage with the Hundred-Eyed Daoist Master.
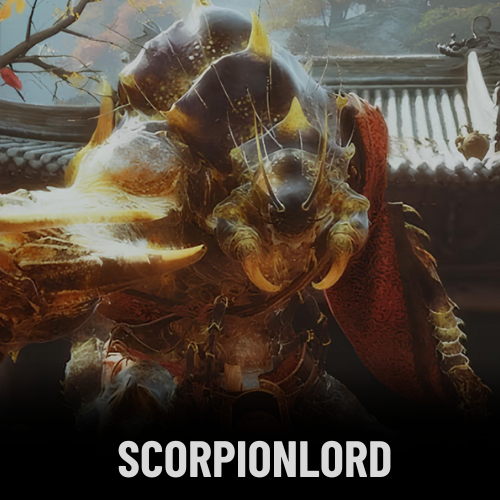
Scorpionlord
Location: To access the secret area where Scorpionlord is located, first defeat the Venom Daoist in both the Webbed Hollow and the Temple of Yellow Flowers. After defeating the Venom Daoist in the Temple of Yellow Flowers, interact with the painting on the wall to be transported to Purple Cloud Mountain. From there, climb the stairs next to the Bounds of Deity’s Abode Keeper’s Shrine and break the barrels on the ground near the house to reveal the boss.
Description: To find Scorpionlord, start from the Valley of Blooms Keeper’s Shrine. Disengage from the shrine, turn left, and jump into the small pool. Cross the pool, continue straight, and turn left when you reach a ledge. Proceed forward and pass through a wooden gate to arrive at the Bounds of Deity’s Abode Keeper’s Shrine. From this point, follow the steps mentioned to reach Scorpionlord.
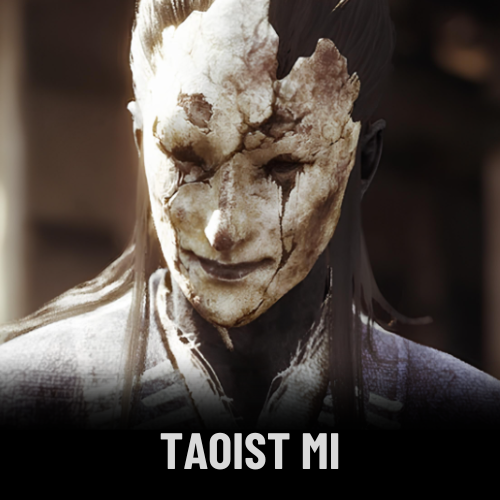
Taoist Mi
Location: To encounter Taoist Mi, start at the Petalfall Hamlet Keeper’s Shrine, which you can reach by following the path from the Valley of Blooms Keeper’s Shrine. Climb the stairs past this checkpoint and speak with the character playing the flute at the top.
Description: After speaking with the flute player, defeat the enemies in the village to obtain the Violet Hail Key Item. Return to the flute-playing character and give them the item to start the battle with Taoist Mi.
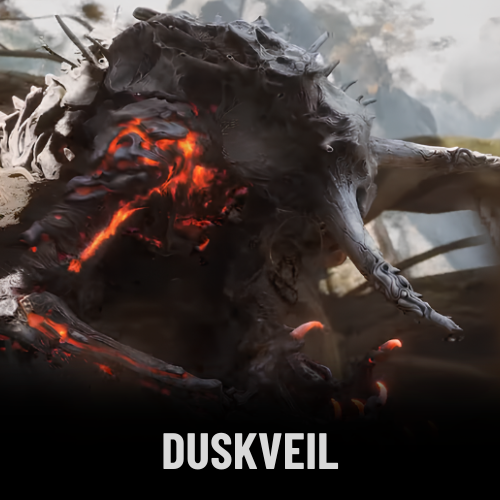
Duskveil
Location: Duskveil, the final boss in Purple Cloud Mountain, can be found by climbing the stairs located next to the Cloudnest Peak Keeper’s Shrine.
Description: To reach Duskveil, start at the Cloudnest Peak Keeper’s Shrine and ascend the stairs nearby to enter the arena for the final boss battle.
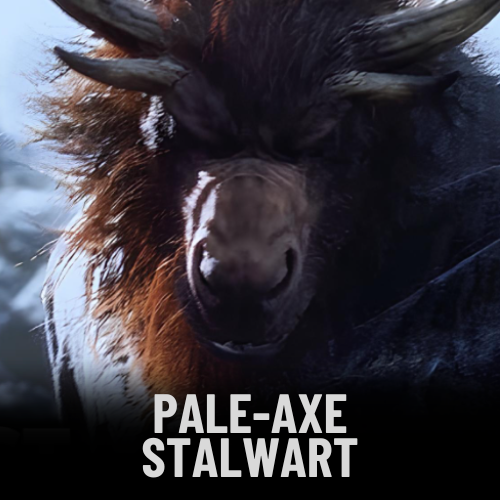
Pale-Axe Stalwart
Boss Name: Pale-Axe Stalwart
Location: Pale-Axe Stalwart is the first miniboss you will encounter in Chapter 5. Initially, you might see him as an enemy, but you will soon discover that he is actually a friendly NPC with a quest for you.
Description: Although Pale-Axe Stalwart appears as a miniboss at first, he is a friendly character who offers a quest once you engage with him in Chapter 5.
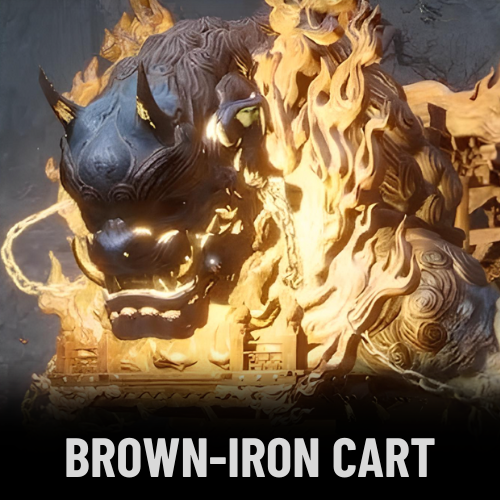
Brown-Iron Cart
Boss Name: Brown-Iron Cart
Location: Brown-Iron Cart can be found at the Camp of Seasons, beyond the area where you encountered Pale-Axe Stalwart.
Description: To locate Brown-Iron Cart, proceed to the Camp of Seasons, which is situated past the location where you met the Pale-Axe Stalwart.
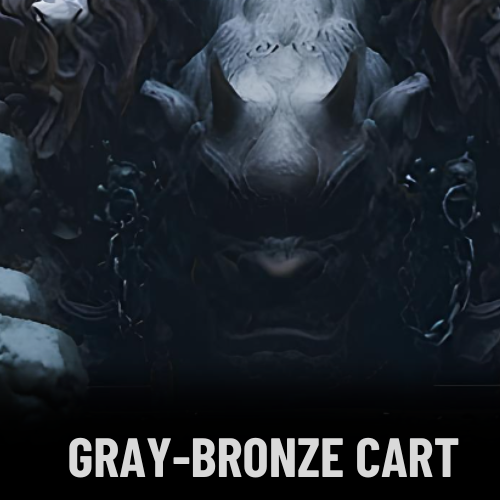
Gray-Bronze Cart
Boss Name: Gray-Bronze Cart
Location: Gray-Bronze Cart is located in the Height of Ember, inside a cave with a narrow passageway at the end.
Description: To find Gray-Bronze Cart, head to the Height of Ember and enter the cave there. Make your way through the cave until you reach a narrow passageway at the end where the boss is waiting.
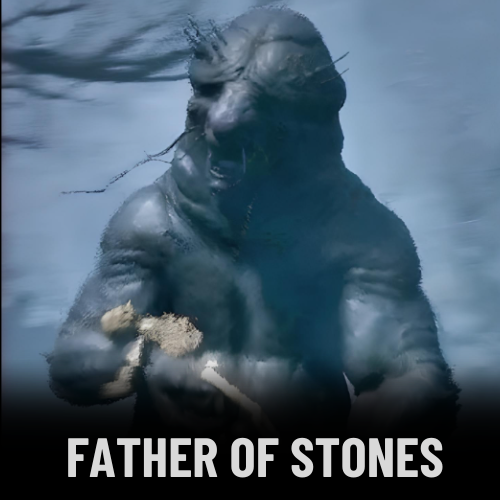
Father Of Stones
Boss Name: Father of Stones
Location: Father of Stones is found in the Woods of Ember, within the Height of Ember. Simply take the nearby road, and the boss will appear.
Description: To encounter Father of Stones, head to the Woods of Ember in the Height of Ember area. Travel along the nearby road, and the boss will reveal itself.
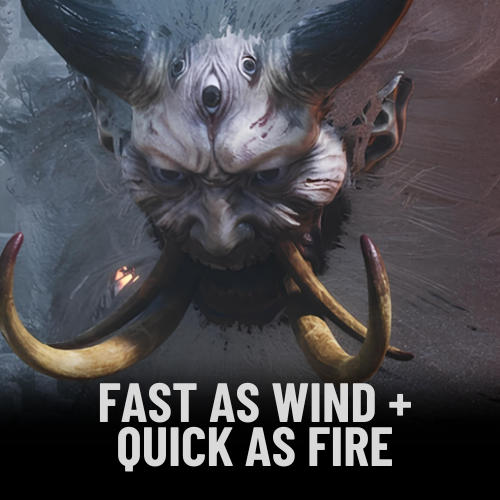
Fast As Wind + Quick As Fire
Boss Name: Fast As Wind + Quick As Fire
Location: Fast As Wind and Quick As Fire are both located in the Woods of Ember.
Description: To find Fast As Wind and Quick As Fire, head to the Woods of Ember, where these two bosses await.
Third Cart
Location: The Third Cart, which is already destroyed, can be found inside the underground cavern at Furnace Valley – Valley Entrance. Follow the main path, go straight, and take a right when you reach the lanterns.
Description: To find the destroyed Third Cart, enter the underground cavern at Furnace Valley – Valley Entrance. Follow the main path, continue straight, and turn right at the lanterns to locate the cart.
Flint Chief
Location: Flint Chief is located at Furnace Valley – Valley Entrance. To reach the boss, follow the main path, continue straight, then take a left at the lanterns, followed by a right turn.
Description: As you approach a large pit of lava, move to the right, and Flint Chief will materialize in front of you.
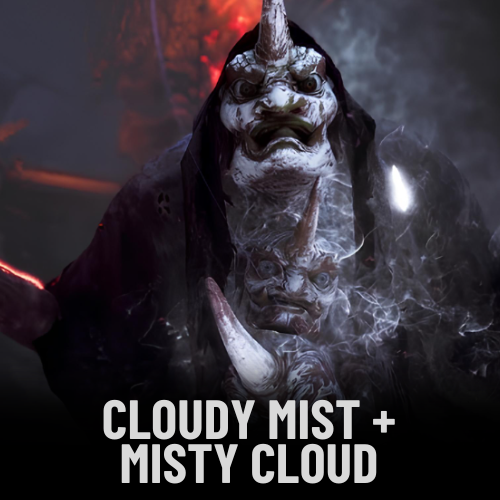
Cloudy Mist + Misty Cloud
Boss Name: Cloudy Mist + Misty Cloud
Location: Cloudy Mist and Misty Cloud are both found in Furnace Valley. Simply follow the main path to reach their boss arena.
Description: To encounter Cloudy Mist and Misty Cloud, proceed along the main path in Furnace Valley until you arrive at their arena.
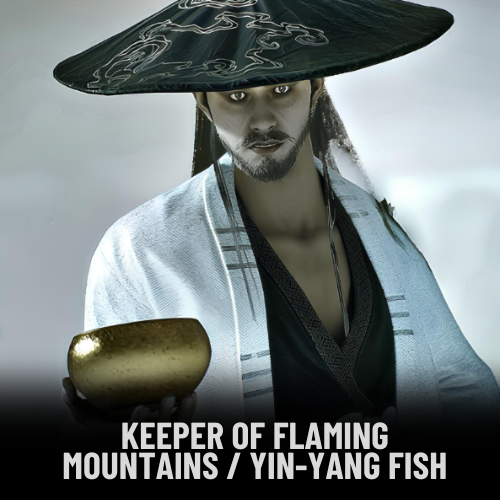
Keeper Of Flaming Mountains / Yin-Yang Fish
Boss Name: Keeper Of Flaming Mountains / Yin-Yang Fish
Location: The Keeper of Flaming Mountains and Yin-Yang Fish are found in Furnace Valley. Yin-Yang Fish appears after defeating the Keeper of Flaming Mountains.
Description: After defeating Misty Cloud, open the doors, follow the main path, and take a right to reach the boss encounter with Yin-Yang Fish, which appears following the defeat of the Keeper of Flaming Mountains.
Crimson-Silver Cart
Boss Name: Crimson-Silver Cart
Location: Crimson-Silver Cart is located in The Emerald Hall. Continue ascending the slope after you’ve defeated the Keeper of the Flaming Mountains.
Description: To find the Crimson-Silver Cart, head to The Emerald Hall and proceed up the slope following your victory over the Keeper of the Flaming Mountains.
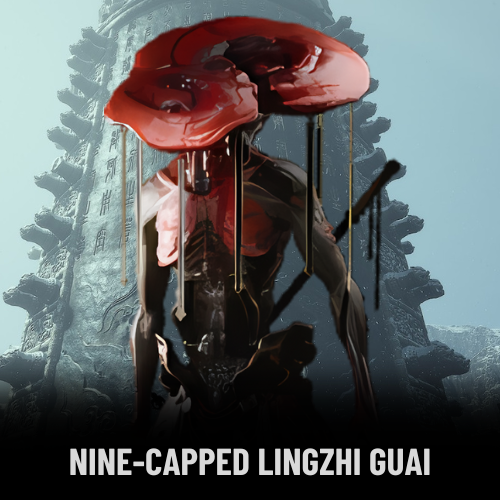
Nine-Capped Lingzhi Guai
Boss Name: Nine-Capped Lingzhi Guai
Location: Nine-Capped Lingzhi Guai can be found in the Field of Fire, near the Ashen Pass III Shrine. This boss will emerge from the ground when you interact with it.
Description: Nine-Capped Lingzhi Guai has the appearance of a flat mushroom. To encounter this boss, visit the Field of Fire at the Ashen Pass III Shrine and interact with the ground to make it appear.
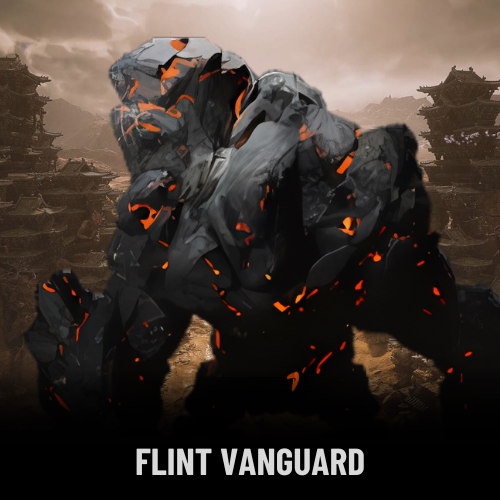
Flint Vanguard
Boss Name: Flint Vanguard
Location: Flint Vanguard is located in the Field of Fire. Begin at the Fallen Furnace Crater, then head back and turn left to find the boss.
Description: To encounter Flint Vanguard, start at the Field of Fire – Fallen Furnace Crater, retrace your steps, and make a left turn to reach the boss.
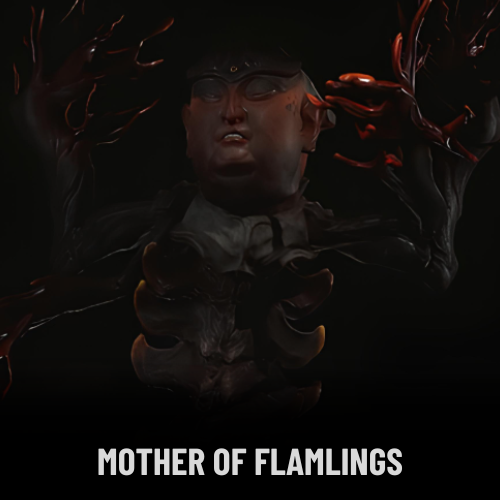
Mother of Flamlings
Boss Name: Mother of Flamlings
Location: After defeating Flint Vanguard, take the path to the right and proceed downhill.
Description: To summon the Mother of Flamlings, you’ll need 4 Flame Ore. Head past the Flame Worms and look for a spot where red lava is emerging from the ground. Interact with this spot to summon the boss.
Rusty Gold Cart
Boss Name: Rusty Gold Cart
Location: After defeating Flint Vanguard and the Mother of Flamlings, continue along the path until you reach the Cooling Slope Shrine. You’ll find this boss at the end of that path.
Description: To locate Rusty Gold Cart, proceed along the path beyond Flint Vanguard and the Mother of Flamlings. Continue until you reach the Cooling Slope Shrine, where the boss awaits at the path’s end.
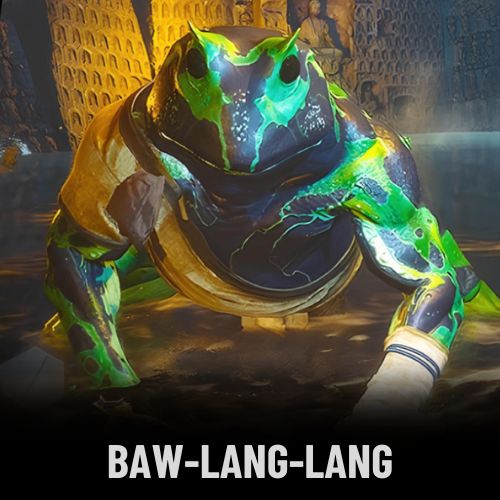
Baw-Lang-Lang
Location: After passing through the Ice doors, head downhill and turn left to encounter this boss. Turning right instead will teleport you to a secret area.
Description: To find Baw-Lang-Lang, go downhill and take a left after passing through the Ice doors. Be aware that turning right instead will teleport you to a hidden area.
Chapter Six
Supreme Inspector
Bosses and Locations: Supreme Inspector
Location: The first major challenge in Chapter 6, the Supreme Inspector, is encountered just past the Verdant Path Shrine along the main path.
Description: Supreme Inspector serves as your first true test in Chapter 6. Simply follow the main path, and you’ll find him after the Verdant Path Shrine.
Jiao-Loong of Waves
Bosses and Locations: Jiao-Loong of Waves
Location: This optional boss in Chapter 6 can be found by returning to the first shrine in the region. Start from the location where you obtained the Somersault Cloud from the Supreme Inspector, then proceed past the pit with chains. When you reach the cliffside, look below for a pool of water—landing on it will trigger the appearance of this Yaoguai Chief.
Description: To fight Jiao-Loong of Waves, an optional boss in Chapter 6, return to the first shrine in the region. From the spot where you got the Somersault Cloud from the Supreme Inspector, continue past the chained pit, and at the cliffside, drop down onto the pool of water to spawn this Yaoguai Chief. It drops the Waterward Orb curio.
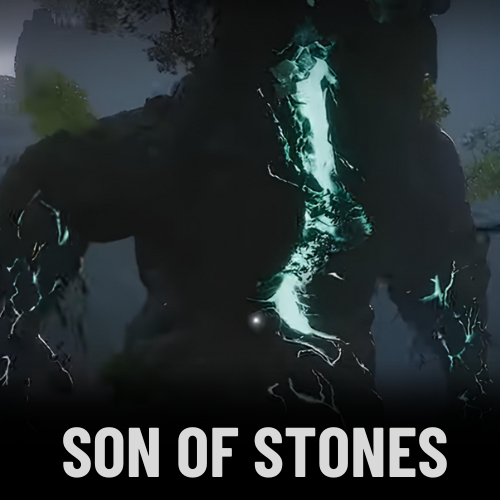
Son Of Stones
Bosses and Locations: Son of Stones
Location: This golem is found in a cliffside area overlooking a lake. It remains passive until provoked, so you’ll need to strike it a few times to initiate the fight.
Description: The Son of Stones, a golem resting by a cliffside overlooking a lake, won’t attack you unless provoked. To start the battle, hit it a few times.
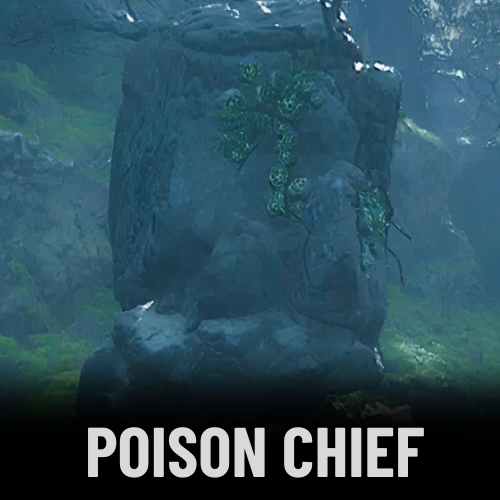
Poison Chief
Bosses and Locations: Poison Chief
Location: Multiple Poison Chief minibosses can be found throughout this region. They share similar abilities, including throwing green pods that explode simultaneously.
Description: The region contains several Poison Chief minibosses, all with similar abilities. These foes are known for tossing green pods that detonate simultaneously.
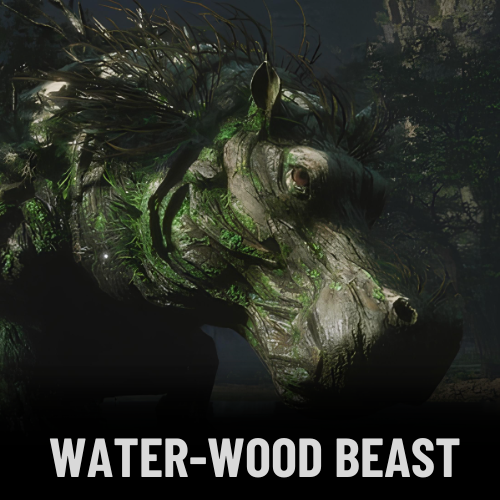
Water-Wood Beast
Bosses and Locations: Water-Wood Beast
Location: This giant hippo-like creature can be found at the western edge of the lake. Be cautious, as it tends to dive underwater before attempting to devour your character in a single gulp.
Description: The Water-Wood Beast is a massive hippo residing at the western edge of the lake. It often dives underwater, then quickly resurfaces to try and swallow your character whole.
Lang-Baw-Baw
Bosses and Locations: Lang-Baw-Baw
Location: Lang-Baw-Baw, one of the six frog minibosses in the game, is located in Chapter 6. You can find this miniboss on the eastern side of the lake, in an area filled with dirt and sand. The frog is situated there and utilizes a stone-based deflection move.
Description: In Chapter 6, Lang-Baw-Baw is a frog miniboss found on the eastern side of the lake. It sits in a dirt-and-sand area and employs a stone-based deflection move during combat.
Gold Armored Rhino
Bosses and Locations: Gold Armored Rhino
Location: After defeating the Supreme Inspector and collecting your reward, head east to find the Gold Armored Rhino. This is the first legendary beast you encounter while gathering the mythical-rarity Monkey King armor set. The Gold Armored Rhino has a tough hide that resists light attacks, so focus on using heavy attacks to destroy its horn.
Description: The Gold Armored Rhino, a legendary beast encountered while collecting the Monkey King armor set, is known for its thick hide that repels light attacks. To defeat it, you must use heavy attacks to break its horn.
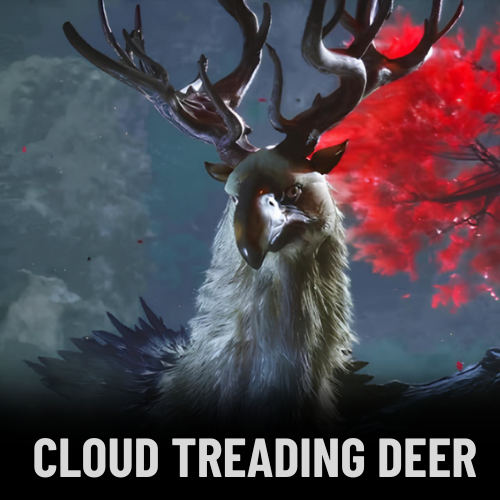
Cloud Treading Deer
Bosses and Locations: Cloud Treading Deer
Location: Your next opponent is the Cloud Treading Deer, a majestic creature that employs ice and wind to hinder your progress. Despite the serene surroundings, this deer will transform into a fierce and aggressive adversary, turning a tranquil setting into a chaotic battlefield.
Description: The Cloud Treading Deer, encountered next, uses ice and wind attacks to disrupt your advancement. Don’t be deceived by its peaceful appearance; it will become a frenzied, bloodthirsty foe in combat.
Giant Shigandang
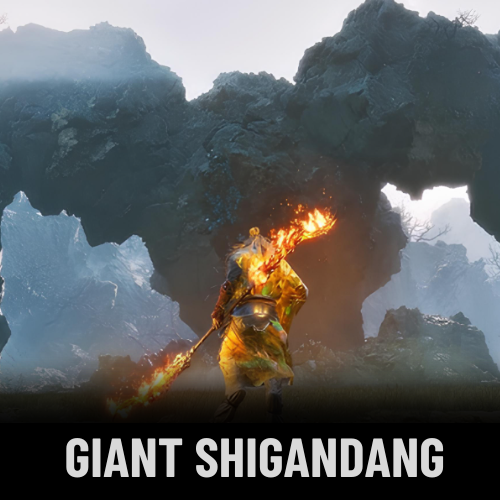
Bosses and Locations: Giant Shigandang
Location: In Chapter 6, while exploring Mount Huaguo, you’ll come across a narrow ravine that leads to a large rock formation. This seemingly ordinary rock will transform into the Giant Shigandang. Be aware that its roar can disperse your Somersault Cloud, causing you to fall to the ground. To summon this boss, you need to collect the following 4 Skandha key items:
Skandha of Form – Chapter 1: Located in Forest of Wolves > Front Hills. From the initial shrine, proceed over the wooden bridge into the forest area. The Skandha can be found in the front left corner, from a buddha-face rock, just before the Bullguard boss.
Skandha of Feeling – Chapter 2: Dropped by the Shigandang Boss. To access this boss, gather all 6 Buddha’s Eyeballs in Chapter 2. Head to Fright Cliff > Rockrest Flat. Enter the boss arena where you battle Stone Vanguard, and after defeating him, interact with the rock in the arena to deliver the Buddha Eyeballs. Defeat Shigandang to obtain the Skandha of Feeling.
Skandha of Thought – Chapter 3: Found in Valley of Ecstasy > Mindfulness Cliff. Move forward from the shrine until you reach wooden boards. Drop down the right side and walk up the path to a stone head. Interact with this head to collect the Skandha of Thought.
Skandha of Choice – Chapter 4: Located in Webbed Hollow > The Purifying Spring. Proceed from the shrine until you reach a pond on the left. Traverse the pond to find a Buddha head sculpture that holds the Skandha of Choice.
Skandha of Consciousness – Chapter 6: Dropped by the Giant Shigandang.
Reward: Bring the 5 Skandhas to Xu Dog. He can be found either at the Cellar Shrine in Chapter 2 or, if you’ve unlocked Zodiac Village, at that location. Give him the five Skandhas, and he will craft the Five Skandhas Pill, which provides a slight boost to health, mana, and stamina.
Feng-Tail General
Bosses and Locations: Feng-Tail General
Location: The Feng-Tail General encounter is not a traditional battle. Instead, it functions as a stat check where your attributes are tested. You can learn more about how to handle this encounter
HERE[www.gamespot.com].
Description: This encounter with the Feng-Tail General involves a test of your character’s stats rather than a typical combat scenario. Make sure your attributes are up to the challenge. For detailed guidance, refer to the link provided.
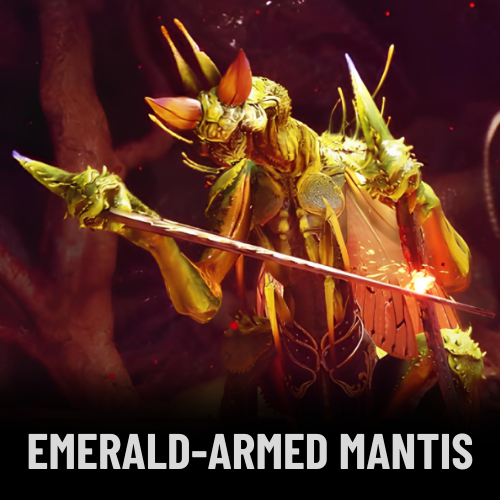
Emerald-Armed Mantis
Bosses and Locations: Emerald-Armed Mantis
Location: To encounter the Emerald-Armed Mantis, you need to defeat the other main bosses of Chapter 6: Gold Armored Rhino, Cloud-Treading Deer, and Feng-Tail General. Once these bosses have been defeated, the Emerald-Armed Mantis will spawn.
Description: The Emerald-Armed Mantis appears after you have vanquished the Gold Armored Rhino, Cloud-Treading Deer, and Feng-Tail General in Chapter 6. Defeating these bosses is necessary to trigger the appearance of the Emerald-Armed Mantis.
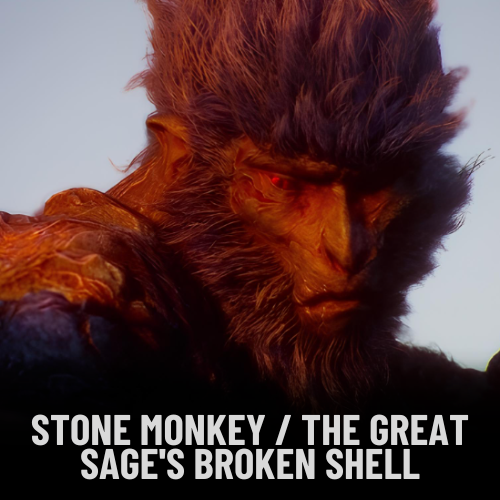
Stone Monkey / The Great Sage’s Broken Shell
Bosses and Locations: Stone Monkey / The Great Sage’s Broken Shell
Location: This boss can be found in the final area of Chapter 6. After completing the key objectives and defeating previous bosses, you will be led to the arena where the Stone Monkey, also known as The Great Sage’s Broken Shell, awaits.
Description: Stone Monkey, or The Great Sage’s Broken Shell, represents the final challenge in Chapter 6. It appears in a designated arena after you’ve progressed through the chapter and defeated earlier bosses. Prepare for a significant battle as you face this formidable foe.
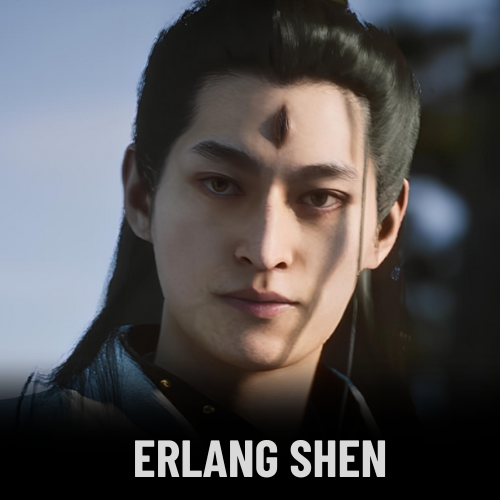
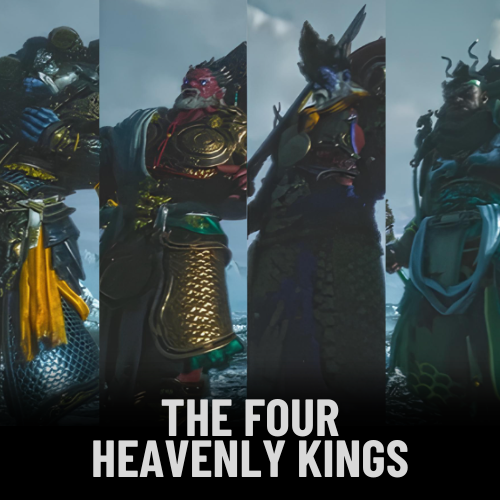
Alternate Ending Secret Bosses
For the secret ending in Black Myth Wukong, you’ll need to take on a killer trio of bosses. It kicks off with the Four Heavenly Kings, then moves on to Erlang Shen, who’s the final and toughest challenge waiting for you at Mei-Jian Peak. It’s a wild ride and a real test if you’re aiming for that hidden ending!
Erlang Shen
Location: After the credits roll, avoid starting a new journey and instead continue with your current one. Make your way to the Great Pagoda Shrine from Chapter 3. Once the cutscene concludes, you’ll be transported to a new area where this boss awaits.
Directions: If you haven’t discovered the Great Pagoda Shrine yet, head to the Snow-Veiled Trail Shrine. Take the path to the right, cross the bridge, and keep going until you reach the Great Pagoda.
The Four Heavenly Kings
Bosses: The Four Heavenly Kings
The Four Heavenly Kings are not directly represented as a singular boss fight. The game features various powerful entities influenced by Chinese mythology, with the closest representations being mythological figures like Erlang Shen or Yaogui Kings.
Directions: While specific encounters with the Four Heavenly Kings are absent, players should explore the mythologically rich boss fights to experience elements of divine guardianship and power in the game.
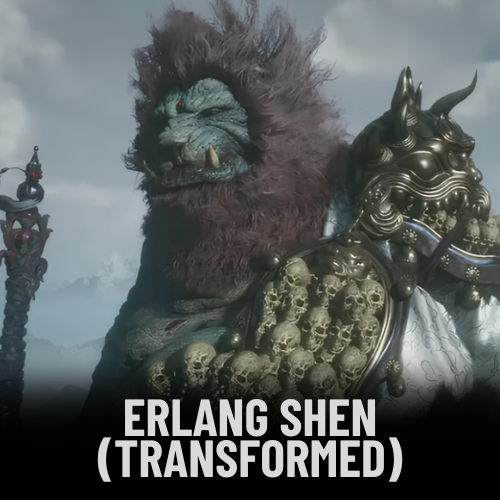
Erlang Shen (transformed)
Bosses and Locations: Erlang Shen (Transformed)
Location: This final battle with Erlang Shen takes place in a shifting arena that reflects the intensity of the fight. It serves as the ultimate test of your abilities, marking the peak of the game’s challenges.
Description: After defeating the Four Heavenly Kings, you’ll face Erlang Shen once more in his transformed form. Overcoming this formidable foe will unlock a completely new ending cinematic, providing a fresh perspective on the story’s conclusion. Get ready for a demanding battle that requires all the skills you’ve honed throughout your journey.
Conclusion
And there you have it, your go-to guide for tackling every boss in Black Myth: Wukong! With this list in hand, you’re more than ready to dive into the action and face off against every foe this epic adventure throws at you. Remember, each battle is not just a test of skill but a chance to immerse yourself in the rich, mythological world of Wukong.
Whether you’re a seasoned warrior or a newcomer looking for a challenge, keep this guide close as you navigate through each boss fight. Embrace the journey, enjoy the victories, and don’t let any boss stand in your way. You’ve got this! Happy hunting, and may your path be filled with triumph and glory.
Related Posts