The ULTIMATE all achievements guide for Myths are 100% True!
Chapter 1-6 Completion
 Chapter 1
“Complete Chapter 1”
 Chapter 2
“Complete Chapter 2”
 Chapter 3
“Complete Chapter 3”
 Chapter 4
“Complete Chapter 4”
 Chapter 5
“Complete Chapter 5”
Oh yeah, final boss spoilers below if you care about that.

Chapter 6
You Gotta Say Yes…

“Get at least 8 Myths in a single photo”
You will probably already have gotten this one by playing the game. If you haven’t gotten it, use the Macaroni power-up and just play like level 6-2 or 6-3 or something and photo a big clump of enemies.
I am unsure if projectiles count but I think they don’t? (someone please fact check this)
Camera Flash parries Ghost Cars

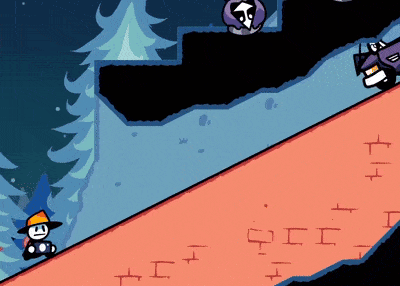
“Beat 1-3 without jumping”
This one is relatively self explanatory. Just don’t jump, ever. Dash into all of the ramps throughout the level to move vertically. I recommend getting a Burek power-up for the upward dash as that doesn’t count as a jump, plus the float is very helpful.
The name of the achievement is actually a hint as the Camera Flash does, in fact, parry the Ghost Cars.
The timing is pretty strict however as you have to take a picture right as you’re about to get hit.
Don’t worry about dying as you can die as many times as you want and still get the achievement no problem.
Do not Provoke

“Beat 3-4 without spawning Envies”
Everytime you take a photo of anything (including projectiles) when Kaygano ISN’T in the picture, she’ll get jealous and her jealously meter will increase. If her jealousy meter reaches the max, she’ll stop for a moment to spawn some Envies.

The Envies are meant to make the fight easier but for this achievement we can’t let that happen.
To avoid spawning the Envies you have to constantly be aware of what you’re taking a photo of and always ensure that Kaygano is in the picture. I recommend getting a Macaroni power-up as that increases the likelihood of Kaygano being in the pictures you take.
If there are a lot of enemies on the field but Kaygano isn’t near them, dash into them! Dashing into enemies to kill them doesn’t make Kaygano jealous.
Ghost Town Figure-Skating

“Beat 6-3 without breaking more than 6 Glass Panels”
This one is quite tricky. There are 4 glass panels the game forces you to break.
The demon ghost guys take 12 seconds to get angry. When they are angry they will relentlessly hunt you until you either die or break another glass panel. Getting hit by them will always set your HP to 1. If your HP is already at 1 then they just kill you.
Speed is the name of the game here. Ignore every single enemy unless they are required to progress.
Take this with a grain of salt, but I’m pretty sure that dying or pressing R will disqualify you from the achievement, so you have to restart the entire level if you fail.
I think I installed this Mod wrong

“Cherry clone a Chapter Boss and beat the level”
My personal favorite achievement due to the sheer amount of chaos involved.
The easiest boss to do this on is the first boss, Engine no. 9, but honestly I recommend doing this at least once on every single boss as it’s actually quite a lot of fun (if you’ve lost your sanity like me). I recommend equipping a Macaroni power-up for this as there will be a lot, and i mean A LOT of stuff on the screen at once.
If you haven’t unlocked the Cherry power-up or don’t want to spend 3000$ buying one, then you’re in luck! Every single boss level has a hidden Cherry power-up somewhere in the beginning section just before the actual bossfight.
Below is a list that shows exactly where each cherry is in each boss level. Most of the cherries require the dash wall jump move that Tortino tells you about in level 3-3.
Do a dash wall jump from the first ramp you see and go left when you’re in the air.

In the room where you have to go up just go to the left and take a picture.

Do a dash wall jump in the first room.
Do a dash wall jump from the right side of the first bump.
Dash into the front of the ship. It sometimes doesn’t work so just keep on trying until it works.
Just photo this one specific spot in the room with those blocks that become solid when you photograph them. Don’t think a dash wall jump is necessary here, I just did it for style points.
If you equip a Cherry power-up at the very beginning of the level at Tortino and then find the Cherry already present in the level you can have 2 Cherries at once, meaning you can double clone the boss and fight 4 copies of them.

This unlocks absolutely nothing so only do this if you’re truly deranged.
Actually Hlev

“Get a Golden 100% true in a level”
As far as I’m aware, the game never explains what a “Golden 100% true” actually is and how you get it. So to put it simply, you just have to get a 100% true within a “Gold Time Goal” that you can see when you press tab within a level you’ve already completed.
The easiest way to get this achievement is to do it on level 1-1 seeing as it’s the first, easiest and shortest level. For level 1-1 I recommend the Macaroni power-up as it’s just always useful and the other power-ups don’t really help you go faster, at least not in 1-1.
If you want some tips on getting 100% true on a level I have a list of general tips for the next achievement.
Mythbane Photoslav

“Get 100% True on every Case”
The tride and true “100% completion” achievement that isn’t just a “get every other achievement” thing. Use the tab menu to constantly keep track of how close you are to 100% true for the level.
Here is a list of general tips for getting 100% true on any level:
- Ignore pins and magnifying glasses. They don’t matter if you’re going for 100% true.
- Don’t die! Every death is an automatic -5% on your final rating. If you ever die in the level, reset.
- Power-ups are allowed. Use whatever power-up is best for the level. If you’re unsure what power-up to use, the Macaroni power-up is very cheap and almost always useful. The Shishkebab is also a very safe and extremely broken but quite expensive option.
- Take your time. You aren’t going for a Golden 100% true. This means you have all of the time in the world and don’t need to rush. This also means you have the time to go for fancier and more worthwhile photos.
- Stop the chaos before it happens. This mostly applies to the later levels, but as soon as you enter a room, try to get rid of as many enemies as you can. Generally the longer you’re in a room for, the more chaos is going to ensue.
- Save camera heals. While it is a bit cheesy yes, it’s also called resourcefulness. By leaving a full camera heal behind for later you can return and get a full heal. This is especially useful if you just aced a section of a level without taking a lot of damage.
- GTFO! You have almost no invulnerability frames in this game. You can go from full health to none in just a couple of seconds. Therefore if you get hit, ensure you don’t get combo’d into taking more damage by dashing away from danger as the dash gives you a good amount of invulnerability frames.
- Good enough. If you have already reached 100% true on the level you’re on, then just speed towards the end of it! Unless you want more $$$ I guess.
Bonus fact: There is a way to get 101% true on a level, and that’s by simply doing a 100% true run without ever taking damage. This doesn’t unlock anything but it does appear on the level select!

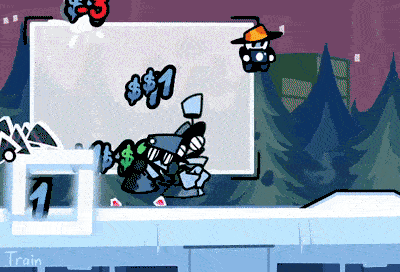
$6 The Dollar

“Get a $6 pop-up from a photo”
The description for the achievement is a bit misleading. If you thought it meant that you just have to earn $6 in total from a photo then you’d be wrong. In reality the achievement wants you to do $6 “damage” in a photo.
If you just want to get this achievement and don’t wanna get into the details of how it works and stuff like that, I found a relatively quick and easy way to earn it by getting to a specific section in level 2-1. Simply watch my super epic youtube tutorial to learn how to do it. It’s a little inconsistent as it requires some rng to work but you should eventually get it with enough tries.