Simple beginner’s guide to getting your afterlife up and running.
Welcome to Hell
This is a pretty simple guide going over some of the basics for building out your afterlife for those who are struggling with the economy, or have picked up some bad habits from the tutorial missions 😛
I’m using mission 4 from the campaign so there’s likely to be some light spoilers. Though this is just a basic guide focusing purely on hell rather than the overworld, and I’ll solely be talking about the build, not anything that the mission is going to throw at you.
Part 1 – Infernal Economics
Purgadollars are fairly easy to understand, they’re what you pay to build stuff, upkeep stuff and pay your staff. Souls will pay out Purgadollars on arriving in hell, and while being punished in an Omnisin or sin-specialist building. One of the key things to note here that the tutorial mentions but doesn’t really highlight is that the money a soul pays for punishment increases the more cycles (i.e. reincarnations) it’s been through –
Ms Braveheart here had an unfortunate run in with a Zhumbite, and as you can see on the left she’s been through this before; hence she’ll pay out $198 rather than the $180 of a first timer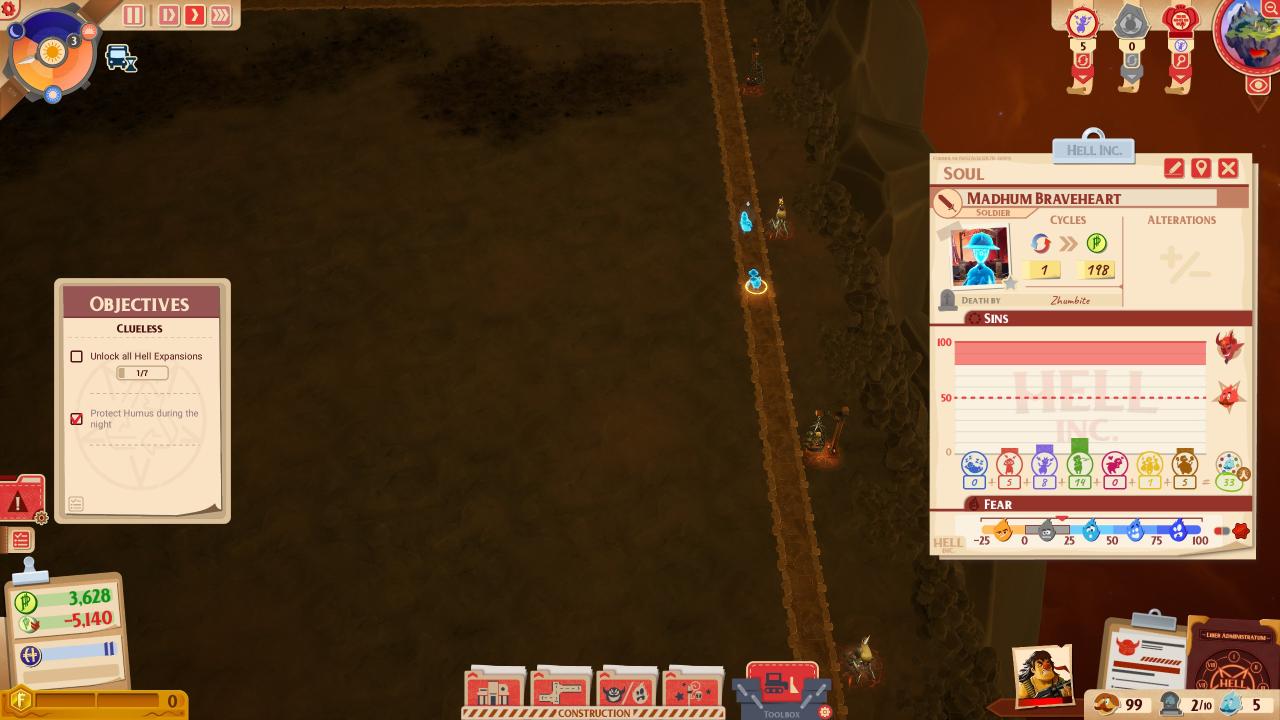
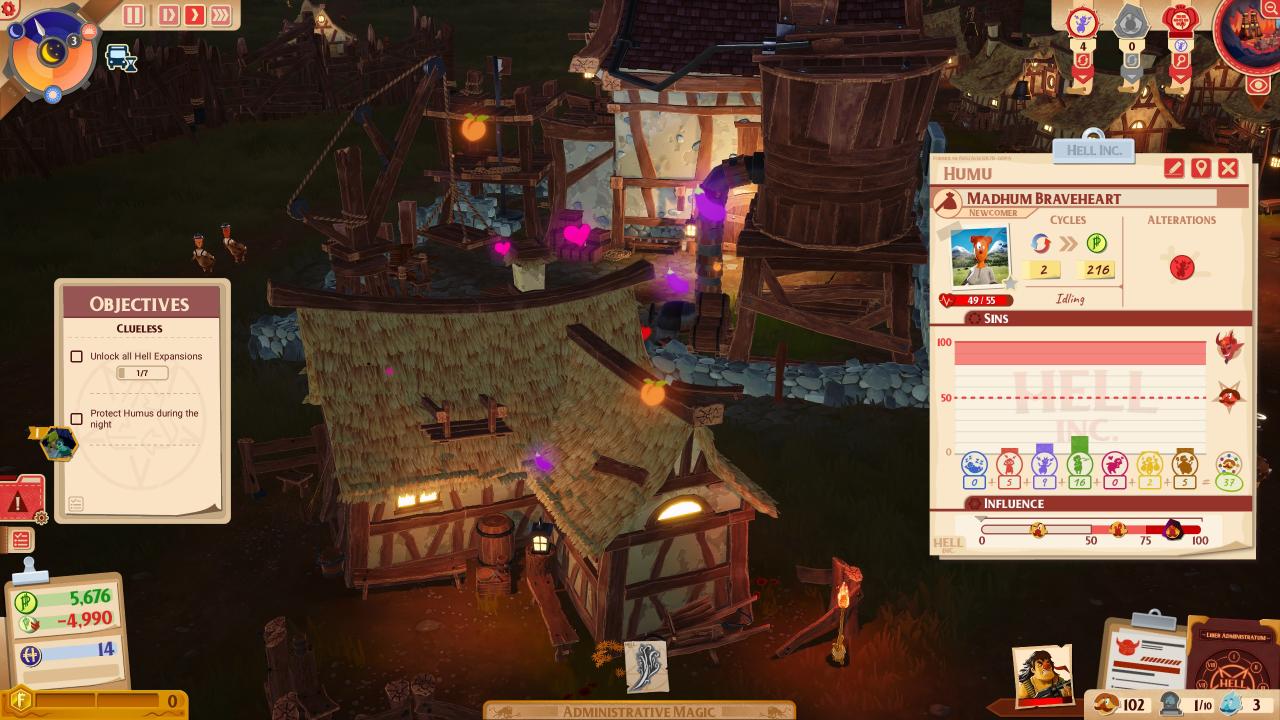 On the right she’s been reincarnated back on the overworld, and as you can see with that extra turn of the wheel behind her she’s now willing to part with $216 next time she suffers an unfortunate accident.
Sidenote – see how she’s a ‘newcomer’ after reincarnation? Just because she was a soldier in her previous life doesn’t mean she’ll become one this time.
So as with any good business, what we really like are consistent return customers. It’s an important thing to note in case you came away from the tutorial with the notion being you’re supposed to scrub every soul until it shines before releasing it back into the wild. What we want is throughput, not thoroughness. The quicker you get them back to the world, the quicker they’ll be back, the more money you’ll make.
Faithcoin is also straightforward, it’s what fills your ‘mana’ meter and what you pay when you start chucking spells around. The most straightforward way of obtaining it is via service buildings like the Hellpet. Important to note however that the Hellpet doesn’t reduce sins or extract money from the Soul, just Faithcoin.
Hearos are used to unlock new buildings, spells etc from the Liber Administratum. You’ll get one of these every time a soul leaves your afterlife with a sum sin total of 50 or less. Unless of course they become a saint.
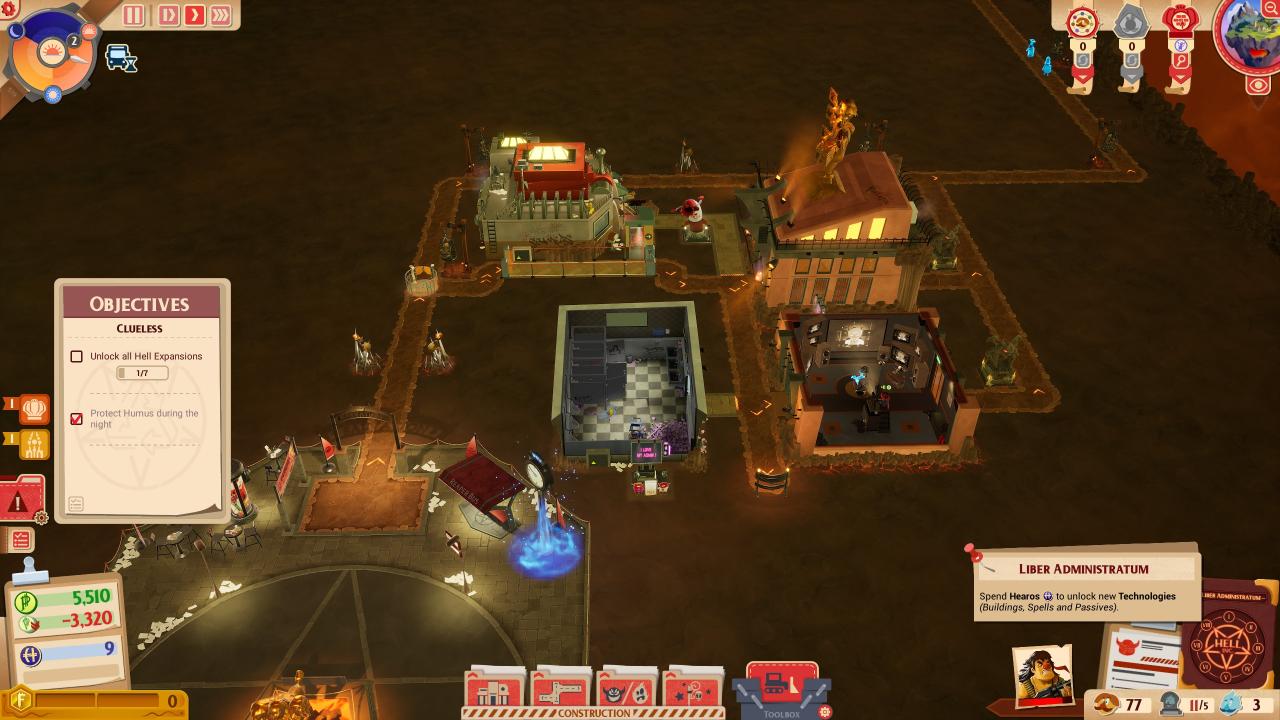
Part 2 – Let’s see what the company provided us with
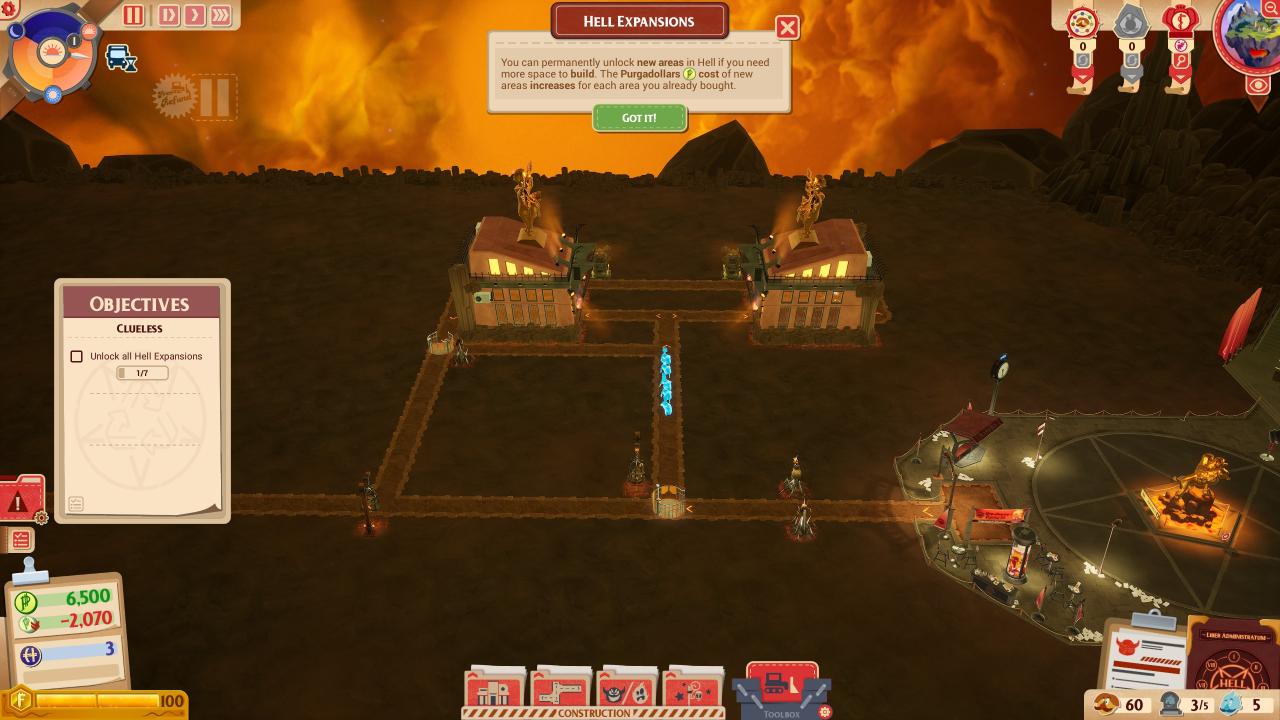
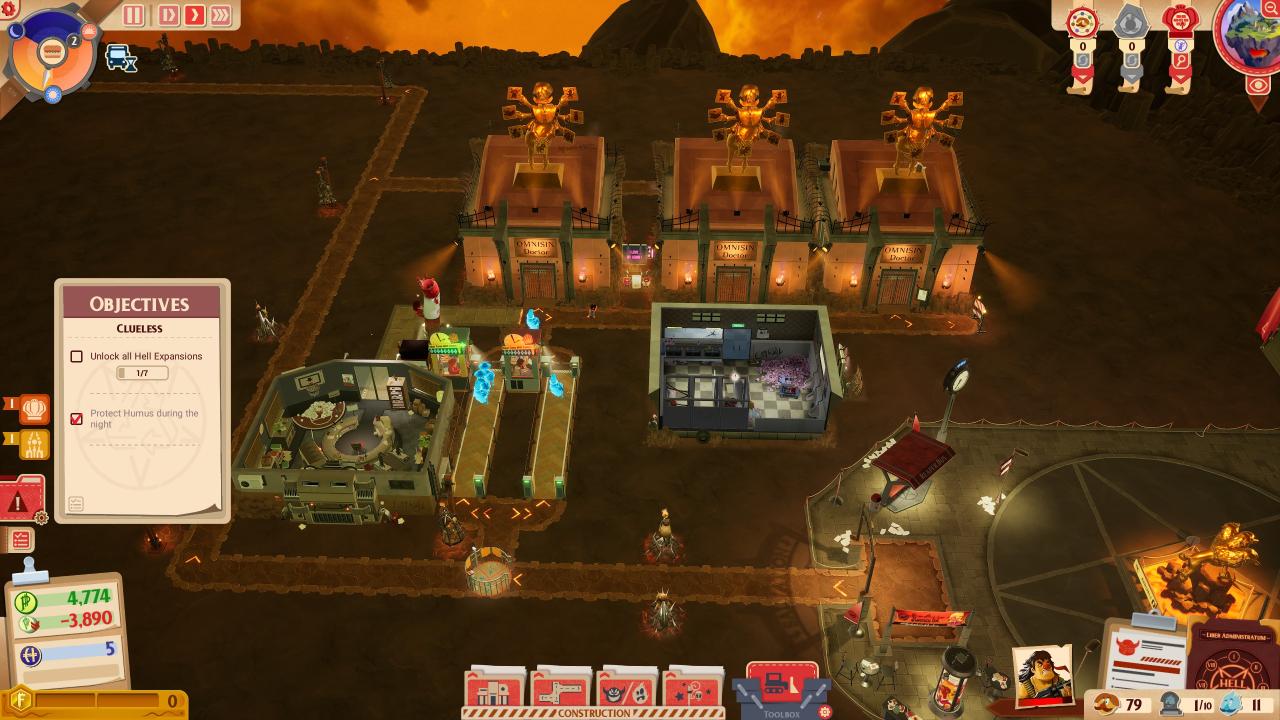
Not the worst, particularly given we only get $6500 to start with. There’s five souls already here and three waiting for the bus in the cemetary. From the arrival point, souls will walk forward, passing the two impaled automatons (we’ll come back to that later) and hit the first dispatcher. It already has a fairly sensible rule – check status, and if they’re a Saint OR already eligible for a Hearo just pass them straight on. Everyone else get’s sent to the left exit (heading up in the picture) toward the two omnisin. Remember when a soul hits a crossroad they round robin – the first soul will turn left, the next straight on and the third right. There’s no queue but that shouldn’t be an issue – ordinarily we don’t want souls hanging around outside of buildings and accruing sin, but with only five and a further three to come that shouldn’t be a big deal. After punishment they then hit a second dispatcher which routes any who aren’t eligible for a Hearo back into the treatment loop.
The real problem here is the route to the resurrection chamber –
So the good here is that the road is lined with fear objects. The bad is that puddle of corruption it’s wandering through – souls will get sin points when they walk over it, so even if we’re routing our Hearo eligible souls in that direction the odds are low they’ll still be eligible by the time they get there.
As an initial start this isn’t actually too bad. You could in fact probably get through the first day without touching anything – with only 60 pop there’s unlikely to be a large amount of deaths unless something happens topside, and with only the five souls and three more to come the two omnisins should just about manage, albeit since we’re looping souls back around if they’re not Hearo eligible it won’t take long before they’re overwhelmed.
Still, we can definitely do better. So let’s do that.
Part 3 – Let’s blow the budget!
So, ordinarily we’d do last things first and fix the path. However, since we’re here we may as well optimise our layout. One important thing to note at this point just in case you missed it is that you can move buildings for free, which is far cheaper than demolishing and rebuilding them. Just select the building and click the four arrows icon. Note the same is true of fear/motivation decorations even though they don’t get their own window, just hold left click on it and you’ll pick it up, place it down where you want it.
So rejigging our entrance –
So let’s go over what I did and why.
First thing I want to do is add a queue before the Omnisins. This gives souls somewhere to stand while waiting for an Omnisin to become available, and they won’t accrue sin points in the meantime. If you notice I’ve offset the queue from the path out of the dispatcher – eventually I’ll be putting a second queue there for efficiency once we start seeing a higher number of souls come through (and with 11 now in the cemetary, that’s likely to happen soon. In fact now would be a good time to upgrade the capacity of the bus, and the first two levels of the first class upgrade while we’re at it).
I’ve re-oriented the two Omnisins to face an entrance path coming off the queue, while exiting souls will be heading onto a central exit path that rejoins the main through route. This leaves me room for additional Omnisins as needed – they will gradually expand to fill that corner in a ‘U’ shape around that central exit path (I’ll get onto why that’s handy in a bit).
Two additions here that are unlocks. The first is the restroom, and the second is an Impish Resources. Both are highly useful buildings. Impish Resources requires an administrative imp, and every time she completes a work cycle in there it reduces your upkeep cost by $150. If you can keep her motivated and working the whole day it quickly pays for itself and then some. The restroom shortens(*) the time imps take for breaks, meaning they spend more time working.
Final additions are fear and motivation boosters. Fear boosters work on souls and get them moving quicker down the path. Motivation works on your own staff and boosts their speed and work rate. In fact if you think you’ve got a decent setup and are still seeing snags this is likely why –
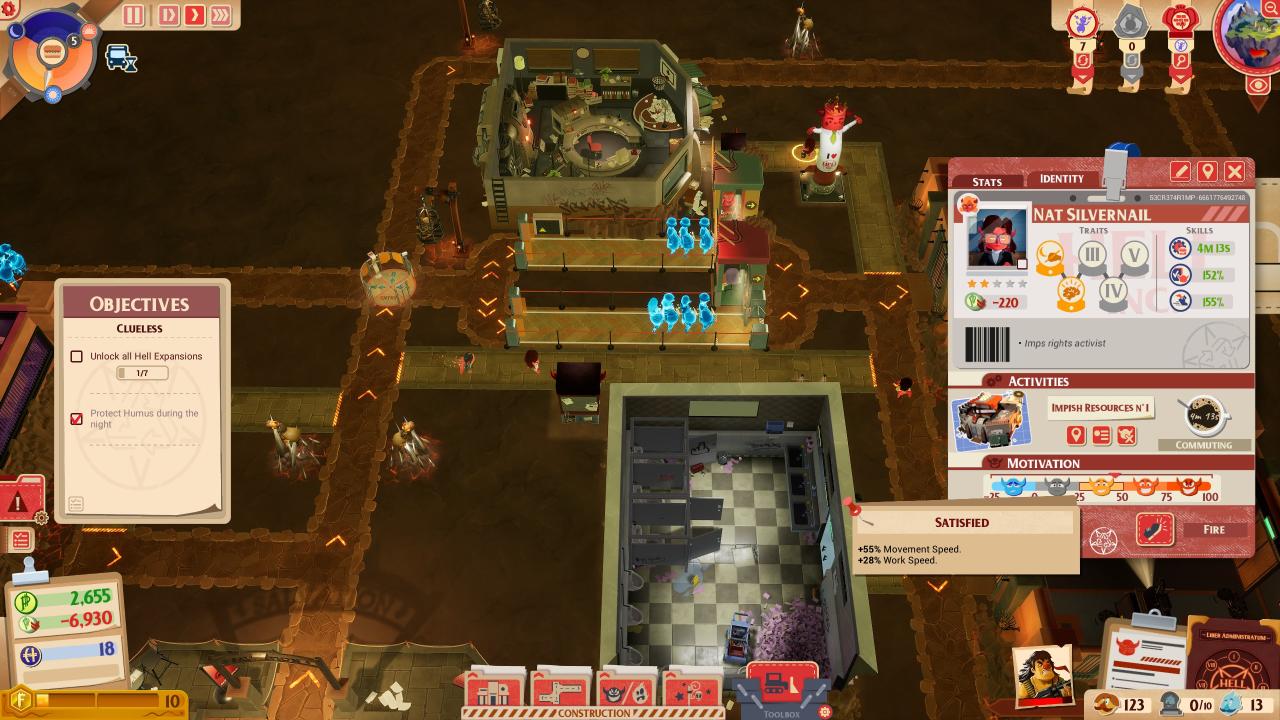 Nat here is currently satisfied, which gets him a 55% boost to his movement speed and a 28% boost to his work rate. If we were down in the grey area he actually gets penalties to his speed and work rate. If you’ve ever thought your omnisins were taking far too long to process souls you’ve just found out why.
What’s handy is that if you place a booster so a building is in it’s area of effect it’ll apply the boost to the building, which is why I’ve got a bunch of motivation boosters attached to the buildings. Note however I’ve stood the fear boosters off? That’s because the boosters have the opposite effect on Souls (and likewise, Fear boosters have the opposite effect on Imps). Technically it does mean the souls are hit with a speed nerf when they enter the building, but since they’ll spend most of their time sat in the chair it’s not like it matters.
This is why I’m using a U shape for the Omnisin. By filtering all of the leaving Souls down the one exit route I only need to line that with Fear boosters to get them jogging. Similarly having the Omnisins in a U lets me share Motivation boosters between them.
One other thing to note is the Imp Path network. Which is where we come to the (*) from the restroom. The rest and break room shorten the time your Imps take on a break, but they still have to walk there and back. While they can use the soul paths, and indeed can do so in both directions, it’s better not to mix traffic. Why? Back to those boosters; every time an imp passes a Fear booster they slow down, every time a Soul passes a motivation booster it slows down. If you can separate out your Imp paths from the Soul path you can therefore use the right boosters on the right path to keep everyone literally jogging along.
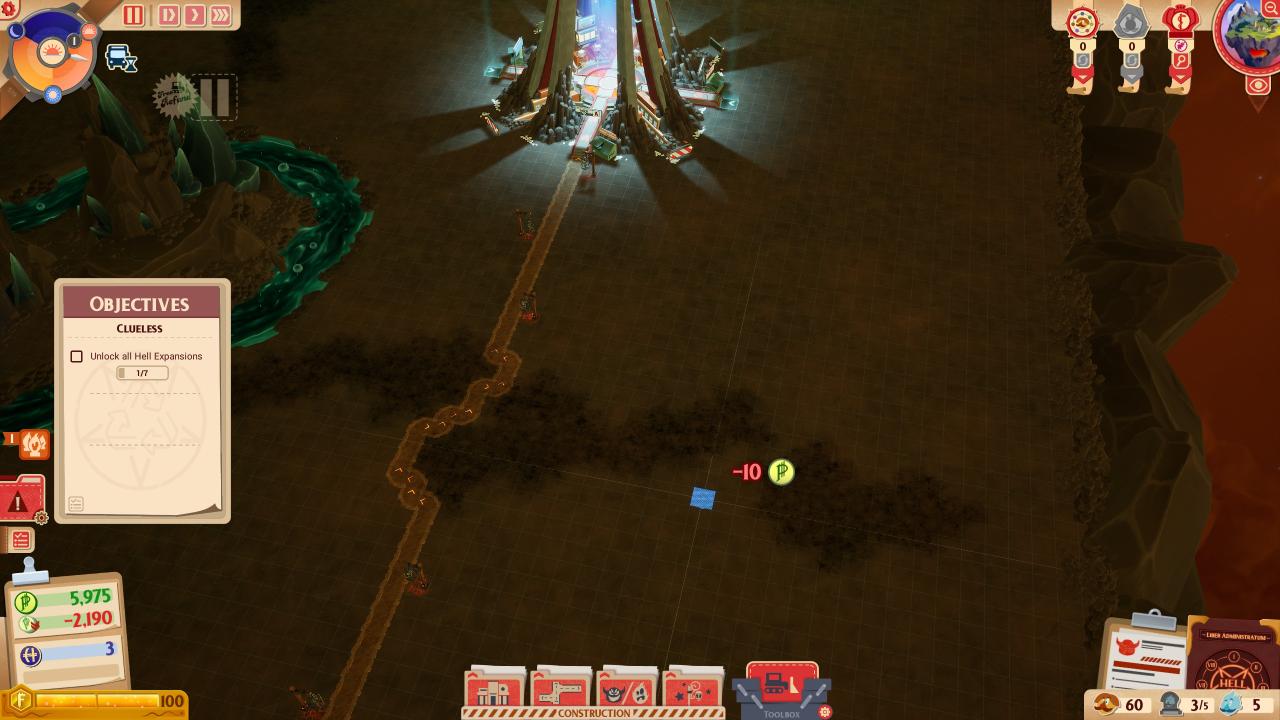
Next we need to fix that exit road –
 So I deleted the original road, and built the new road across almost to the end of the level (leave a one square gap along the right edge for Fear boosters). This avoids the corruption pool entirely, and while it’s a little less direct lining it with fear boosters will counter that by keeping the souls moving fast. For best results simply watch a soul leaving and stick down another booster next to each point where it returns to normal speed – ideally we want to keep them at least jogging the whole way.
Finally let’s talk about the two things I’m missing. The first is that second dispatcher. Reason being looping is usually counter productive. Souls which are eligible to earn a Hearo are also eligible to become Saints. While the odd two or three Saints can be useful, too many of them will become a serious problem, particularly without time dilation unlocked. In addition as I mentioned earlier, throughput is better than thoroughness; better to loop a soul via a new life and have it paying more money on the next go around than looping it within hell and having it pay the basic rate.
The second is the Hellpet. This is simply a cost saving; in the early game I’m not likely to be chucking around that many spells to begin with, and I’d rather rely on shrines of power for the occasional boost than spend money on the Hellpet. I will eventually add a couple (in fact another ‘U’ shape) in the area next to the reincarnation chamber.
Part 4 – Expanding
Oh, also since this is the first time we’ll be building off pause another pro-tip; early game if you’re going to add anything beyond a cheap booster it’s best to do it in the morning just after paying the upkeep. This let’s you get the stuff you need built and leaves the rest of the day to get your finances back to paying the upkeep.
So, how do we know when it’s time to build more? Well, we could go through a crash course on queue theory, or we could just wait for something like this to happen –
We have 10 souls freshly arrived in Hell, and 3 souls still being processed from the last bus. While the queue certainly has space for those ten souls it’s unlikely the two Omnisims will have processed all ten of them by the time the next bus arrives. At which point we start growing a backlog, and once you have a backlog you’re constantly on the back foot so to speak.
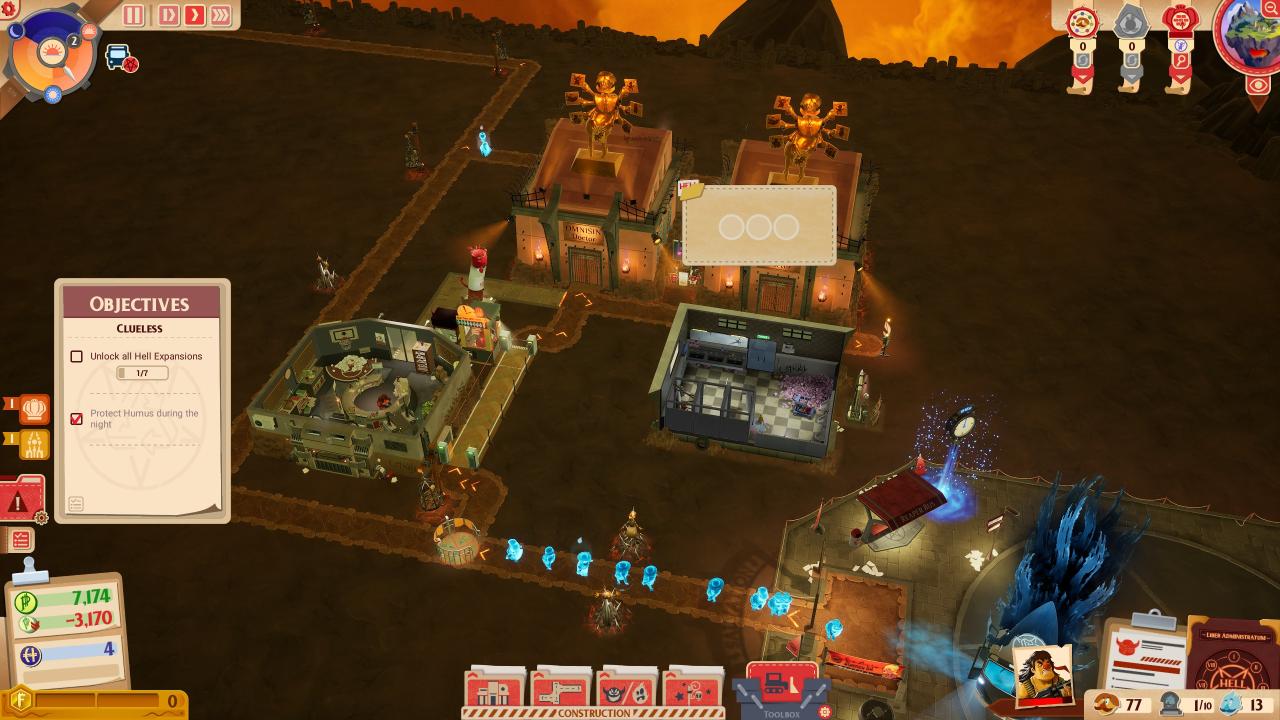
So at this point I’m going to add the second queue and another Omnisin –
Nothing particularly complicated about it. The new Omnisin draws from the same entrance queue that we’ll eventually loop around, and feeds back out to the central exit route. The two queues should be all we really need for the rest of the map, we’ll just continue to add Omnisins to our ‘U’ if we start seeing the queues getting more than half full (though before buying more processors, it’s always worth checking the admin imp who’s supposed to be working that line hasn’t just went to powder her nose. If she has, fork her back to work before adding more Omnisins).
At some point of course we’ll start seeing Deviants, so we’ll need to start recruiting specialists. Though we don’t need to wait until then; one of the other mistakes people seem to pick up from the tutorial is that the specialist punishment buildings only treat deviants. They don’t, they can and should treat any soul that has sin points in their area.
On this scenario Pride tends to be the main source of deviants; there’s a lot of builders and doctors topside who all accumulate it. For the specialists we won’t try to incorporate them into the Omnisins, rather we’ll simply branch off the main path –
We branch off that initial dispatcher and build a single Prideologist. No queue, as I don’t at this point expect we’ll see enough high pride souls coming in at any one time to need it. Rule is added to the dispatcher to send any soul with a Pride score higher than thirty towards the Prideologist, and then it’s looped back to the main path before the dispatcher. Funnily enough at the time I took the screenshot there were 5 deviants, all pride. There was only 1 when I started building.
This is a bit of an exception to my preference not to loop, but there’s a reason for it. In this scenario there’s a lot of builders and doctors who’ll accrue Pride, and as you can see in the screenshot I have a ruler who’s also going to influence everyone towards Pride. Which means pretty much every Humus is going to start coming through with double-figure pride scores. So looping them through a Prideologist first is effectively a ‘reset’ to ‘normal’ Humus levels to keep the Omnisin effective. Eventually of course we’ll start seeing other deviants (Wealth and Lust tend to be common on this map) and I’ll add specialists to deal with those, though they’ll just branch off the main path and back onto it rather than loop, since those deviants shouldn’t be too common.
Handy tip – if you haven’t realised yet you can click to drop down the deviant tab which will show you which is the most common sin in the overworld and the total sin points. It’s worth checking this from time to time so you’re not surprised by a sudden busload of unexpected deviants. Mathematically you could probably take the total sin points for a given sin, divide it by your population and come up with a rule of thumb for when to start adding specialists to deal with it. Non-mathematically you can just select a few souls or Humus from time to time and look at their sin chart, if you see the same sin above 30 or so on multiple individuals it’s probably time to invest in the specialist.
Money saving tip – in some scenarios or sandbox you might see other sins trending over time as rulers change or the campaign throws some BS event at you. It’s useful to remember that moving buildings is free, and the specialist buildings tend to have the same size footprint. So in this case, if Lust suddenly becomes the fashion rather than Pride I’d just swap the two buildings around; as I said, and with no hint of foreshadowing whatsoever, the purpose of this loop is simply to prevent getting overwhelmed by a sudden army of deviants due to a push on a specific sin by ruler or scenario bonuses, Omnisins are good at getting the general level of sin down but they can’t counter a sizeable boost to that sin from scenario conditions, rulers etc
Also a quick word on the dispatcher. It’s important to remember that souls assess the rules from top to bottom, so even though we’ve got a rule to let all deviants through, because our Pride > 30 is the first rule any pride deviant will match that first and head to the Prideologist rather than simply passing straight through.
Part 5 – Over to You
It’s about the right time to start thinking about adding Hellpets, as I said much earlier my favoured method there would be to start a new cluster up near the resurrection chamber with a dispatcher set to send Hearo, Saint and Deviants through while diverting everyone else to a queue for a few Hellpets (though since you usually don’t need faithcoins anywhere near as much as you need money you could be more selective there – send only those above or below a certain threshold of sin points for example), remembering to build a rest/breakroom and of course an Impish Resources (because they’re cumulative).
Of course there’s a lot I haven’t touched on too – staff abilities and level up, how to deal with those annoying Saints if they start getting out of hand, when/what to unlock and when/what to upgrade and of course anything involving the care and feeding of Humus. Likewise I’m sure this isn’t the best possible build and there’s plenty of scope for further efficiency, or even entirely different ways to tackle the problem. My hope with this guide is it’ll give those of you who are struggling to clear the runway enough of a kickstart to get airborne and start flying yourselves.