If you’re here, then you’re probably fed up with Ubisoft’s endless string of poor decisions. From buggy updates to a clunky, intrusive launcher, and even revoking games/DLCs sometimes. Ubisoft has managed to take the joy out of our favorite games. But don’t worry, there’s a way out! This guide will show you how to transfer your Watch Dogs 2 progress from Ubisoft’s mess of a platform to the much more reliable Steam. Let’s free ourselves from Ubisoft’s grip and get back to enjoying our classics the way they were meant to be played!
Why should you move away from Ubisoft Connect?
Ubisoft’s new launcher has become a nightmare for many of us. Constant crashes, forced updates, missing/revoked games and/or DLCs, and a user interface that seems designed to frustrate rather than help, so make sure you stop buying anything directly through Ubisoft. Steam offers a stable, user-friendly environment that respects your time and enhances your gaming experience. By transferring your save files, you can escape Ubisoft’s incompetence and continue playing games without having to worry Ubisoft’s constant problems.
What you’ll need:
- Your existing Watch Dogs 2 save files from Ubisoft Connect.
- Watch Dogs 2 purchased and installed on Steam.
- You gotta be fast with moving files.
Step-by-Step Instructions:
All Watch_Dogs 2 save files (including Steam) are saved in Ubisoft’s folder
If you have any progress on Steam that you’re willing to replace, then please BACK UP YOUR SAVE FILES BEFORE PROCEEDING!!
Most people install launchers in the C drive within the Program Files folder, if you don’t keep it inside “Program Files”, then you’re a smarter person.
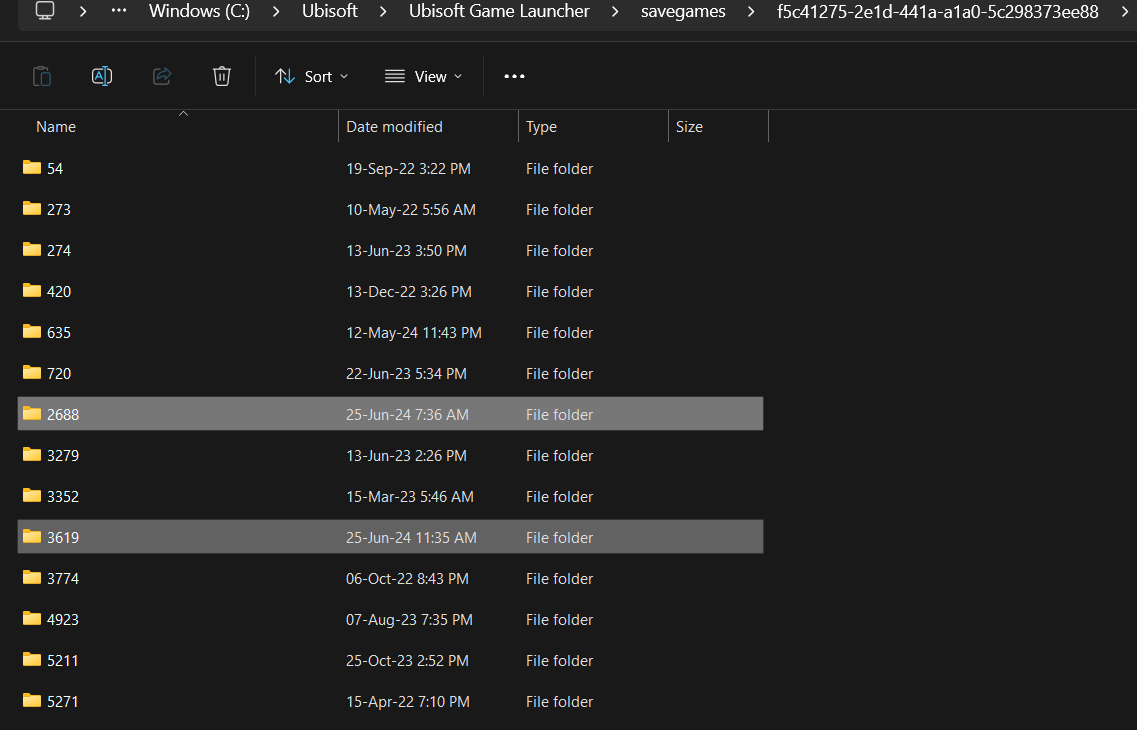
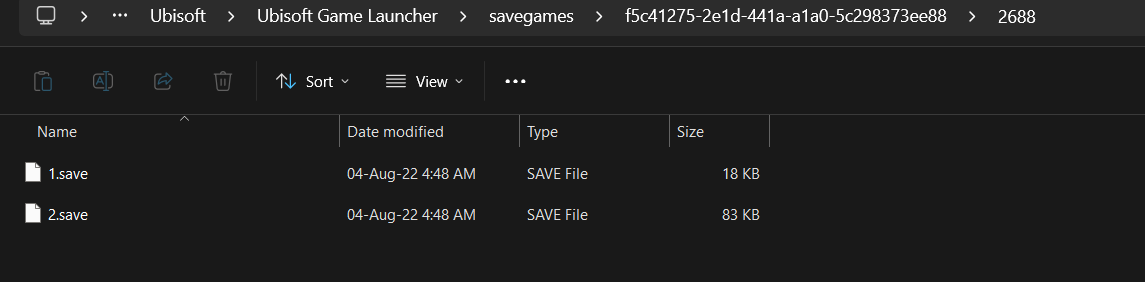
- Go to the Ubisoft launcher directory “*\Ubisoft\Ubisoft Game Launcher\savegames\[Your Uplay ID]\2688”
- Copy all the files you find in there.
- Leave the 2688 and head to 3619 (that’s where Steam saves are stored, and if you don’t find it, then just make a new folder and name it 3619) “*\Ubisoft\Ubisoft Game Launcher\savegames\[Your Uplay ID]\3619”
- The next step is going to be a difficult step, so prepare yourself before proceeding.
- While having the “3619” folder open, launch Watch_Dogs 2
- As soon as you see the “Synchronizing Achievements with the cloud” finish synchronizing, immediately paste the files you copied earlier (from “2688”) into “3619”
The “Synchronizing Achievements with the cloud” or “Synchronizing save files with the cloud” window will replace any files you placed there, so it’s best to put the save file(s) in “3619” right after that window closes and before the game completely launches, which is basically after Ubisoft finishes your progress sync. Please make sure to it quick!
Alternative Step-by-Step Instructions:
This method is for people who got their PC hardware so maxed that Watch_Dogs 2 launches in a time span where it’s humanly impossible to copy the files during it.
- Disable cloud sync in your Ubisoft Connect.
- Go to the Ubisoft launcher directory “*\Ubisoft\Ubisoft Game Launcher\savegames\[Your Uplay ID]\2688”
- Copy all the files you find in there.
- Go to “*\Ubisoft\Ubisoft Game Launcher\savegames\[Your Uplay ID]\3619”
- Paste the file(s) you copies from 2688
- Launch the game, and make sure your progress is all loaded and everything is fine.
- Enjoy your game, and now you can turn back on cloud sync.
Conclusion:
Transferring your Watch Dogs 2 save files from Ubisoft to Steam is a straightforward process that can significantly improve your gaming experience. By following these steps, you can continue playing the game on a more reliable and user-friendly platform. It’s time to ditch Ubisoft’s broken launcher. Enjoy gaming without the hassle, and leave Ubisoft behind!