
I’m putting together a full path to every achievement in Hello Love Temptation — all 8 of them — by walking through the main story once and then running four targeted replays plus one short cleanup. If you’re the kind of player who hates replaying blind to find where a route forked, this is for you. Everything assumes Classic mode, and I’ll tell you up front that the two things most likely to cost you an achievement are the timed 5-second choices and the final ending forks, so I note those every time they come up.
I wrote this up because this game hides its branching in places that don’t look like branches — a filmstrip card, a phone reply, a typed conversation. I went through each chapter carefully and recorded the exact selections so you can follow along in order without second-guessing. Let ordinary videos run on their own; the only time you need to act is at the choices I list here.

The overview is simple enough: there are 8 achievements to collect across all 6 chapters, and you can finish the whole game using Classic mode. That’s the mode I’m assuming throughout — if you switch modes, the choices I list won’t line up the way I describe them, so I’d just leave it on Classic and stay put.
Before you dive in, here’s how the achievements are ordered so you can see the shape of the route before you take a single step. You’ll start with the main playthrough, which hands you the achievements that come naturally as the story unfolds. After that, the achievements tied to the people around you open up, and then it’s a chain of replays: Graduation, Late-Night Diner, The Last Supper, and finally a short cleanup run for Sleepless. If you follow that order instead of hopping around, each replay only asks you to change a small handful of choices.
Nothing here is complicated once you understand the furniture of the game. Most of the story plays out through ordinary videos — let those run on their own, because the only moments that actually need your input are the specific choices I point out. When a prompt does appear, you’ll be working with a small set of tools: a cont button, End and Next buttons, filmstrip cards you drag through, phone replies you tap out, and typed conversations in CatChat. There’s also a Balance System tutorial you’ll run into, which is worth paying attention to so you don’t fumble the timing later.
The reason I lay all this out first is that the two real slip-ups in this game happen at the edges of those mechanics — a timed pick that’s gone in five seconds, or an ending fork that quietly decides which achievement you’re about to earn. I’ll flag both every time they show up so you don’t lose a run to a choice you didn’t notice.
Main playthrough / Chapter 1 – Seven-Year
This is where the run actually starts, and it sets the pattern for the whole guide: let anything that isn’t a choice play itself out, and only step in when I point at something specific. Stay on Classic mode and take the instructions in sequence. If you start clicking around during the ordinary videos, you’ll only slow yourself down.
Let the opening movie play until it lands on the three-clip selection screen. From there I pick in this order:
- Lower left slot: Morning. After it ends, you’re returned to the selection screen.
- Upper centre slot: Striving. Let it finish and bounce you back again.
- Right slot: So Sweet. Same deal — clip plays out, then you’re back at the selection.
Once all the clips I listed above show as Viewed, hit Cont to move on. If the Balance System tutorial pops up here, click GOT IT in its lower-right corner so it gets out of your way.
Then comes Coco’s phone conversation — pick the top reply, “Not Guessing, Childish”. When Coco’s messages wrap up, tap End on the phone. This reply is one of the early forks the game quietly tracks, so don’t rush past it.
Right after that, choose left: “Work Stuff”. Whether you pick this or the alternative is exactly what steers you toward one achievement route over another later on, so it’s worth a beat of attention.
Next is the Chairman’s phone conversation. Choose the bottom reply: “Okay, Leader, I’ll Seriously Think About It.” When his messages finish, click End on the phone.
Let the following scenes run until you reach the Whisper clip-selection screen. Click the centre option, The First Time, and let the clip finish so it returns you to the selection screen. Once the clips I listed show as Viewed, press Cont.
One last pick closes out the chapter — choose lower right: “Not Decided”. That final choice here is the one that decides which version of the later chapters you’ll be walking into, so if something down the line looks different from what you expected, this is usually where the divergence started.
Main playthrough / Chapter 2 – Parallel World
Chapter 2 opens the same way Chapter 1 did — let the playback roll on its own until you land on a selection screen with four clue cards waiting. This one is a two-part trap: first you pick four clues in a specific order, then the game throws four choices at you back to back with barely a breath between them. Miss a slot and you’ll drift down a branch you didn’t plan for.
Work the clue cards in this order, letting each clip finish and letting the selection screen return before you touch the next one:
- UPPER LEFT: Group Photo
- LOWER LEFT: Photo Frame
- CENTRE-RIGHT: Mobile Phone
- RIGHT: Magazine
Once all four show as Viewed, hit Cont. Don’t skip ahead early — I let each clip play to the end because cutting a scene early can leave the card unflagged, and then the chapter gates you from the choices that follow.
The four back-to-back choices are the part that catches people off guard, since there’s no pause to think in between. Pick them in this sequence:
- RIGHT: “Won’t Disappoint”
- LEFT: “Right”
- RIGHT: “Yes”
- RIGHT: “It’s fate”
Those positions are deliberate — three lean right, one leans left. I found that keeping the direction in my head (“right, left, right, right”) made the rapid-fire section far easier to nail without fumbling. Get one wrong here and you’re already off the path you’ll need for the Graduation route later, so slow down and confirm each press.
Main playthrough / Chapter 3 – Departure
Once the Chapter 3 memory filmstrip loads, look at the top row and click the highlighted fifth card on the far right — “Lu Working Overtime”. It’s the only card with that highlight, so you won’t have to hunt for it.
The passages that follow appear one at a time. After passage 1 finishes, hit Next; after passage 2 finishes, hit Next again. On the third passage, the Next button is replaced by the completion button — click that to move on.
Now comes the first real pressure point in this chapter. A 5-second choice pops up, and if that timer runs out before you pick, you’ve already drifted off the path. Choose LEFT for “Relax”. I keep my thumb hovering the moment the filmstrip ends, because five seconds is shorter than it feels when you’re watching the passages play out.
The next prompt is calmer. Choose UPPER RIGHT for “Long Distance Ok”.
Let the scenes keep running on their own until you reach the typed conversation in CatChat1. This is the part that trips people up — it isn’t a multiple choice, it’s a full five-message conversation you have to type out by hand. For each of the five replies: click the input line beside the keyboard icon, type the reply, and click Send once. Wait until the typing field is available again before you start the next one.
The five replies, in order:
- “I believe we can make it work, but I shouldn’t take you for granted. Let’s agree on regular calls and visits, and decide together what we’ll do if the distance becomes too hard.”
- “We’ll arrange an earlier visit. If the distance keeps hurting us, we’ll reconsider the plan together. Our relationship matters to me.”
- “Tonight. Let’s choose a date together, and I’ll book the first visit before I leave.”
- “I’ll tell you straight away, arrange a video date, and book the next visit with you. Let’s choose a backup weekend now.”
- “I’ll share photos and voice messages from my day, check in every morning and evening, and make time to hear how you’re feeling.”
Type them exactly as written and send each one before touching the next. If the Send button doesn’t seem to react, you’ve almost certainly typed into the wrong spot — click the input line beside the keyboard icon again and it’ll behave.
Once the fifth reply sends, a fixed two-choice question appears. This one has no timer, so take your moment. Choose LEFT: “Enjoy quiet comfort at home”. That closes out Chapter 3 and sets you up for the branch ahead.
Main playthrough / Chapter 4 – Boundary
Chapter 4 is where the pressure actually lands, because this one throws three separate 5-second choices at you in the middle of a fight. Let the playback roll until you reach the Chapter 4 memory filmstrip.
On the filmstrip, click the card marked by the yellow corner brackets — that’s “Café”. From there it’s a steady read: wait for passage 1 to finish appearing, then click Next. Do the same after passage 2, and the same after passage 3. Once passage 4 shows up, the Next button is replaced by a completion button — click that instead.
Now the conversation moves to the Wifey phone. When that exchange finishes, click End on the phone. This is the part I’d keep an eye on, since what follows is the quickest stretch of the whole chapter.
Three timed picks hit back to back, each with only a 5-second window:
- First 5-second choice — click LEFT: “I sent”.
- Second 5-second choice — click RIGHT: “Not My Fault”.
- Third 5-second choice — click UPPER LEFT: “Watch Your Words”.
If you fumble one of these, you’re going to be replaying the chapter, so I’d move deliberately rather than fast. After the third pick, let the argument outcome finish playing — that’s where the Nostalgia achievement unlocks.
Keep the scenes running until the typed conversation appears in CatChat2. This one’s a five-reply back-and-forth, and each swap works the same way: click the input line beside the keyboard icon, type exactly what’s listed, then click Send once. Wait while the other side types, and the box opens up again for the next one.
Reply 1: “We can sit down calmly, but I don’t want to pretend nothing happened. I’m sorry I spoke harshly. I want to listen to what hurt you and agree on how we handle disagreements better.”
Reply 2: “That message made you feel our relationship wasn’t being respected. I made it worse by dismissing your feelings and speaking harshly. You deserved an honest explanation and a chance to be heard.”
Reply 3: “I’ll keep messages with colleagues professional, avoid flirting, and make it clear that I’m in a relationship. Let’s agree on boundaries that apply to both of us, and I’ll take your concerns seriously.”
Reply 4: “Yes. Starting today, I’ll stick to those boundaries, stop inappropriate conversations, and listen without getting defensive. Let’s check in next week about whether my actions are rebuilding your trust.”
Reply 5: “Yes. Let’s discuss one issue at a time when we’re calm, hear each other out, and agree on specific changes. I won’t bring up old mistakes to hurt you during future arguments.”
Once the fifth reply sends, a fixed two-choice question appears with no timer attached. Choose LEFT: “Prepare gifts, book a familiar restaurant”. That wraps Chapter 4 and lines you up for the next one.
Main playthrough / Chapter 5 – Tea & Liquor
Chapter 5 opens the same way the last two did: let the intro playback run until the memory filmstrip appears. On that filmstrip, the card you want is the one flagged by yellow corner brackets — click “Expressway”. I’ve gotten into the habit of checking for those brackets rather than reading every label, since the correct card is always the one the game has highlighted for you.
From there it’s a steady rhythm of clicking Next. Let passage 1 finish appearing, then hit Next. Same for passage 2, passage 3, passage 4, and passage 5 — each time, wait for the text to fully appear before advancing. After passage 6 finishes, the Next button is replaced by a completion button, so click that instead. Don’t rush this part; if you click before a passage finishes loading, you’ll just be waiting on the same screen anyway.
Two choices come next. Take LEFT: “Look Forward”. Then take RIGHT: “Fine, New Mood”. Once those are locked in, let the Unwind scene play out to the end.
Finishing that scene unlocks the achievement Dangerous Resonance — one of the eight on the list, so you’ll want to see that pop before moving on.
Keep letting the scenes roll until you reach the typed conversation in CatChat3. This is a full five-reply exchange, and unlike the quick choices earlier, you have to type each response yourself. Click the input line beside the keyboard icon to bring up the field, then type reply 1 exactly:
“I felt anxious about what leaving meant for us. I should have talked to you before leaving. I want to hear how you felt and make decisions about our future together.”
Click Send once. Then wait — the game needs a moment before typing becomes available again, and clicking Send early does nothing. When the field is live, click the input line beside the keyboard icon once more and type reply 2:
“I’ll set aside time for us every week, put work away when we’re together, and discuss major work decisions with you. If plans change, I’ll tell you early and agree on another time together.”
Send it, wait for typing to come back, and repeat the pattern for reply 3:
“Saturday from 7 to 10 pm. I’ll finish work beforehand, put my phone away, and spend that time with you. Let’s have dinner together. Does that time work for you?”
Then reply 4:
“Yes. I’ll let nonurgent work wait. If an unavoidable emergency comes up, I’ll tell you immediately, explain what’s happening, and agree on a replacement time with you. I won’t leave you waiting.”
And finally reply 5:
“I’d like to cook noodles together at home. I’ll get the ingredients and do the washing up. We can enjoy dinner and talk without work interrupting us.”
Send that last one and you’re done typing. A fixed two-choice question appears with no timer attached, so there’s no pressure here — take your time. Choose LEFT: “Sort out the logic, find a solution” to close out Chapter 5 and move on to the next one.
Main playthrough / Chapter 6 – No Goodbye
Chapter 6 opens with the brief beside-the-sea conversation — the game labels this SelfAsk. Let it play out, then take the LEFT option, “Pessimistic”. This one sets the tone for everything that follows in the chapter, so I wouldn’t second-guess it if you’re following the main route.
From there, keep letting scenes run until you hit the typed conversation in Restart. This is the longest typing sequence in the game — five replies, each one gated behind a wait. The pattern I used was simple: type, send, wait for the input field to unlock again, repeat. Don’t rush the sends; if the field isn’t ready, clicking does nothing anyway.
Click the input line beside the keyboard icon, then type reply 1: “I pulled away first by putting work ahead of us and avoiding difficult conversations. I’m sorry. I want to listen to how that hurt you and find out whether we both want to try again.” Send it once.
Wait until typing becomes available again, then open the input line and type reply 2: “Tonight, I’ll listen to what hurt you and agree on changes with you. I’ll set aside time for us each week, discuss important decisions with you, and follow through consistently.” Send once.
Same process for reply 3 — wait for the field, click the input line, and type: “I’ll set clear work hours and keep one evening each week for us. If an emergency interrupts our plans, I’ll tell you immediately and arrange another time with you. I won’t disappear or leave you guessing.” Send once.
Reply 4 follows the same rhythm: “Yes. If work keeps growing, I’ll discuss my workload with my manager and set firmer limits. I’ll involve you in any changes and keep our time together a priority.” Send once, then wait again.
Reply 5 closes the conversation: “Yes. I’m sorry I ignored you. I’ll listen without defending myself, check in regularly, and tell you when I need space instead of going silent. I know trust takes consistent actions and time.” Send that one last time.
Once the typed exchange wraps, a fixed two-choice question appears — no timer, so there’s no need to panic. Choose LEFT: “Plan the itinerary in detail”.
Now the part I’d genuinely slow down for. The chapter ends with a timed fork, and this is the one I’d flagged to watch. When the choice pops, pick LOWER RIGHT: “Turn Leave”. Get that wrong and you’ll land on a different ending card than the one tied to the main-playthrough achievement, so double-check which corner you’re selecting before the timer runs out.
Let the ending movie play all the way through until the “Let go” ending card appears. That card is the trigger for Silent Moonlight — you should see it register right as the movie finishes.
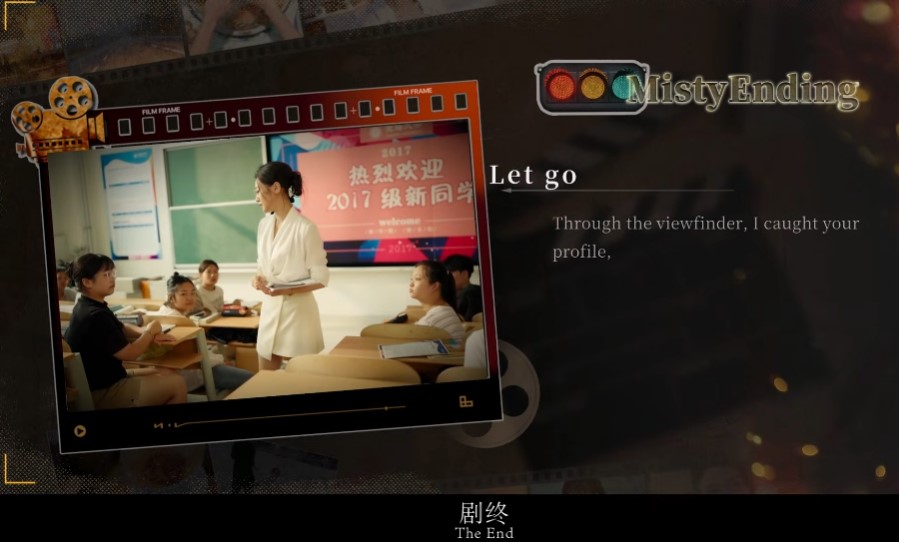
After the card shrinks down and the bottom navigation slides in, click Storyline in the bottom-left corner. If a promotional overlay pops up on the way, just clear it with the large X. Give the Storyline map and its scores a moment to load before you make your next move — the numbers populate after a short delay, and you’ll want them settled before you navigate deeper.
Extra ending – People around
The moment the main playthrough wraps, don’t back out to the menu — the People around ending branches off from right here, and I found it easiest to trigger it while the story state was still fresh rather than reloading later. From the ending screen, drag the empty map background off to the right until the Restart hourglass slides into view.
Click that Restart hourglass photograph. Let the scenes run, and keep your hands off the screen until the typed conversation in Restart appears — the game handles the playback on its own. When the typed-conversation screen shows up, hit Cont.
Now wait for the fixed two-choice question. Pick “Enjoy the joy of going with the flow” on the right. This one is easy to breeze past, but the very next prompt is the one that actually decides your ending, so slow down here — the ending choice is a genuine fork and it’s the easiest thing to fumble in this whole section. Choose “Greet”, the left option. Hit the wrong side and you’ll have to redo the drag-and-Restart sequence, which is exactly the kind of backtracking I wanted to spare you.
Let the ending movie play through until the “People around” ending card appears — that’s your confirmation the fork landed correctly. The Thanks achievement pops with it.
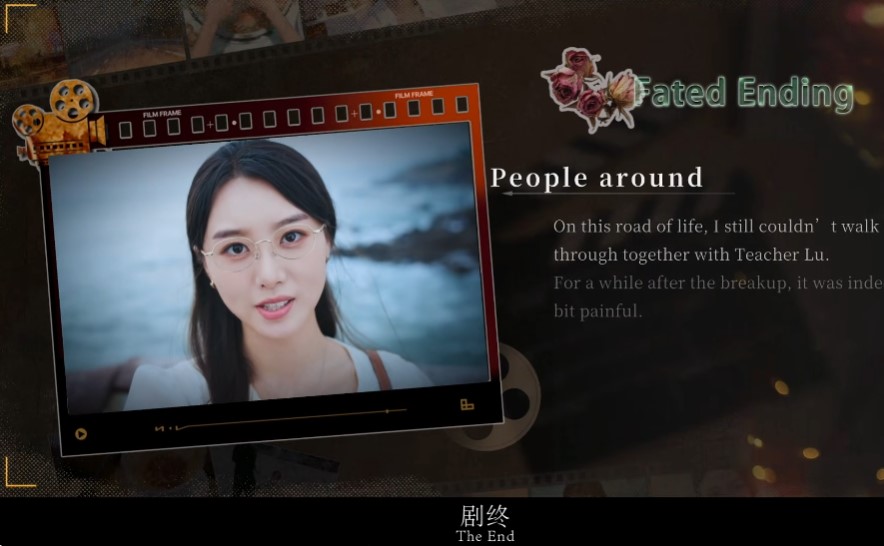
Give the ending card a moment to shrink down and reveal the bottom navigation; the preview may loop in the meantime, so don’t panic if it replays once. Click Storyline in the bottom-left corner. If the promotional overlay shows up again, clear it with its large X. Then let the Storyline map and its scores finish loading before you move on.
Replay 1 – Graduation / Chapter 1 – Seven-Year
With the Storyline map loaded, the first replay begins the same way the main run did — you just pick a different starting point. In the left chapter list, click Ep.1 Seven-Year. If the 7 years marker isn’t on screen yet, drag the empty map background to the right until it slides into view; it’s the opening portrait with a clock, and it’s the node you want.
Let the opening movie run until it reaches the three-clip selection screen, then work through the clips in the same order you did the first time:
- Lower left: Morning — let it finish and return to the selection screen.
- Upper centre: Striving — let it finish and return to the selection screen.
- Right: So Sweet — let it finish and return to the selection screen.
Once all three are marked Viewed, click Cont. If the Balance System tutorial pops up again, clear it with GOT IT at the lower right.
Here’s where this replay diverges from the main playthrough, so keep your clicks deliberate. In Coco‘s phone conversation, choose the top reply: “Not Guessing, Childish”. That’s the opposite of the main run, and it’s the whole reason this route unlocks a different ending later. When Coco’s messages wrap up, click End on the phone.
Next, pick right: “Change Topic”. Following that, in the Chairman‘s phone conversation, choose the bottom reply: “Okay, Leader, I’ll Seriously Think About It.” — then click End once his messages finish.
Let the following scenes play through to the Whisper clip-selection screen, then click centre: The First Time. Let it finish and return to the selection screen, and once it’s marked Viewed, click Cont.
To close out the chapter, choose the upper right option: “So Soon”. That’s the Graduation route’s Chapter 1 in the books — now on to the Parallel World chapter, where the mirrored answers continue.
Replay 1 – Graduation / Chapter 2 – Parallel World
Chapter 2 on the Graduation route is where the four-clue screen comes back, and unlike the opening clips, nothing here changes from the main run — you still want to watch all four in the same order. Let playback roll straight into it, then work through the clues exactly like this: click upper left for the Group Photo, let it play out and snap back to the selection screen, then lower left for the Photo Frame. Next is centre-right for the Mobile Phone, and finally right for the Magazine. Same drill each time — wait for the clip to finish and return to the grid before touching the next one. Four in a row like that is easy to rush, so I always let the last one fully resolve before hitting anything else.
Once all four are marked Viewed, click Cont and the choices open up. This is the part that actually diverges from the main playthrough, and it’s a clean mirror of it:
- Left: “Don’t Understand”
- Right: “Wrong”
- Left: “No”
- Left: “Man prevails”
You’ll recognize these from the main run all flipped the other way — where the main path had you agreeing and reassuring, Graduation wants the opposite on every single one. Four back-to-back picks with no video padding between them, so watch your left/right carefully; the third one being left after a right is exactly the kind of flip that trips you if you’re clicking on autopilot. Get those four in and the first Chapter 2 fork is set — the Departure chapter is next, where one timed choice finally breaks the pattern.
Replay 1 – Graduation / Chapter 3 – Departure
Back into Departure for the Graduation run, and the beat that changes from the main playthrough hits early. Let playback carry you to the Chapter 3 memory filmstrip, same as before.
On that filmstrip, click the highlighted fifth card at the far right of the top row — “Lu Working Overtime”. Same card you picked last time, so nothing to rethink there.
The passages play out the same way they did on your first run: click Next once passage 1 finishes appearing, click Next again after passage 2, and then after passage 3 click the completion button that takes the place of Next.
Here is where it diverges from the main route. This next pick is a 5-second choice, and it’s the one the previous section was warning you about — the timed decision that finally breaks the pattern. Choose RIGHT: “Life Value”. On the main playthrough you went left here; for Graduation you flip to the right. If you’re clicking on autopilot, this is exactly the moment to slow your hands down.
Then choose LOWER CENTRE: “Come Back”. Different again from the main run, so don’t let muscle memory carry you into the old pick.
Let the scenes play until you reach the typed conversation in CatChat1. This time you don’t have to work through it — just click Cont on the typed-conversation screen to skip straight past it.
Finally, wait for the fixed two-choice question and choose LEFT: “Enjoy quiet comfort at home”. Same closing choice as the main route, so you can settle back here — the flips for this chapter are behind you now, and Boundary is up next.
Replay 1 – Graduation / Chapter 4 – Boundary
Boundary during the Graduation replay is where the branching finally starts to feel familiar — same Café memory filmstrip as the main run, but two of the timed picks flip position on you. Let playback carry you into the Chapter 4 memory filmstrip first, then click the card walled off by yellow corner brackets: “Café”.
The passage rhythm is identical to the main route. Let passage 1 finish appearing, click Next. Same for passage 2, then passage 3. After passage 4 resolves, that completion button replacing Next is your cue — click it and let the scene roll into the Wifey phone conversation. When that wraps, hit End on the phone.
Now the two quick ones. Both are 5-second picks, so don’t drift. First choice is RIGHT: “Colleague Sent”. I’ve fat-fingered this one before by reflex-clicking left — the main route had “I sent”-style wording on the left, so your muscle memory will try to betray you here. Second choice is LEFT: “I’m so sorry”. Grab them fast, then relax — the rest of this chapter is just watching.
Let the scenes play until the typed conversation in CatChat2 comes up. Since this is a replay, there’s nothing new to type — click Cont on the typed-conversation screen to skip straight past it. Finally, wait for the fixed two-choice question and choose LEFT: “Prepare gifts, book a familiar restaurant”. That closing choice matches both prior routes, so nothing shifts at the finish line — the Graduation flips for Boundary are officially behind you, and the Tea & Liquor chapter is what’s waiting next.
Replay 1 – Graduation / Chapter 5 – Tea & Liquor
Back into Chapter 5 for the Graduation run, and the setup is identical to the main playthrough — same Expressway memory filmstrip card waiting for you. Let the playback roll until that filmstrip appears, then click the card marked by the yellow corner brackets.
From there it’s the same rhythm as before: six passages appear one after another, and you click Next once each one finishes loading. For passages 1 through 5, that’s a straightforward Next click per passage. On passage 6, the button itself changes — swap to the completion button that replaces Next and click that to move forward.
Now come the two flipped choices, and these are where the Graduation route diverges from what you did in the main run. First pick LOWER RIGHT: “I’m Sentimental”. Then choose LEFT: “Too Tired”. Both of these are the opposite of the main playthrough selections, which is exactly what you want here.
After those two picks, let the scenes play out until you reach the typed conversation in CatChat3. Just like the earlier chapters on this route, you don’t need to type anything — click Cont on the typed-conversation screen to skip straight past it.
Finally, wait for the fixed two-choice question and choose LEFT: “Sort out the logic, find a solution”. That closing choice matches the other routes, so nothing shifts at the finish — Chapter 5 for the Graduation path is done, and you’re heading into No Goodbye next.
Replay 1 – Graduation / Chapter 6 – No Goodbye
Chapter 5 for the Graduation run is behind you, so this last stretch is where the route finally pays off. Here you change the mood of the whole run — instead of the sour read, you let the game breathe and pick the hopeful path, and that choice at the SelfAsk conversation sets everything that follows.
Let playback run all the way to the SelfAsk prompt, the conversation by the sea. When the options open up, pick RIGHT: “Optimistic”. This is the one place in the Graduation run where I’d slow down for a second, because swinging the other way here drops you back toward the original ending and undoes the whole replay.
From there, just let the scenes roll until you hit the typed conversation in Restart. Once that screen loads, click Cont to skip it — same as the earlier chapters, there’s nothing to type on this route. Then wait for the fixed two-choice question and choose LEFT: “Plan the itinerary in detail”. That closing pick is shared with the other paths, so it won’t move the ending on its own.
Let the ending movie play out until the “Everything is worth it” ending card appears. That’s the signal you’ve landed the correct result — the Graduation achievement should pop right there.
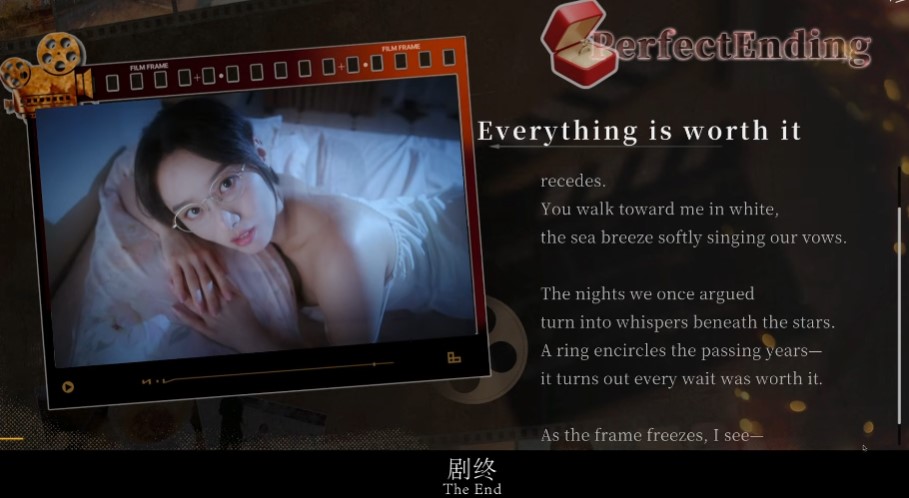
Once the ending card shrinks down and the bottom navigation shows up again, head to the bottom left and click Storyline. The preview behind it may loop a few times, which is normal, so don’t worry if the screen keeps moving. If a promotional overlay slides in, close it with its large X. Then give the Storyline map a moment to load — the scores need a beat to catch up before you can read them.
Replay 2 – Late-Night Diner / Chapter 1 – Seven-Year
Back to the very beginning for the Late-Night Diner path. Click Ep.1 Seven-Year in the left chapter list, and if the map opens with nothing useful in view, drag the empty background to the right until the 7 years portrait is on screen. Select it — the one showing the clock — and let the opening movie play through to the three-clip selection screen.
If you did Chapter 1 on either of the earlier routes, this part will feel like muscle memory, which is exactly why it’s the safest place to forget something. Take it one clip at a time.
- Click LOWER LEFT: Morning, then wait for the clip to finish and the screen to return.
- Click UPPER CENTRE: Striving, again letting it play out and settle back.
- Click RIGHT: So Sweet, and once it finishes you should be looking at the same selection screen you started on.
With all three clips marked Viewed, click Cont. If the Balance System tutorial pops up here, just dismiss it with GOT IT at the lower right — it won’t hold you up.
Now for the first real fork, and it diverges from last time. In Coco‘s phone conversation, pick the TOP reply: “Not Guessing, Childish”. Once the messages run out, tap End on the phone.
Go with LEFT: “Work Stuff”. Then, in the Chairman‘s phone conversation, choose the BOTTOM reply: “Okay, Leader, I’ll Seriously Think About It.” Hit End again when the messages stop.
Let the following scenes carry you to the Whisper clip-selection screen. Click CENTRE: The First Time, then let it finish. Once that clip shows Viewed, click Cont.
Close the chapter by choosing UPPER RIGHT: “So Soon”. That matches the Graduation route’s ending pick, so don’t let the two blur together — the Late-Night Diner run will split off from Graduation in the later chapters, and I’ll flag each one as we get there.
Replay 2 – Late-Night Diner / Chapter 2 – Parallel World
Chapter 2 of the Late-Night Diner run plays out exactly the way you did it during Graduation — the four clues go in the same order, and so do the four follow-up choices. If you’ve been running these routes back to back, this stretch should feel almost automatic, which is honestly the point. I like having one chapter where I don’t have to stop and second-guess myself.
Let playback roll into Chapter 2 until the four-clue selection screen appears, then work through the picks in this order. Each one sends you back to the same screen, so you can tick them off as you go.
- UPPER LEFT: Group Photo — let the clip finish and return to the selection screen.
- LOWER LEFT: Photo Frame — let the clip finish, then back to the screen.
- CENTRE-RIGHT: Mobile Phone — same again, watch it through and return.
- RIGHT: Magazine — let it finish and come back one last time.
Once all four are marked Viewed, click Cont. Try not to jump the gun here — I’ve caught myself hitting it while a clip was still running, and the screen won’t move until everything you picked has actually played out.
The four choices that follow run in the same flipped pattern as the Graduation route, so keep them straight rather than defaulting to your main-playthrough picks:
- LEFT: “Don’t Understand”
- RIGHT: “Wrong”
- LEFT: “No”
- LEFT: “Man prevails”
That’s the whole chapter. The Late-Night Diner route is still sharing its path with Graduation at this point, so nothing here branches on its own — the two runs just keep matching each other through Chapter 2. I’ll call out the spot where they finally split when we reach it.
Replay 2 – Late-Night Diner / Chapter 3 – Departure
Running Chapter 3 a second time is where the muscle memory starts paying off — same memory filmstrip, same passages, so I don’t have to hunt for anything. Let the playback roll until you hit the Chapter 3 memory filmstrip, then click the highlighted fifth card at the far right of the top row: Lu Working Overtime.
From there it’s a straight rhythm. Wait for passage 1 to finish appearing, then click Next. Same deal after passage 2 — let it settle, then Next. Once passage 3 finishes, click the completion button that takes the place of Next.
Now the part I actually have to watch myself on: the five-second choice hits right after, and it’s the same fork as the main run. You’ve got to pick LEFT and select Relax before the timer drops. If you blink, it defaults past you and you’re rerouting the whole thing — I’ve felt that sting before, so keep your thumb near the left side.
That leads into a second pick, this one untimed: LEFT for I’ll Support. Different from the Graduation pass, which used Come Back here — worth noting so you don’t copy the wrong run by accident.
After that, just let the scenes play through until the typed conversation kicks in on CatChat1. The Graduation route had me sit through that whole exchange, but the Diner run doesn’t need it — click Cont on the typed-conversation screen and it skips clean past. Then wait for the fixed two-choice question to settle in, and choose LEFT for Enjoy quiet comfort at home.
That closes out the chapter. The Late-Night Diner path is still running parallel to Graduation for the most part, but you can already see the small divergences starting to stack up — remember them, because Chapter 4 is where a couple more of these choices flip against the Graduation run and I’ll flag each one as it comes.
Replay 2 – Late-Night Diner / Chapter 4 – Boundary
Chapter 4 is where the Late-Night Diner run really starts to pull away from Graduation, and this is exactly the chapter I warned you about at the end of the last section. Same starting point as always — let the playback roll until the Chapter 4 memory filmstrip shows up, then click the card framed by those yellow corner brackets, “Café”.
From there it’s the usual reading rhythm: after passage 1 appears, hit Next. Same thing after passage 2. Same again after passage 3. Once passage 4 finishes, the Next button swaps out for the completion button — click that one to move on. When the Wifey phone conversation wraps up, tap End on the phone, same as the other chapters.
Now the two choices that differ from your Graduation run, and both of them are on that 5-second timer, so don’t drift. The first one, pick LEFT: “I sent”. The second one, again LEFT: “My Fault”. These are the flips I flagged — if you carry over the Graduation answers here out of habit, you’ll fork the wrong way, so slow down and read the option before the timer drains.
Let the scenes play through until the typed conversation kicks in on CatChat2. Click Cont on the typed-conversation screen to skip the back-and-forth — this is the same shortcut the replays use, and it keeps things moving. Then wait for the fixed two-choice question and pick LEFT: “Prepare gifts, book a familiar restaurant”. That closes Chapter 4 for the Late-Night Diner path, and it’s the same closing line you used before, so no surprises there.
Replay 2 – Late-Night Diner / Chapter 5 – Tea & Liquor
Chapter 5 opens the same way it did on the Graduation run, so let the video play until the memory filmstrip appears. On that filmstrip, click the card marked with the yellow corner brackets — “Expressway”.
From there, click Next after each passage finishes appearing, all the way through passage 6. Passage 6 doesn’t give you a Next button at the end — instead it swaps in the completion button, so click that to move on.
Now the choices. First, pick LOWER RIGHT: “I’m Sentimental”. Then pick LEFT: “Too Tired”. These are the same flipped picks you made on the Graduation run, so if you’re following the replays in order this should feel familiar by now.
Let the scenes run until the typed conversation in CatChat3 appears, then click Cont on the typed-conversation screen to skip the whole exchange. That Cont shortcut is what keeps these non-target replays fast — no need to type through a conversation you’ve already done.
Wait for the fixed two-choice question, then choose LEFT: “Sort out the logic, find a solution”. That wraps Chapter 5 for the Late-Night Diner path.
Replay 2 – Late-Night Diner / Chapter 6 – No Goodbye
Final chapter for the Late-Night Diner run, and this one follows the same beats as the main path with a couple of quiet swaps that matter more than they look. Let playback roll until you reach SelfAsk, the conversation beside the sea. That’s your signal to start paying attention again.
Pick LEFT: “Pessimistic”. It’s the same fork you’ve seen before, just the opposite side from where you’ll eventually land on the other route — easy to autopilot past if you’re not reading carefully, which is exactly how I almost fumbled it my first time through.
Let the scenes play out until the typed conversation comes up in Restart. Click Cont on the typed-conversation screen to bypass it, same as the other replays — no reason to sit through a conversation you’ve already typed through once. Then wait for the fixed two-choice question and select LEFT: “Plan the itinerary in detail”.
Sit back and let the ending movie run to completion. When the “Sudden turns” ending card appears, that’s the moment you’ve been working toward — ACHIEVEMENT – Late-Night Diner should unlock here. Give it a second: wait for the ending card to shrink and the bottom navigation to show up. The preview can loop, so don’t panic if it replays a few times; just wait for the menu to settle.
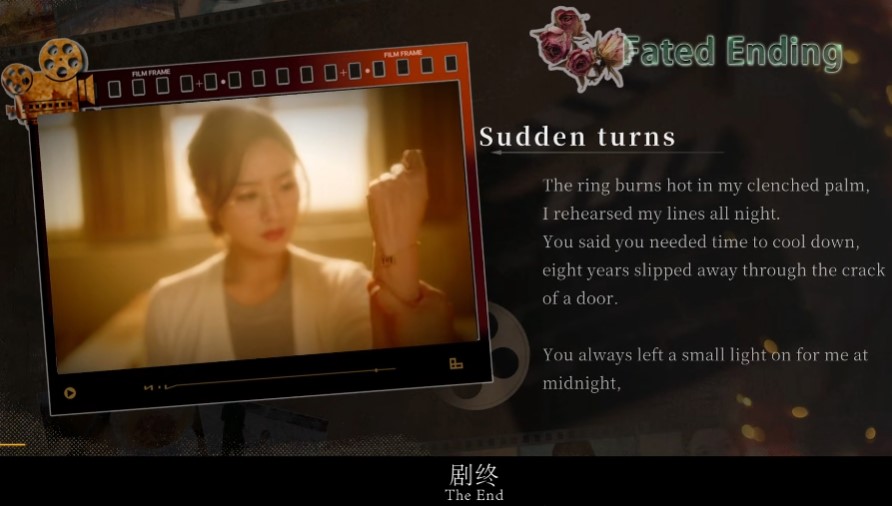
Click Storyline at the bottom left. If a promotional overlay pops up, close it with the large X. Then wait for the Storyline map and its scores to finish loading before you move on. That confirms the route registered properly, and it’s where I always double-check that the achievement actually fired before jumping into the next replay.
Replay 3 – The Last Supper / Chapter 1 – Seven-Year
With the Late-Night Diner route banked, I’m back at the beginning for the third replay. Open the left chapter list and click Ep.1 Seven-Year to jump straight in.
If 7 years isn’t already in view on the map, drag the empty background to the right until it appears. Then click 7 years — it’s the opening portrait with a clock on it.
Let the opening movie play until you hit the three-clip selection screen. This is the same trio as every other run, so if you’ve been following along the picks should feel familiar by now.
Start with Morning in the lower left. Let the clip finish, and it drops you back at the selection screen. Next, click Striving in the upper centre, then let that one play out too. Last is So Sweet on the right. Once all of these show as Viewed, click Cont.
If the Balance System tutorial pops up again, just click GOT IT at its lower right to dismiss it.
Here’s where this run starts to diverge from the main playthrough. In Coco’s phone conversation, choose the TOP reply: “Not Guessing, Childish”. Once Coco’s messages finish, click End on the phone.
Now pick “Change Topic” on the right. I always slow down on this one — it’s the kind of small fork that’s easy to breeze past if you’re clicking quickly, and it’s what steers you onto the Last Supper path.
In the Chairman’s phone conversation, take the TOP reply: “Thank You for the Chairman’s Guidance”. When his messages are done, click End on the phone again.
Let the following scenes run until you reach the Whisper clip-selection screen, then click The First Time in the centre. Let it finish and return to the selection screen, and click Cont once the clip is marked Viewed.
For the closing choice, pick “Not Decided” in the lower right. That wraps Chapter 1 for this route — on to Parallel World.
Replay 3 – The Last Supper / Chapter 2 – Parallel World
Chapter 2 on The Last Supper run is the easy part — and honestly, that’s a relief after some of the trickier routes. The clue screen and the four back-to-back dialogue choices here match the main playthrough exactly, so if you did the first pass you already know the rhythm. Let playback roll straight into the chapter and stop when the four-clue screen appears.
Work through the four clues in this order, letting each clip play out and return you to the selection screen before you touch the next one:
- Upper Left: Group Photo
- Lower Left: Photo Frame
- Centre-Right: Mobile Phone
- Right: Magazine
Once all four are marked Viewed, click Cont. Now the four choices fire off one after another with no filmstrip in between — just pick and let the next one land. This is the same sequence as the main run, which is worth noting because in other replays you’d be flipping these, and it’s easy to mix them up when your brain has already learned the flipped version:
- Right: “Won’t Disappoint”
- Left: “Right”
- Right: “Yes”
- Right: “It’s fate”
Watch the timing on the last three — they can chain quickly, so I kept my hand near the correct side rather than reading each prompt cold. Once “It’s fate” registers, the chapter moves on and you’re clear into Departure.
Replay 3 – The Last Supper / Chapter 3 – Departure
We’re back at the Chapter 3 filmstrip, and if you’ve run the earlier replays you already know the drill here. The version of Departure I use for The Last Supper is a close cousin of my first Graduation route — one timed flip, one reply flip, then I let Cont carry me through the typed CatChat1 conversation so I’m not sitting through all five replies a fourth time.
Let playback run until it reaches the Chapter 3 memory filmstrip. On that filmstrip, click the highlighted fifth card at the far right of the top row — “Lu Working Overtime”. Once you’ve selected it, the passages unspool one at a time: after passage 1 finishes appearing, click Next; after passage 2 finishes, click Next again; and after passage 3, click the completion button that replaces Next. I keep my cursor parked on that lower-right button after the second Next, because the swap from Next to the completion button is instant and easy to fumble if you’re reading cold.
Then comes the one timed pick in this chapter — a 5-second choice, so don’t look away. Choose LEFT for “Relax”. If you somehow land the wrong side, you’re locked into the wrong ending fork for this replay, and that’s exactly the kind of silent miss that makes people redo an entire route. After that, pick LOWER CENTRE for “Come Back”. This is the flip I care about — in the main playthrough I chose the life-value branch here, whereas The Last Supper and Graduation both want “Come Back”.
With both choices in, let the scenes play until the typed conversation in CatChat1 shows up. Since I’ve already sat through the full five-reply version of this conversation on the main run, I click Cont on the typed-conversation screen to skip it here. Then wait for the fixed two-choice question and choose LEFT: “Enjoy quiet comfort at home”. That’s the same closing pick the main run and my earlier replays all used, so nothing new to memorize there — Departure is done, and Boundary is next.
Replay 3 – The Last Supper / Chapter 4 – Boundary
Boundary on this route mostly mirrors what I did earlier, but the timed picks split off in a different direction, so don’t coast through on muscle memory. Play back until you land on the Chapter 4 memory filmstrip.
On that filmstrip, click the card framed by yellow corner brackets — “Café”. Then step through the passages in order: let passage 1 finish appearing and click Next, do the same after passage 2, and again after passage 3. Once passage 4 has fully shown, click the completion button that takes the place of Next. When the Wifey phone conversation wraps up, click End on the phone.
Now the part I’d tell anyone to slow down for, because missing a single 5-second pick here can quietly break the ending you’re chasing. Three timed choices land back to back:
- Choose RIGHT: “Colleague Sent”.
- Choose RIGHT: “Clear Conscience”.
- Choose LOWER RIGHT: “Hug”.
Each one only stays on screen for about 5 seconds, so keep your hand near the mouse. After that, let the scenes roll until the typed conversation comes up in CatChat2. Click Cont on the typed-conversation screen to skip it — same as my other replays, no need to type replies on this route.
Wait for the fixed two-choice question, then choose LEFT: “Prepare gifts, book a familiar restaurant”. That’s the identical closing pick the main run and my earlier replays used, so Boundary is done here. Next up is Chapter 5 – Tea & Liquor, where this route finally reverts to the main-playthrough choices.
Replay 3 – The Last Supper / Chapter 5 – Tea & Liquor
Tea & Liquor on this route is the point where things snap back to the main-playthrough selections, so if you’ve already done the first full run, this chapter will feel like muscle memory. Let playback carry you to the Chapter 5 memory filmstrip.
On the filmstrip, click the card ringed by yellow corner brackets — “Expressway”. From there it’s a straight Next chain: tap Next once passage 1 has finished appearing, then again after passage 2, passage 3, passage 4, and passage 5. After passage 6, the button that replaces Next is your completion click — hit that to close out the filmstrip.
Next come the two picks. Choose LEFT: “Look Forward”, then RIGHT: “Fine, New Mood”. Let the Unwind scene play through to the end, then let the following scenes run until you land in the typed conversation inside CatChat3.
This is the one spot in the chapter where you actually touch something other than a choice prompt — click Cont on the typed-conversation screen to skip it, the same as I did on the previous replays. Wait for the fixed two-choice question to appear, then choose LEFT: “Sort out the logic, find a solution”. Identical to the main run, so Tea & Liquor is wrapped up here. Chapter 6 – No Goodbye is next, and this is where the route diverges again with its own SelfAsk answer and a timed ending fork.
Replay 3 – The Last Supper / Chapter 6 – No Goodbye
Back at SelfAsk by the sea, and this time I’m answering the opposite way from the Graduation run. Pick RIGHT and go with “Optimistic”. That single answer is what keeps The Last Supper on its own track, so don’t rush past it thinking it’s just flavor dialogue.
From there, let the scenes roll on their own until the typed Restart conversation comes up. Unlike the earlier replays, I don’t need to type anything out here for this route — I just hit Cont to skip it and move forward.
The fixed two-choice question shows up next. Choose LEFT: “Plan the itinerary in detail” — same selection as the previous two runs, so nothing new to think about there.
Now the part I always slow down for: the timed ending fork. This is the ending choice, and it comes and goes in about five seconds — exactly the kind of moment that costs people an achievement if they blink. Choose UPPER RIGHT: “Greet”. If you’ve been following the Sleepless cleanup notes, you’ll recognize this as the same fork that shows up later, so getting familiar with it here is worth it.
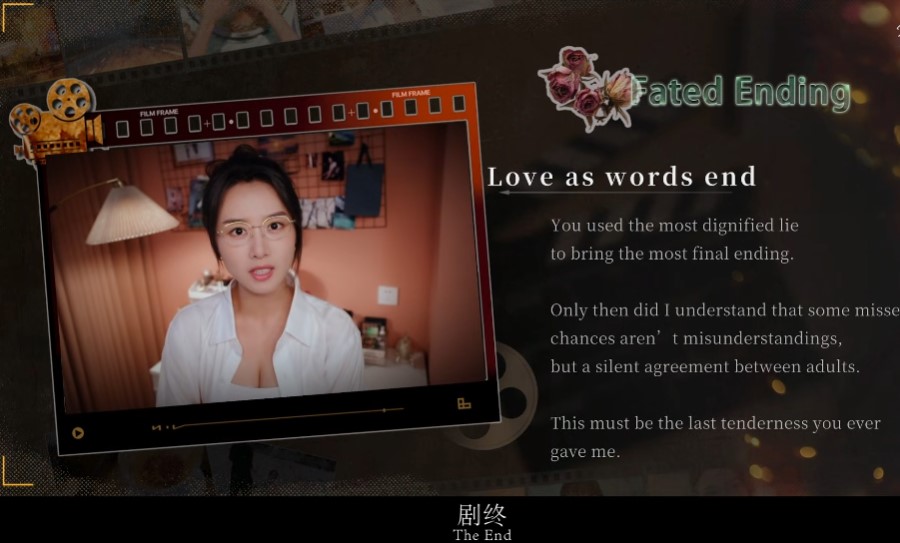
Let the ending movie play all the way through until the “Love as words end” ending card appears. That’s the cue — the The Last Supper achievement unlocks right here.
Once the card shrinks and the bottom navigation slides back in, click Storyline in the bottom-left corner. The preview can loop while you’re waiting, so don’t panic if the visuals replay — just be patient. If a promotional overlay pops up over the menu, close it with the large X, then give the Storyline map and its scores a moment to finish loading. Three replays are in the books at this point; the only thing left is the quick Sleepless cleanup.
Short cleanup – Sleepless
Right after the credits roll on The Last Supper, don’t back out to the main menu — this last cleanup starts exactly where that ending left you. From the empty map, drag the background to the right. Keep pulling until the coffee-filter photograph slides into view; it sits off to the side of the default position, which is why it’s easy to skim past if you only glance at the screen. That little bit of fumbling is exactly why Sleepless trips people up — it isn’t hidden behind a chapter or a route, just tucked one swipe away.
Once you can see it, click the coffee-filter photograph labeled Coincide. This is the fork that decides which of the two remaining ending cards you get, and it’s a timed pick — you’ll be choosing before long, so don’t wander off mid-scene.
At the ending choice, go LOWER LEFT and select Avoid Not See. I checked this one twice, because the opposite option reads just as tempting and there’s no redo once the scene confirms — pick the wrong side and you’re sitting through another stretch of video before you can circle back.
Let the ending filmplay out without skipping. When it finishes, the Return your true heart ending card appears, and that’s the note you’re waiting for. The Sleepless achievement pops with it.
That’s the fourth and final hidden fork cleared, and with it your counter lands at 8/8 achievements — every ending in the game now sits in your library. The cleanup is short by design: one drag, one timed pick, one card. Nothing left to second-guess.