
Here’re some useful tips and tricks on how to play the game.
Tips & Tricks
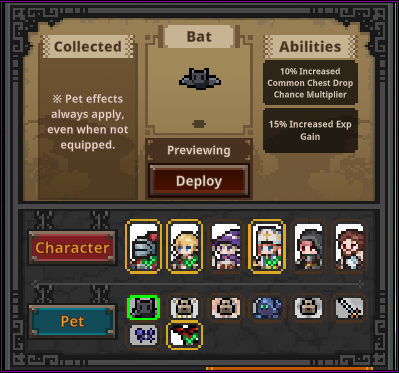 I have mentioned it very briefly in the first section on the Formation window, about pets. Because their effects are always active no matter if they are are deployed or not, it could be a good idea to unlock them sooner than later as the available ones so far all require the slaying of a certain amount of specific monsters. These are some of the stages where you can find them:
- Bat found around Act 1-8
- Giant Fly found around Act 2-4 & 2-5
- Fire Spirit found around Act 2-8 & 2-9
- Blue Golem found around Act 3-6
- Ghost found around Act 3-4 & 3-5
Which or whether they are the best is up for debate but from my experience they don’t seem to be commonly spread around so if you can find them anywhere it’s better to just get at it.
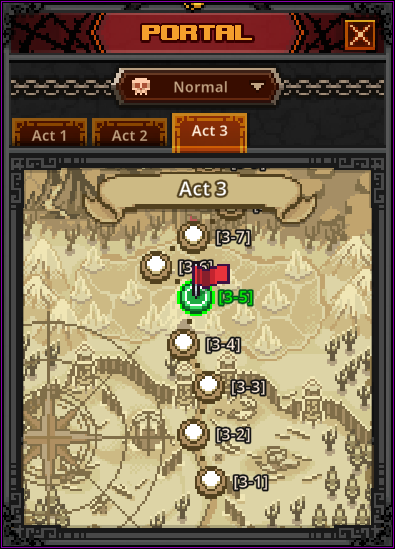 Remember that at any time you can fast travel/select to any of previously completed stages by clicking on the shiny blue portal icon on the bottom right of your main TBH window which pops up the Portal window as shown on the right hand side.
🌽 Farming Efficiency 🌾
Suggested by Fardeki but I do think it’s a notable tip is to find out what works best for yourself when it comes to farming stages. Just because you can complete the highest stage that is available to you, does not necessarily mean it’s going to be the most fruitful for you in terms of loot. Sometimes it pays out better to visit a previous stage for it’s faster and/or easier clear times.
Some people swear by a more offensive setup such as Priest + Ranger + Sorcerer for faster clearing which I can understand because the Knight’s performance to provide more sustain and push stages does come at a DPS loss compared to a more AoE or damage-oriented class. And if your Priest singlehandedly is enough to sustain herself in a certain stage then this setup might work out best for farming sake.
That is as far as I will cover it though as formations are still subject to personal experience and data collecting. But I do hope that this might incentivize people to try and utilize the other 2 DLC classes and raise them to see if they can uphold a rightful place for certain setups or builds. As I will do so as well myself in due time.
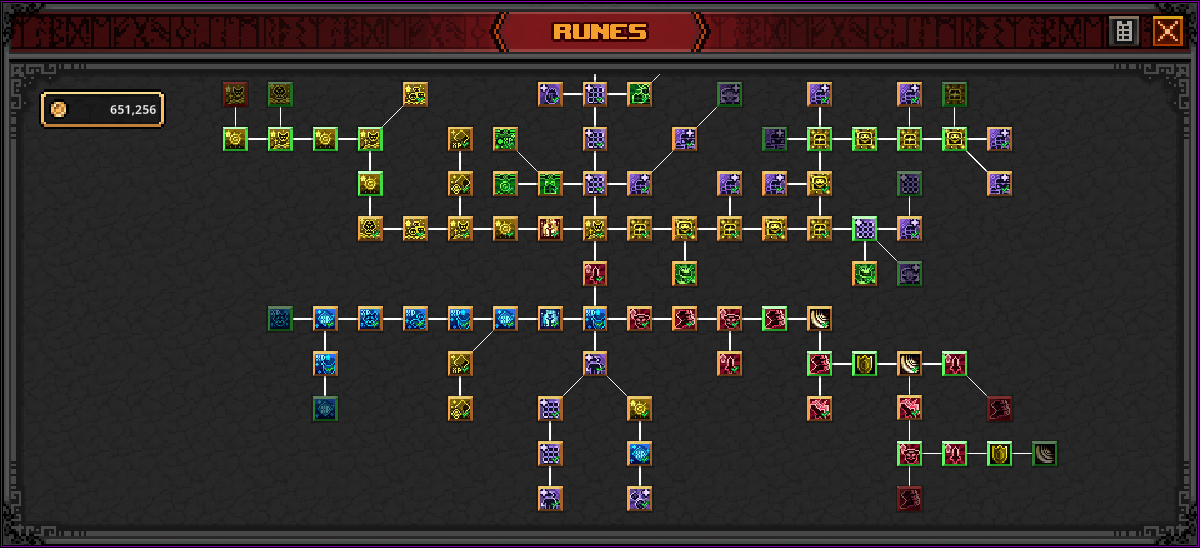
Let’s have a look at the Rune Tree (after I told myself I wouldn’t cover this part in detail). For starting out your main draw would be to get a full formation going to make farming and pushing that much easier, which means your focus will be directly down to the south from your first Rune.
I have not marked them on the picture but you can see there are two purple Runes/icons that resemble a stickman silhouette with a green checkmark on it. These are your two Runes that will unlock the remainder 2 slots for your Formation. Bear in mind the pricing on the last rune is going to be 150.000 gold which for starters can be a bit daunting to attain perhaps but getting it out of way sooner than later will make up for it in the long run.
On the right side across from the Rune that unlocks your third Formation slot is the rune that unlocks your second active skill slot costing 50.000 coins. I would put this Rune on a bit of a lesser priority because even though another skill slot could also serve to make farming/pushing more efficient it does obviously require more skill point investment which you may not have so easily to spare in the early levels if you want to raise the passive talents first. And also because you may not want both Tier 1 active skills and instead go for the higher tiered ones later on.
Wrapping this section up, I will briefly explain where the focus of upgrades lies in each of direction(s) in the Rune Tree, starting with:
- North-West: This mostly yellow area of runes will focus on maximizing gold gain. Gold from bosses, gold per kill, really anything that increases your gold gain one way or another as well as minor runes to increase the gold and XP from Cube Alchemy.
- Far North: Inventory slots, stash pages and the ability to auto open chests for you. Important to note here is that the auto open chests feature comes at different cooldowns. 300 seconds/5 minutes for common chests and 600 seconds/10 minutes for blue/stage boss chests. The runes next to them that reduce the cooldown so far are hardly worth it as they cost quite a sum and only reduce these timers by 9 and 15 seconds respectively.
- North-East: This shiny area will feature chest drop chances and capacity galore. Looking to increase your capacity to stack more chests before overflowing and/or just generally make drop chances on said chests more frequent, this is the place to be.
- South-East: The red light district area that features “All Hero Attack, Armor and Speed” galore. Looking to boost your overall DPS and/or resilience, look no further.
- South-West: The blue sea of maximizing experience gain. If you value experience gains more for a faster progression on your heroes and/or leveling your full roster of classes, then be sure to have a look around here. Accompanied by some minor ones to further increase XP and gold from Cube Alchemy.
Now which of these you should focus (other than the obvious Formation slots to the South) is up for you to fill in and opinions might vary on this. Personally I went with a bit of mixed/overall spread because it has to be said that the further you go into a direction the more exorbitant the prices will naturally be. Inflation and capitalism ho~