
This one covers the full sweep of 100 Hidden Relics: every artifact numbered by screen, the seven animals you need for the critter achievement, and the three endings that unlock once you’ve beaten the game multiple times. If you’re stuck circling a screen hunting for that last relic, or you just want the animal-only run out of the way cleanly, this is for you.
The thing that made me put this together is how the game subtly hides its own help. There’s a built-in assist — if you go a full minute without finding anything, the game highlights something for you. That feature is a lifesaver when you’re stuck, and I mention it up front because a lot of players never notice it exists. My layout here splits the list into screens so you can hunt deliberately instead of clicking wildly and accidentally vacuuming up the wrong things.
How This Guide Is Organized
Here’s the order I laid everything out, so you know what you’re looking at:
- The first section lists only the items found on each screen — no markup, just what lives where. I wish the game itself had given me this, because it encourages you to actually look rather than click everything in a panic.
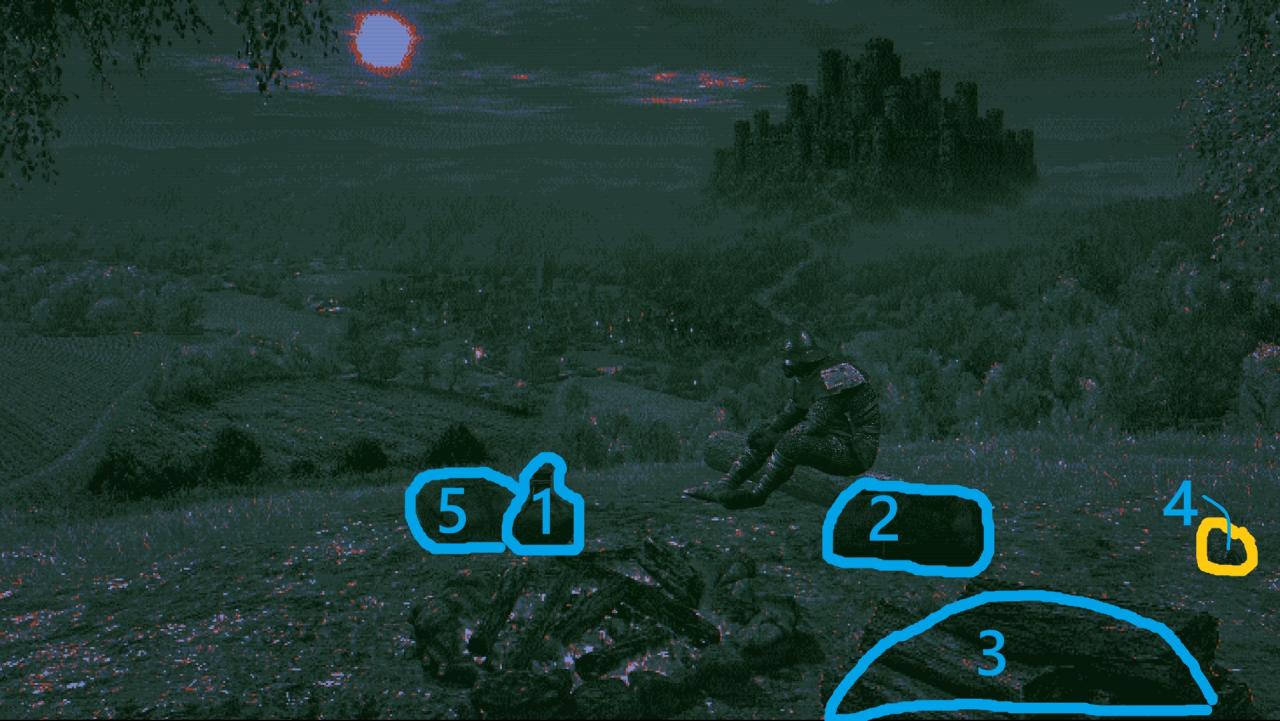
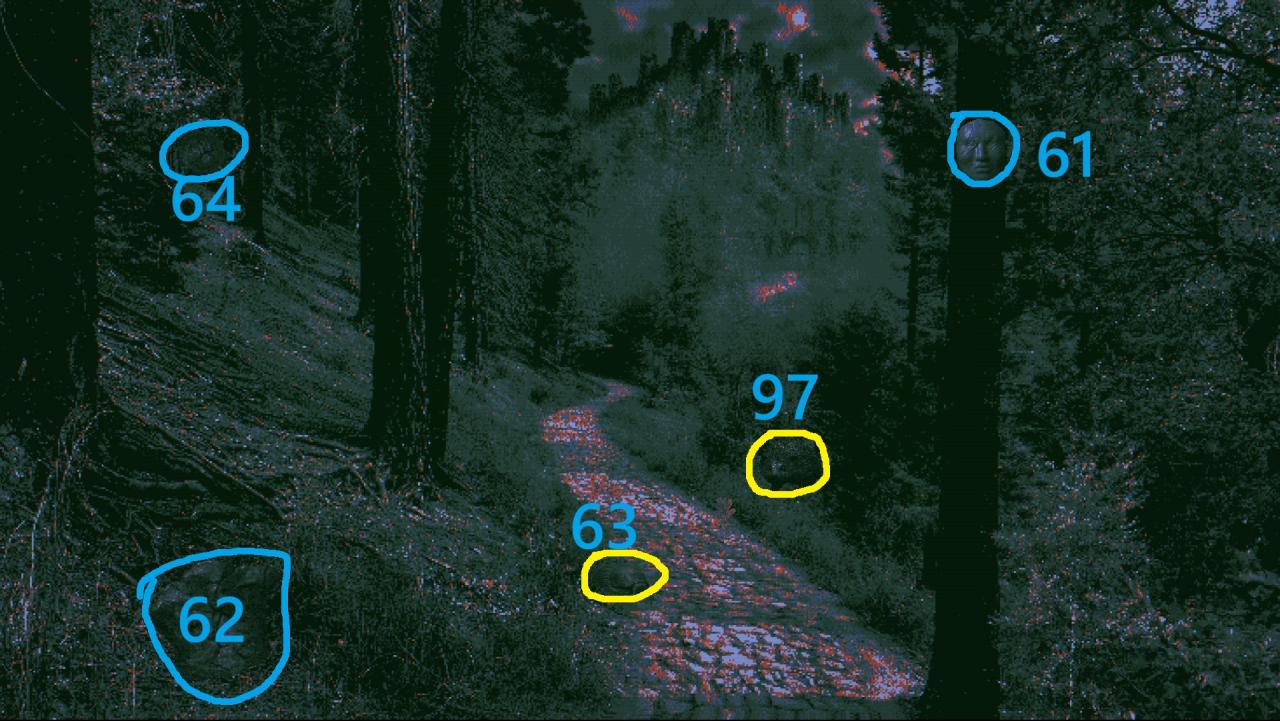
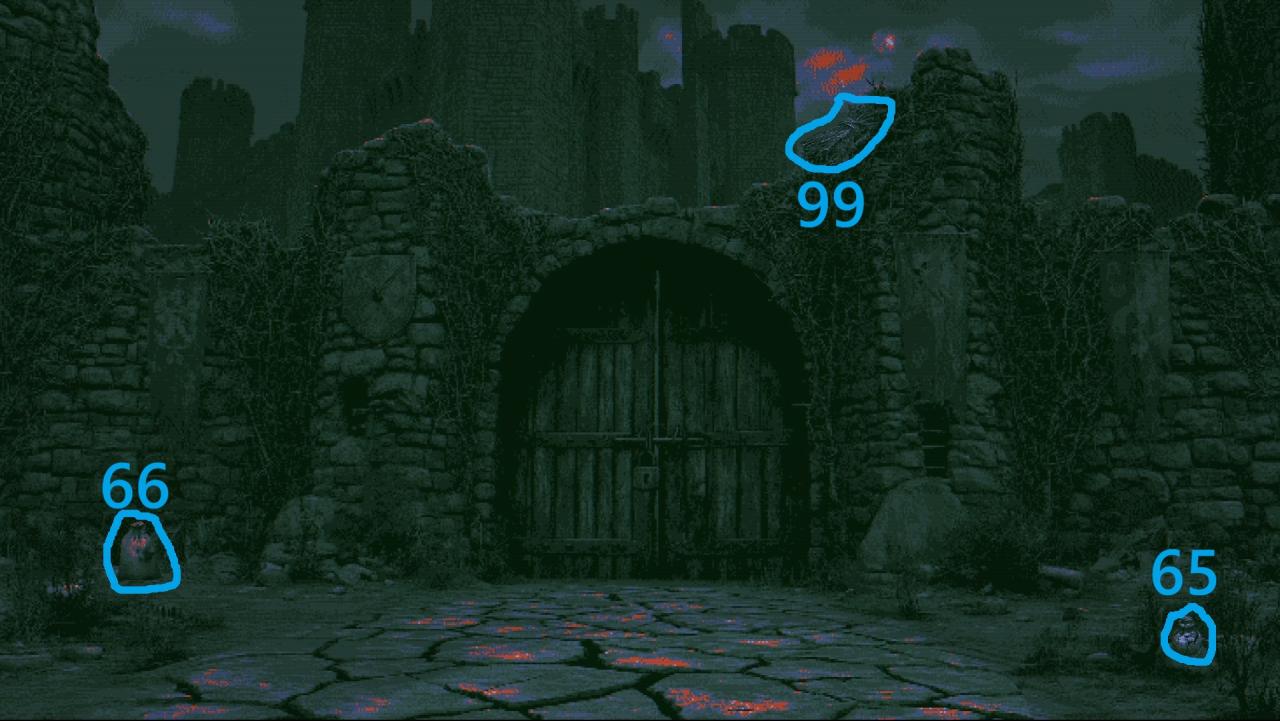
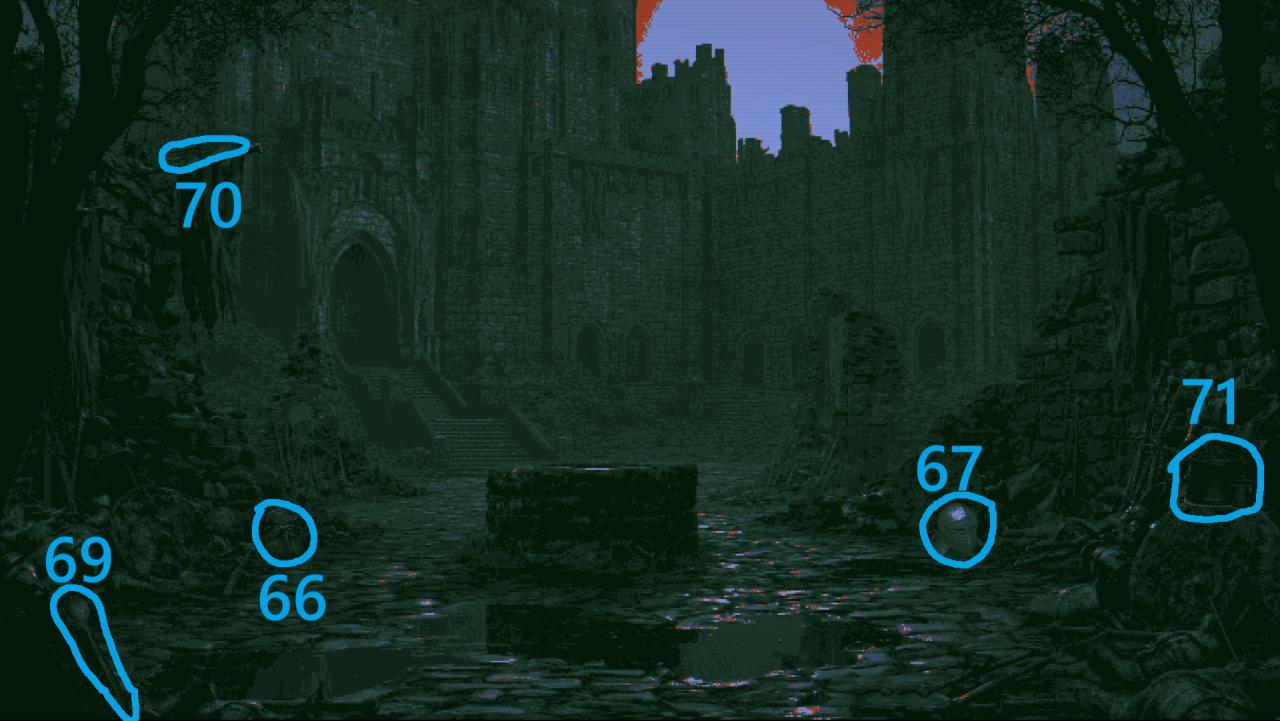
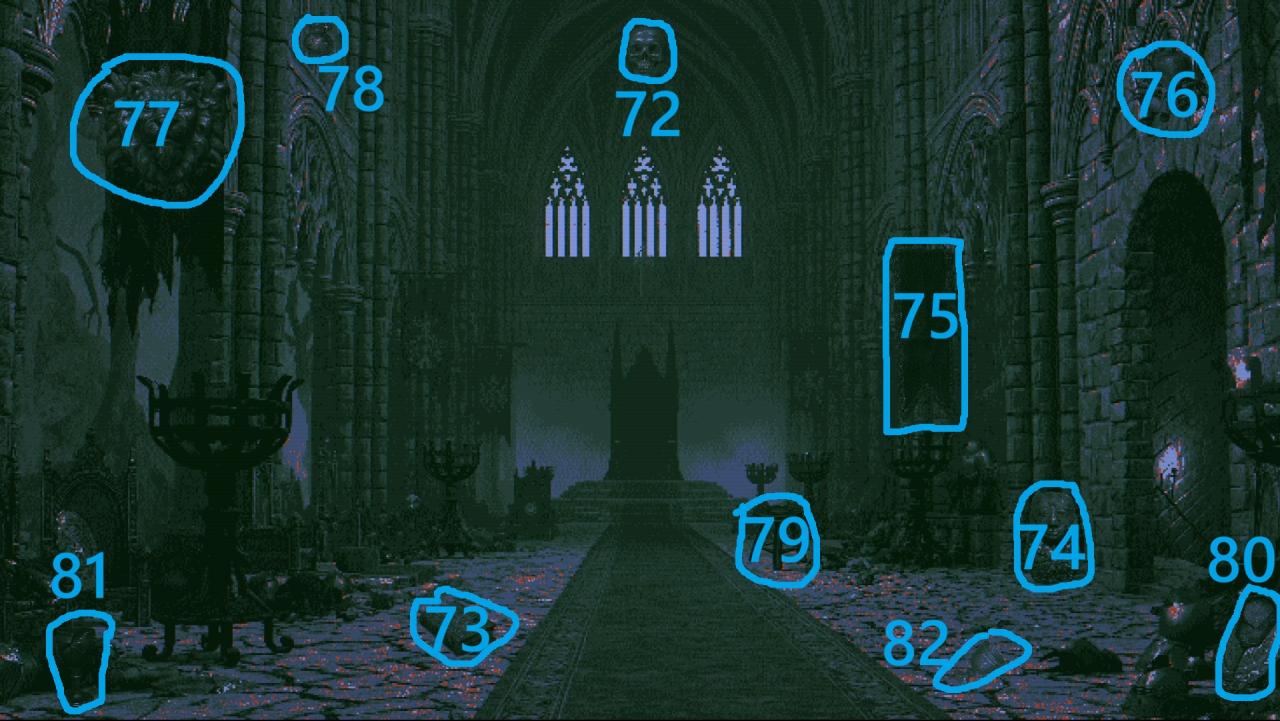
- Next come the circled screenshots. Animals are highlighted in yellow, key items in red, and everything else in blue.
- Then the dedicated animals-first route.
- And finally the endings.




A handful of achievements I don’t spell out — you’ll earn them naturally, or they’re simple enough to figure out without hand-holding.
Items Per Area (Screens Only)
Use this section as your pure checklist. I’m listing exactly what sits on each screen, nothing more, so you can read the screen name and know what to look for.
Campfire area — 5/6 items. Here you’ll find the Costrel (a drinking flask), the Bedroll, Cordwood, a Dead Beetle, and a Bundle of Cloth. The sixth is Innocent blood (#100), and it’s a special case — you have to come back much later, after you’ve entered the final area with the door and water, then click on the Guy standing here twice.
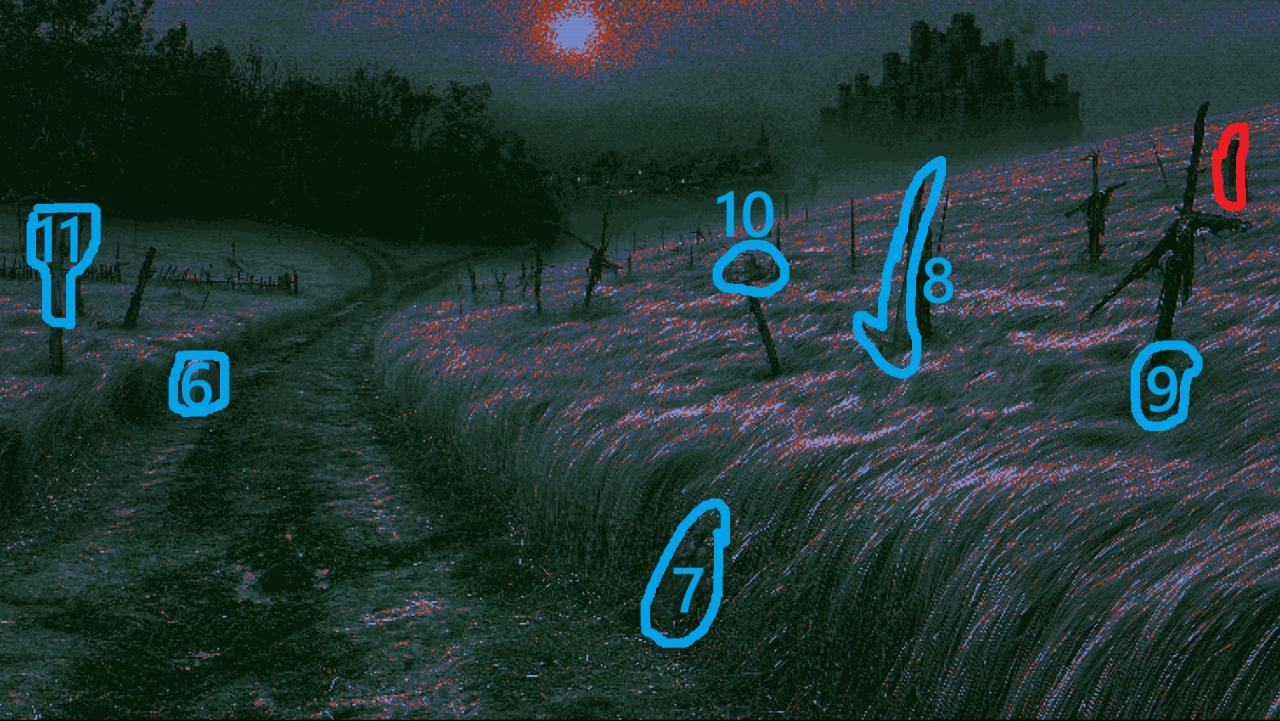
Field — 6 items plus half of a key. That’s the Milestone, Father Statue, Reaping Scythe, Spade, Straw Hat, and Pitchfork, along with the Half Courtyard Key.
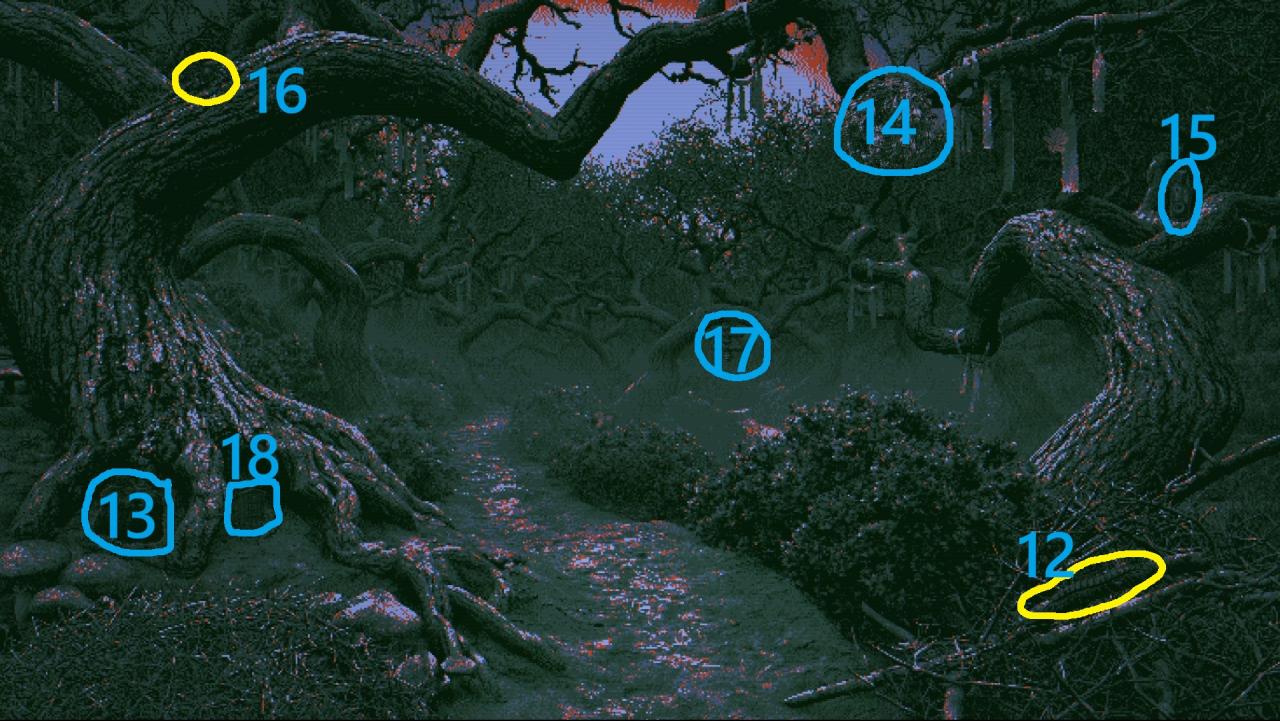
Forest path 1 — 7 items: Centipede, Fur Pelt, Bramble Ring, Eye in Jar, Black Spider, Wooden Fetish, and the Wooden Door.
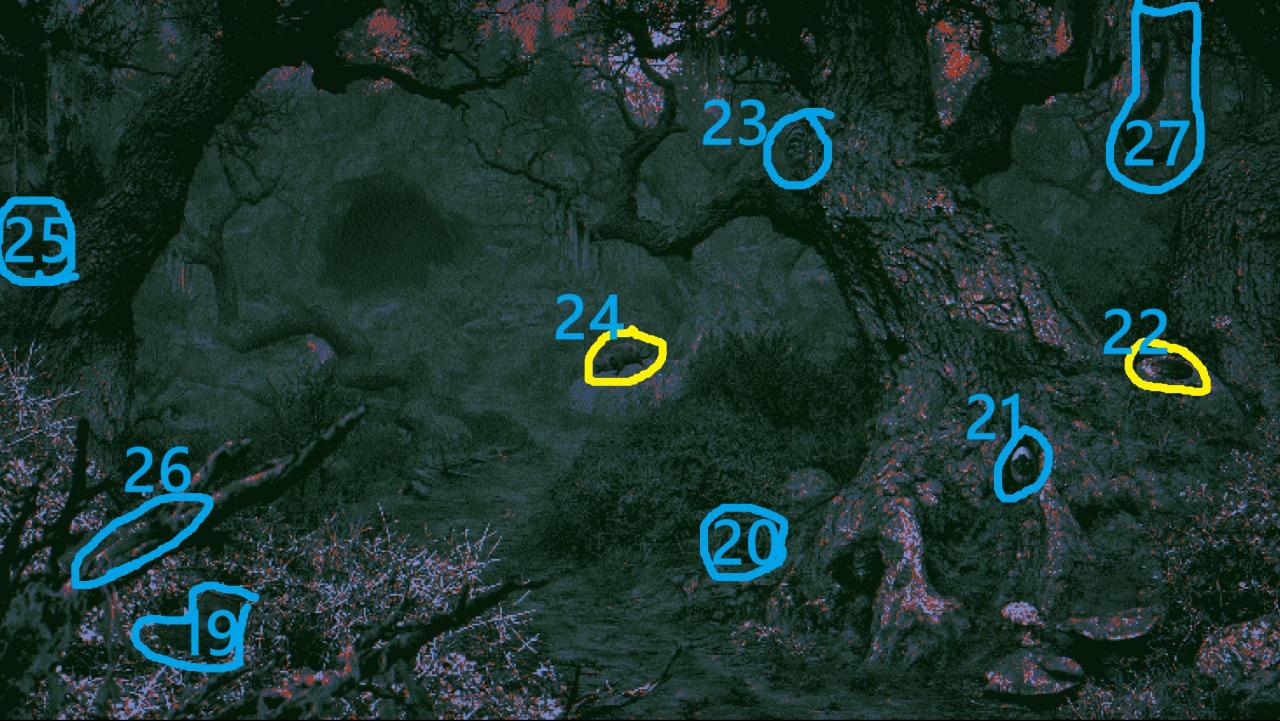
Forest path 2 — 9 items: Leather Boot, Hemp Coil, Egg, Cockroach, Ear, Plague Rat, Ironbound Bucket, Distilled Herbs, and Hook.
One thing worth flagging before you reach the village: there’s an achievement for grabbing all items the very first time you enter it. That means you can’t earn it alongside the animals-only achievement in the same run — the two runs contradict each other. You could start a fresh save and head straight there to attempt it, but I wouldn’t bother, since you’ll be completing this game three times regardless.

Village — 11 items: Tanned Hide, Coin Purse, Horseshoe, a Bodkin (a slender needle-like tool), Water Bucket, Meat Pastry, Empty Basket, Weathered Jug, Scale, Spoon, and the Nailed Apple.
Church, Outside — 6 items: Shattered Medallion, Bronze Bell, Wooden Crucifix, Stone Relief, Rosary, and Monolithic Cross.
Church, Inside — 9 items: Plate of Ash, Tarnished Candles, Mother Statue, Wall Sconce, a Breviary (a Christian prayer book), Candlestick, Candle, Censer (the incense vessel you’d see in a Catholic church), and the Lamp (#98).
Before you use the Lamp to light up the cave, stop and stand in the opening for a few minutes — that’s how you earn the [Wrong Way] achievement. It’s a silly one to miss, so I’d pause there deliberately rather than rush past.

Cave — 8 items plus half of a key: Pickaxe, Flagon, Seeded Flesh, Burner Pot, Vial, Bone Necklace, Knife, a Reredos (an ornamental screen), and the second Half Courtyard Key.
Path — 5 items: Blind Mask, Beggar Rags, Deformed Snail, Warding Pendant, and the Hedgehog (#97).
Gate — 3 items: Cracked Pot, Supply Sack, and a Fascine (a bundle of sticks, #99).
Courtyard — 5 items: a Bascinet (helmet), Burlap Sack, Cooking Spoon, Iron Fork, and Hearth Cookware.
Castle interior — 11 items: Skull, Grimoire, Cursed Idol, Wall Banner, Thorn Bell, Lion Crest, Round Pendant, Joint Stool, Hand Mirror, Goblet, and Silver Goblet.
Throne room — 6 items: Coronet (crown), Ancient Mask, Clay Vase, Scholar’s Folio, a Porringer (bowl and spoon), and a Flute.
Altar / final area — 8 items: Shrunken Head, Small Chest, Cleaver, Bitter Draught, Effigy Mask, Hair Comb, Charnel Bone, and Corked Vial.
A quick note on the numbering: items 97 and 99 ended up out of order because I botched the spreadsheet. 98 is the Lamp and Innocent blood is #100 — the Guy at the very start you click twice, once you’ve at least reached the final area with the water and door.
Circled Screenshots
This is the same breakdown, but with the items visually circled so your eyes know where to go. Yellow marks animals, red marks key items, and blue covers everything else.
Campfire area — 5/6 items.
Field — 6 items, one half of a key.
Forest path 1 — 7 items.
Forest path 2 — 9 items.
Village — 11 items.
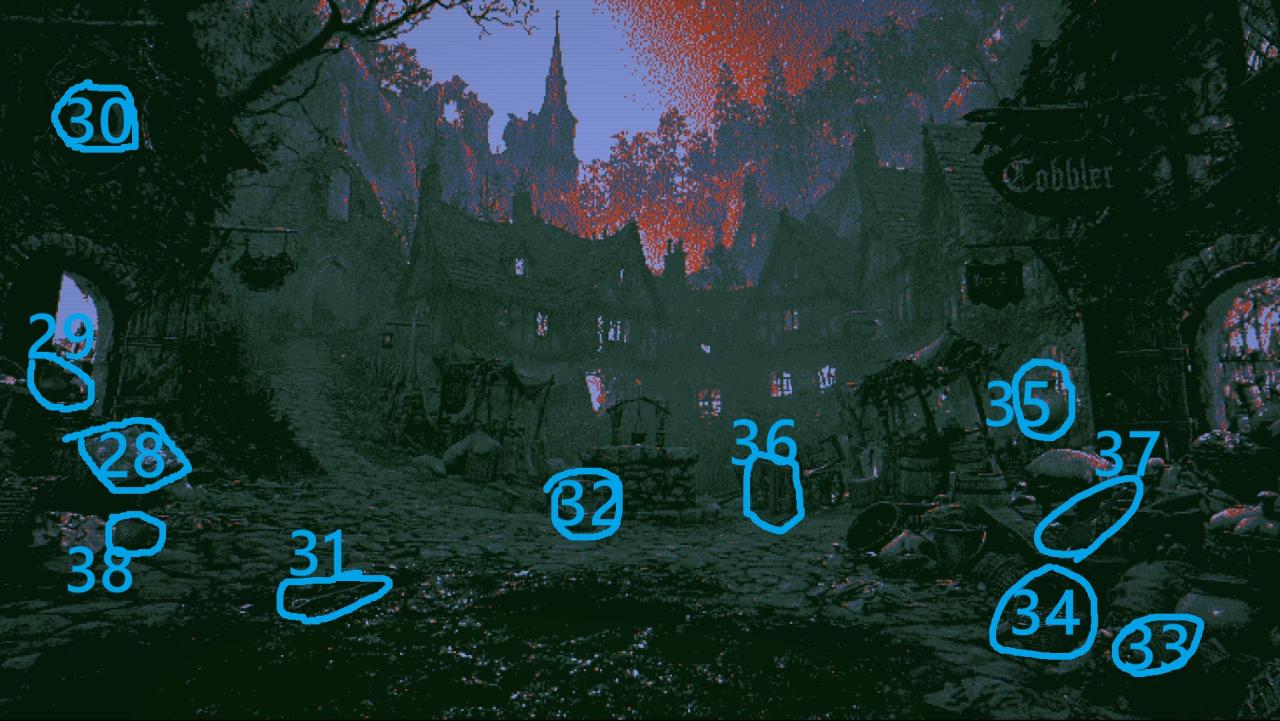
Church, Outside — 6 items.
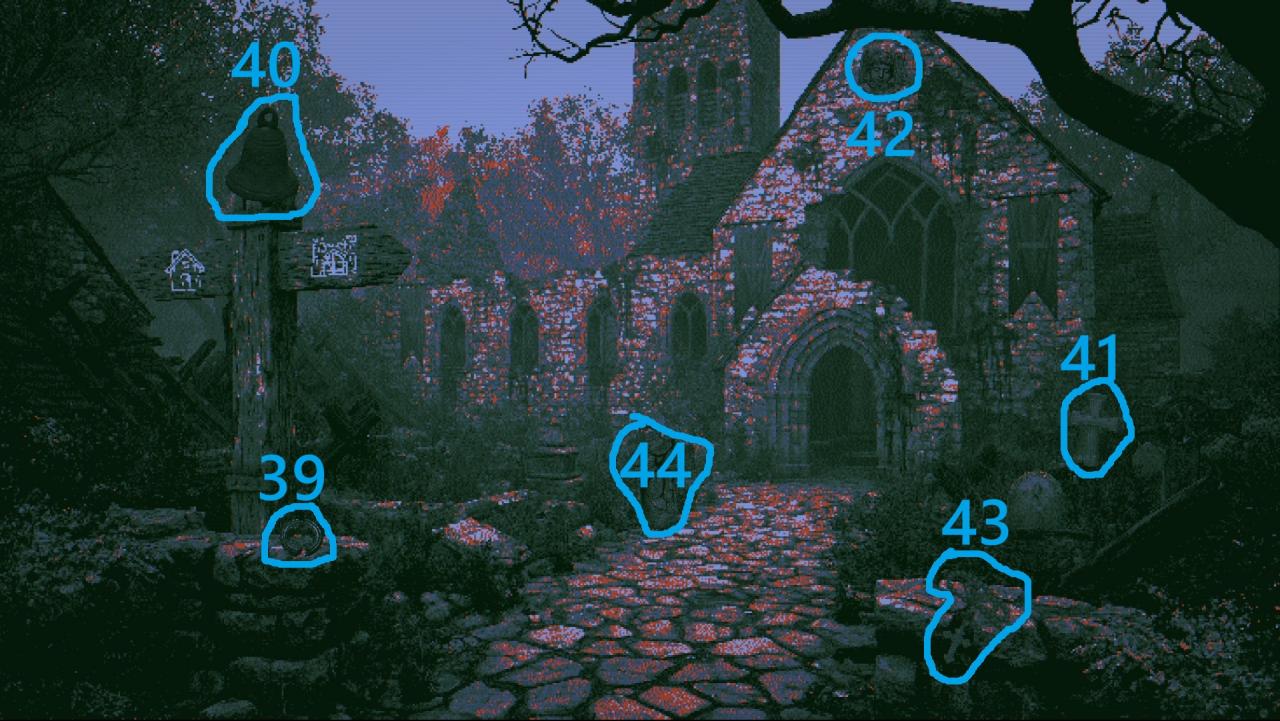
Church, Inside — 9 items.
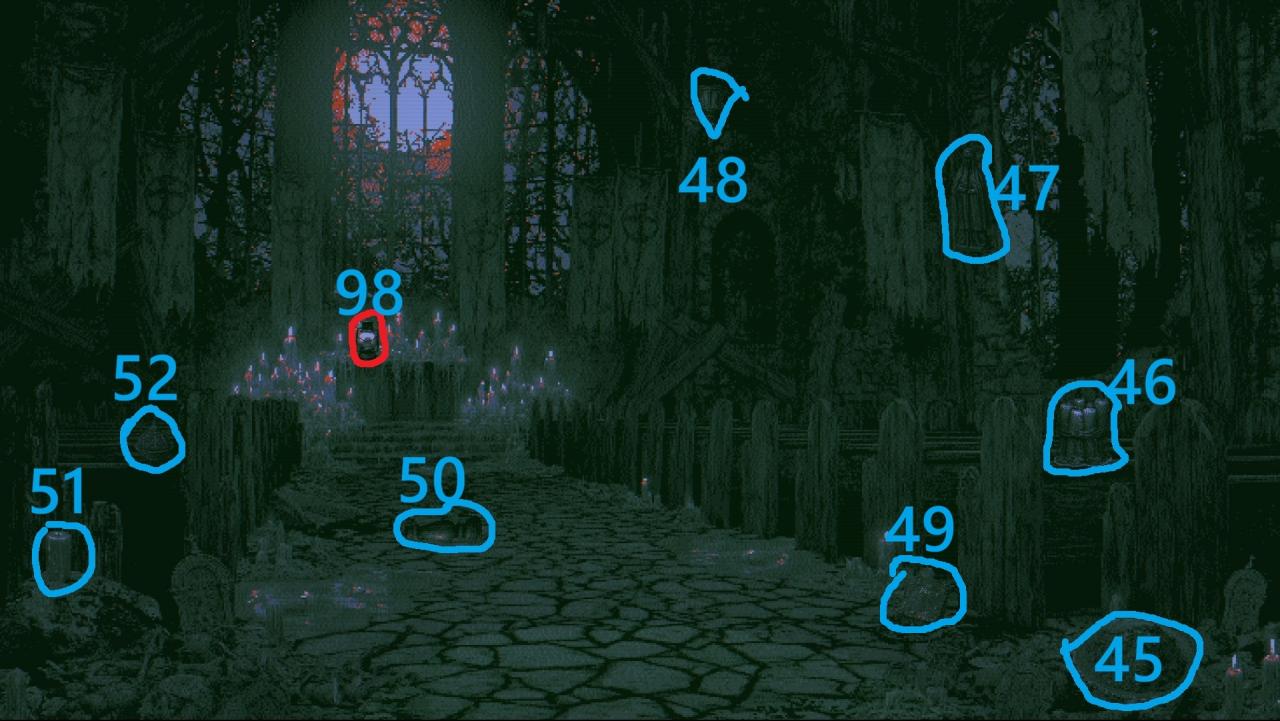
Again, remember the [Wrong Way] achievement here — linger in the cave opening before lighting it with the Lamp.
Cave — 8 items, half the courtyard key.
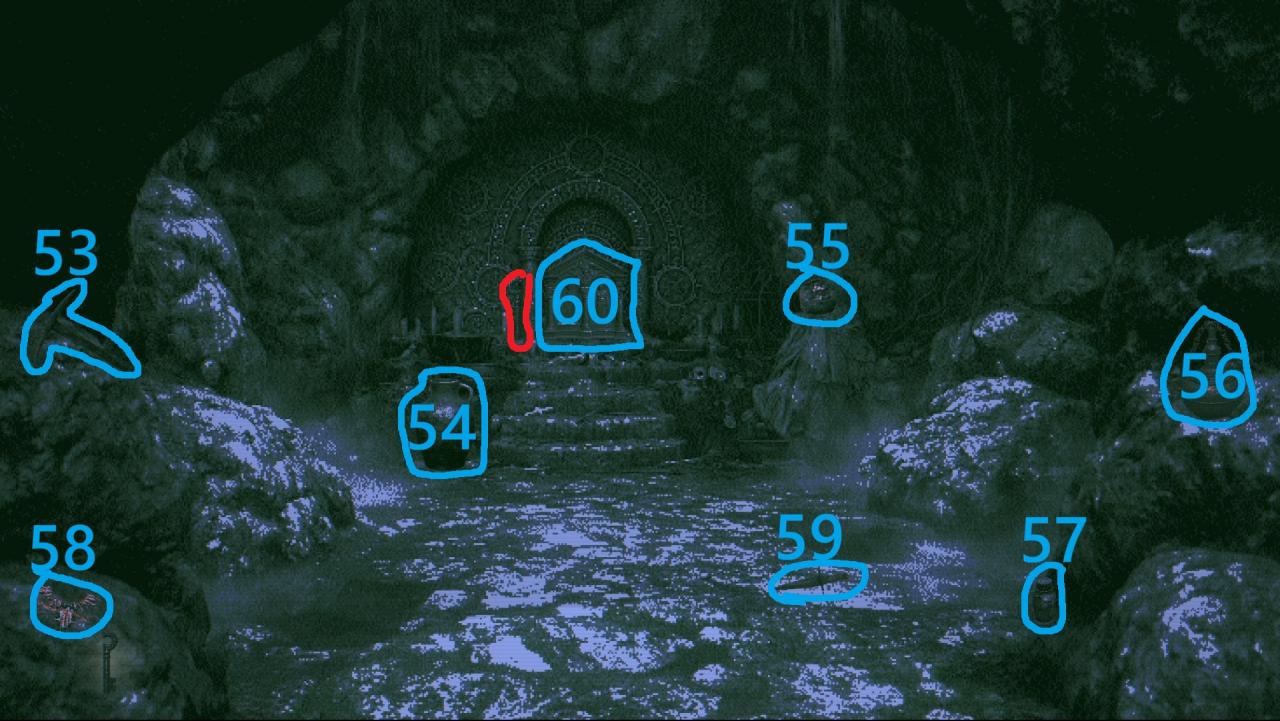
Path — 5 items.
Gate — 3 items.
Courtyard — 5 items.
Castle interior — 11 items.
Throne room — 6 items.
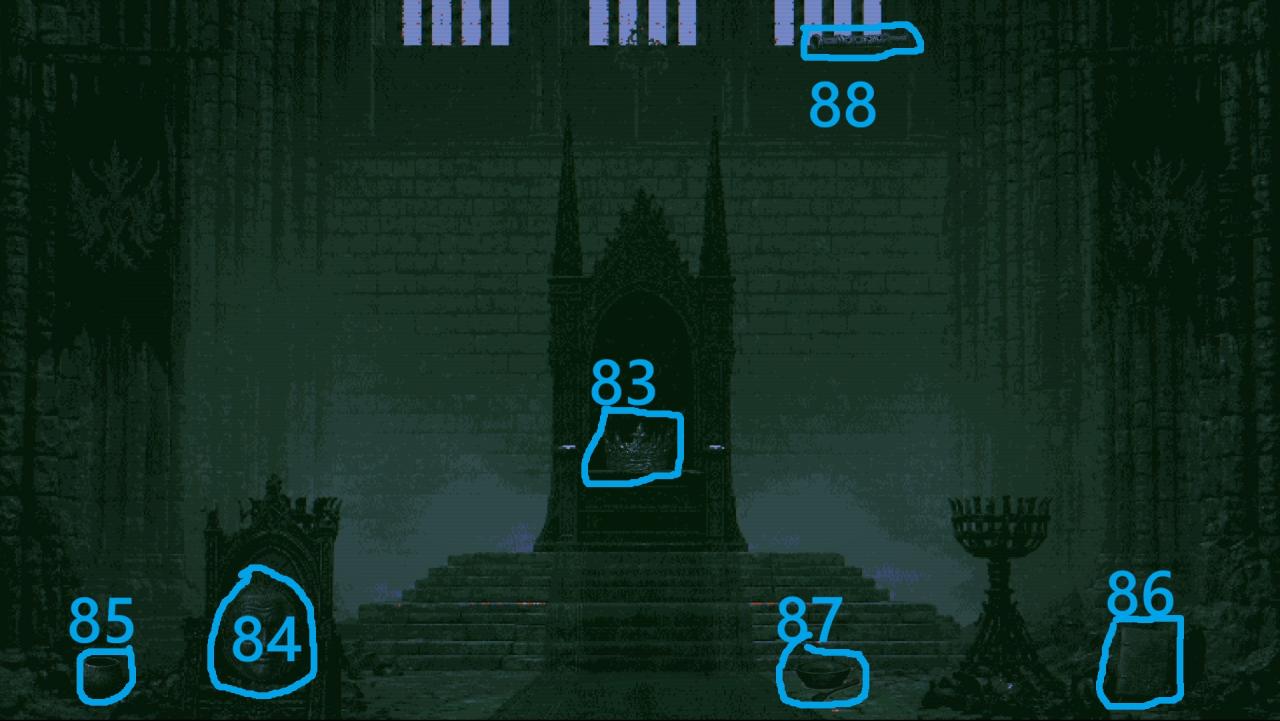
Altar / final area — 8 items.
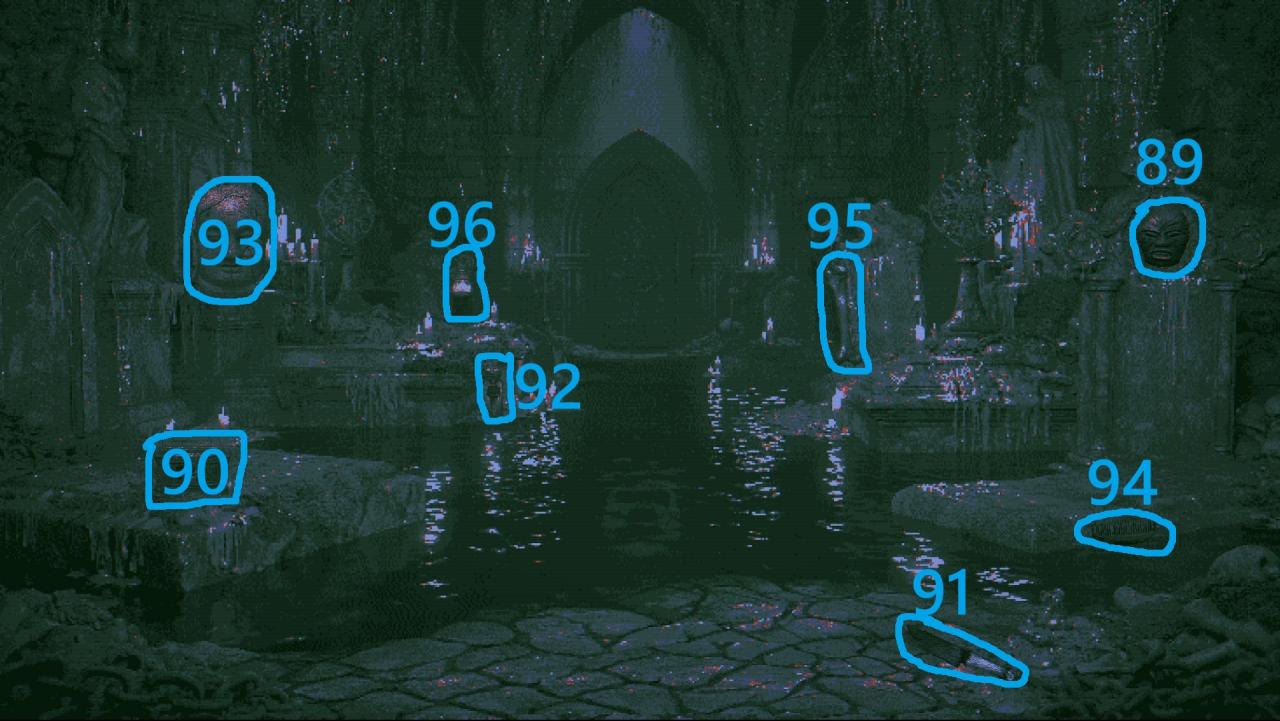
The Animals-Only Route
There are 7 animals total, and if you collect them before touching anything else, you’ll pop the achievement. I ran this on the rain run without a hitch, so it’s a safe order to follow.

Start at the Campfire Area and grab the Dead Beetle (#1). It’s the yellow circle in the shot below — and do not click anything else on this screen. The blue circles are the remaining artifacts, so leave them alone. I reused the same screenshot here deliberately, since the animal sits in the same frame.
On Forest Path 1, collect the Centipede (#2) and the Black Spider (#3) — both circled in yellow. Resist everything else on the screen.
Then Forest Path 2: the Cockroach (#4) and the Plague Rat (#5). Same rule — animals only.
Finally, on the Path to Gate, grab the Hedgehog (#6) and the Deformed Snail (#7). Once those two are in the bag, the achievement is yours.
All Three Endings
Finishing the game once nets you the [The Ritual] achievement.

The next time you land on the main menu, look at the bottom left — a little raincloud appears there.
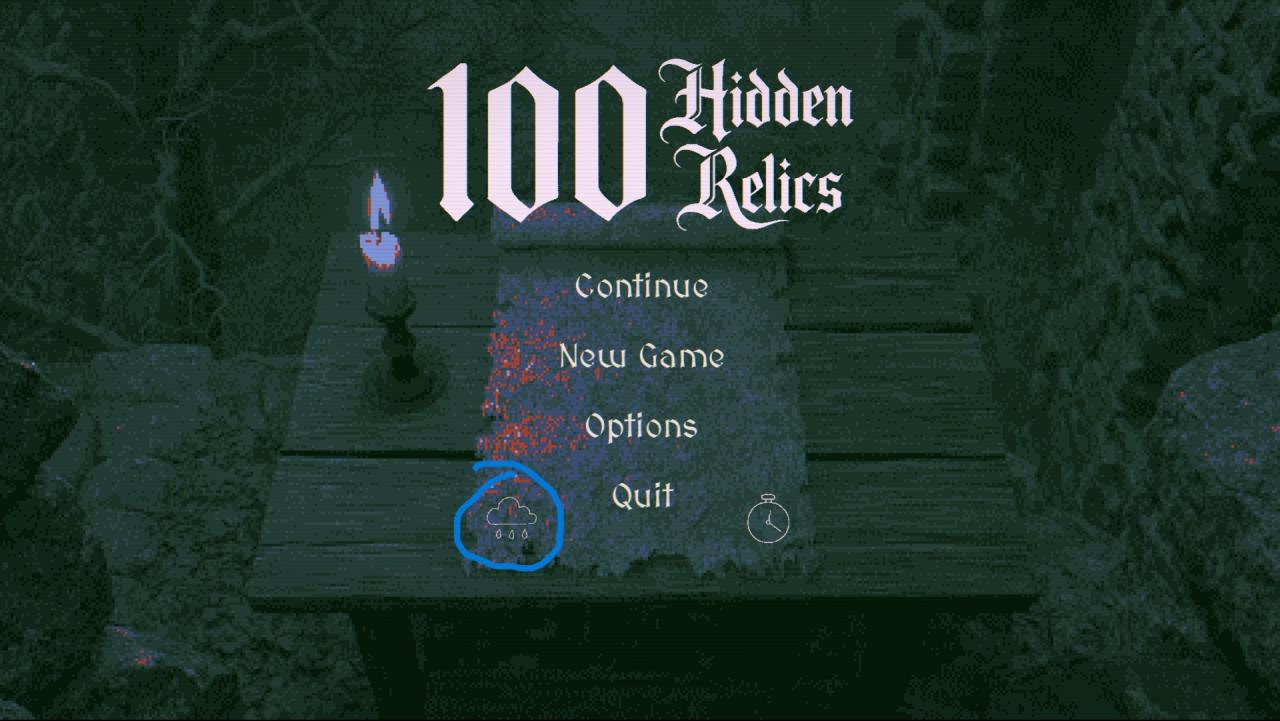
Click that cloud and you’ll start a fresh game, except it’s raining. Finish the run that way and you earn the rain ending achievement, [Come Rain or Invocation].

Come back to the menu again and a timer icon shows up in the bottom right.
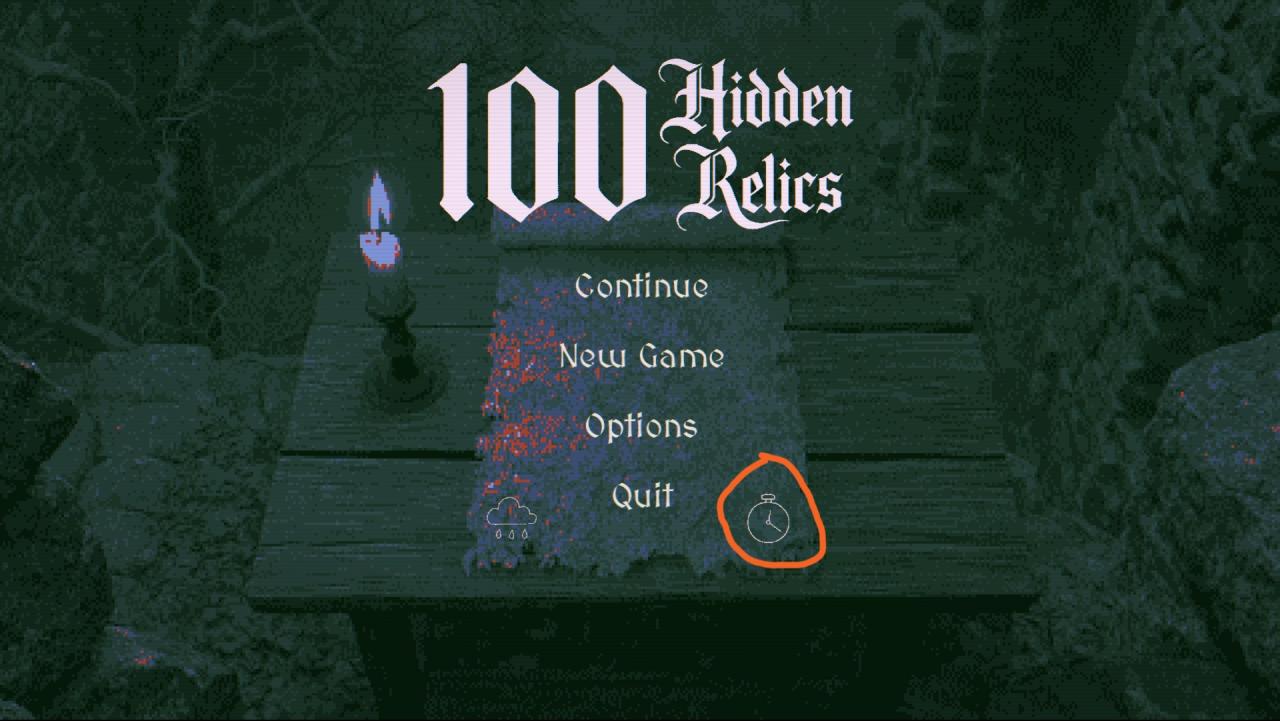
This final mode gives you 4 minutes to complete the entire game. It sounds intimidating on paper, but by now you’ve finished twice, so you should be more than capable. My advice: use the circled pics, skip every line of dialogue, and just move. I dropped one item on my attempt and had to double back to the forest path, but since you loop back to the start anyway, that’s a fine moment to sweep up anything you missed. Handily, the game flags the location of your missing item once you’re close to a full set, so [Better Swift Than Cursed] shouldn’t hurt too much.

Conclusion
That’s the whole lot — every artifact, all seven critters, and the trio of endings. Keeping track of this many relics was a genuine headache, so if you spot something I fumbled or missed, do let me know and I’ll get it fixed.