A complete guide for level 1. This doesn’t show you enemies, items, or secrets. However, it does show you where to go so if you ever get lost you can find your way!
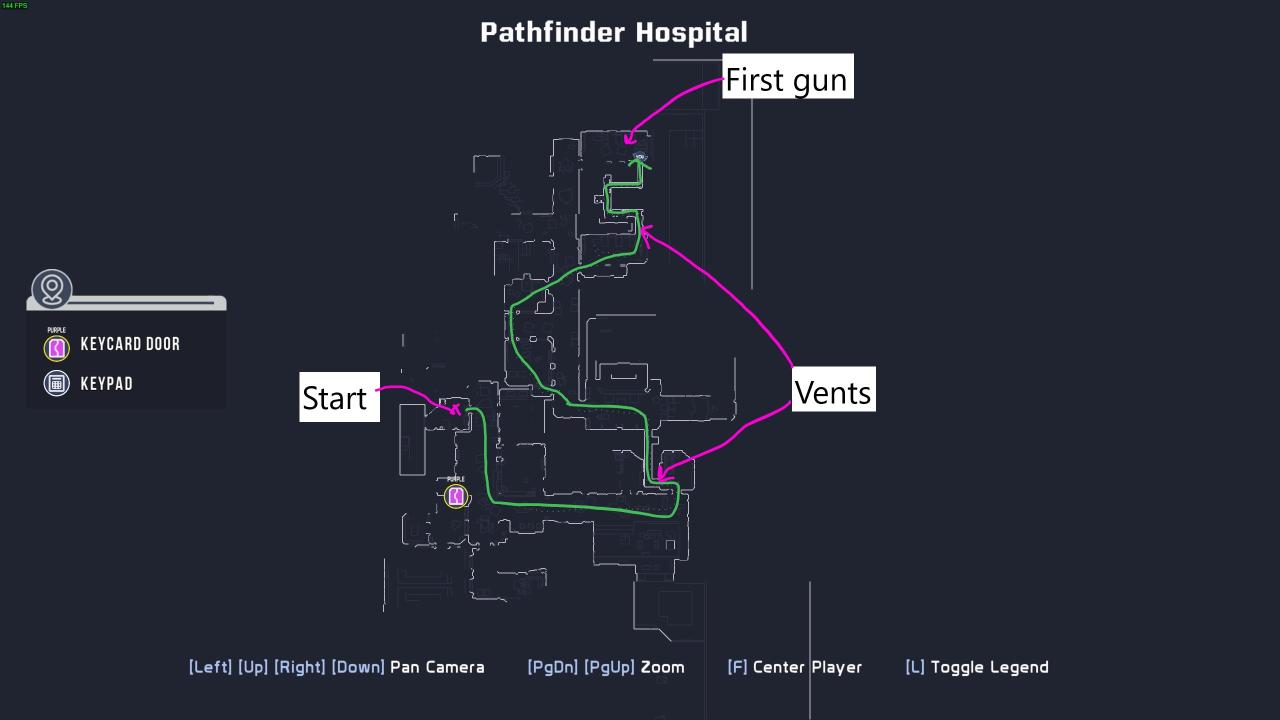
Part 1: Getting your gun
Part 2: Getting your suit
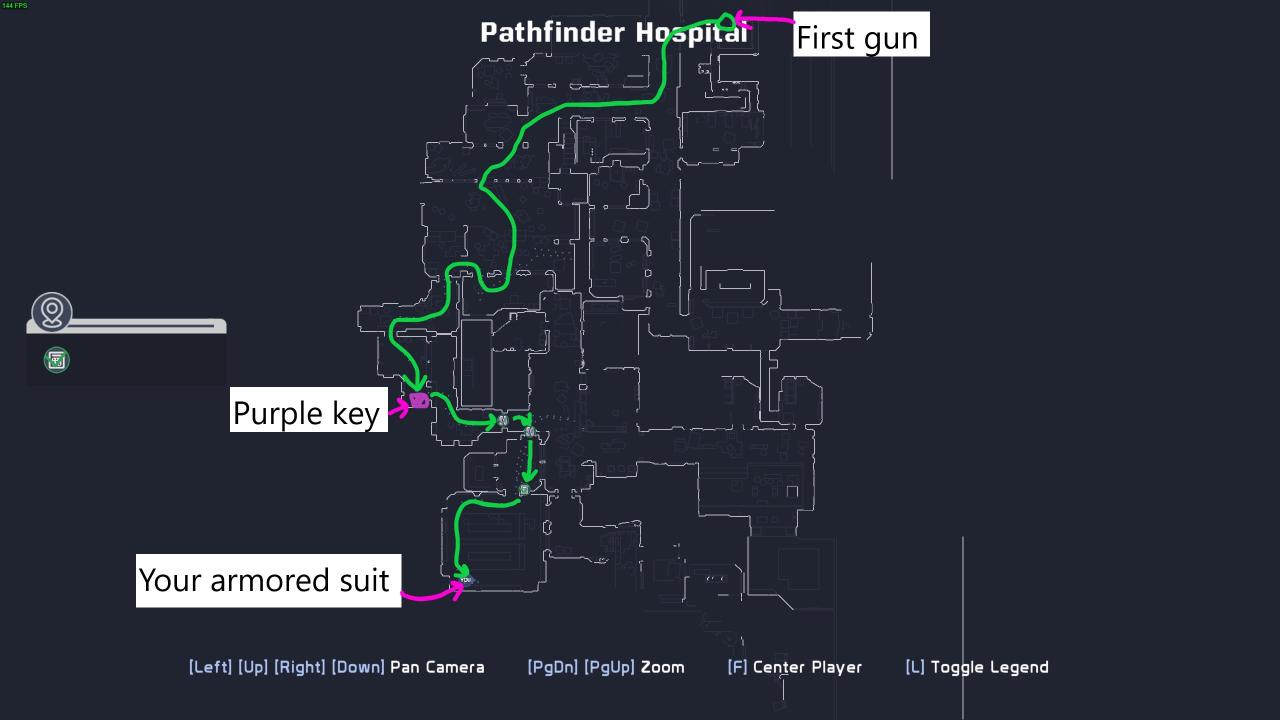
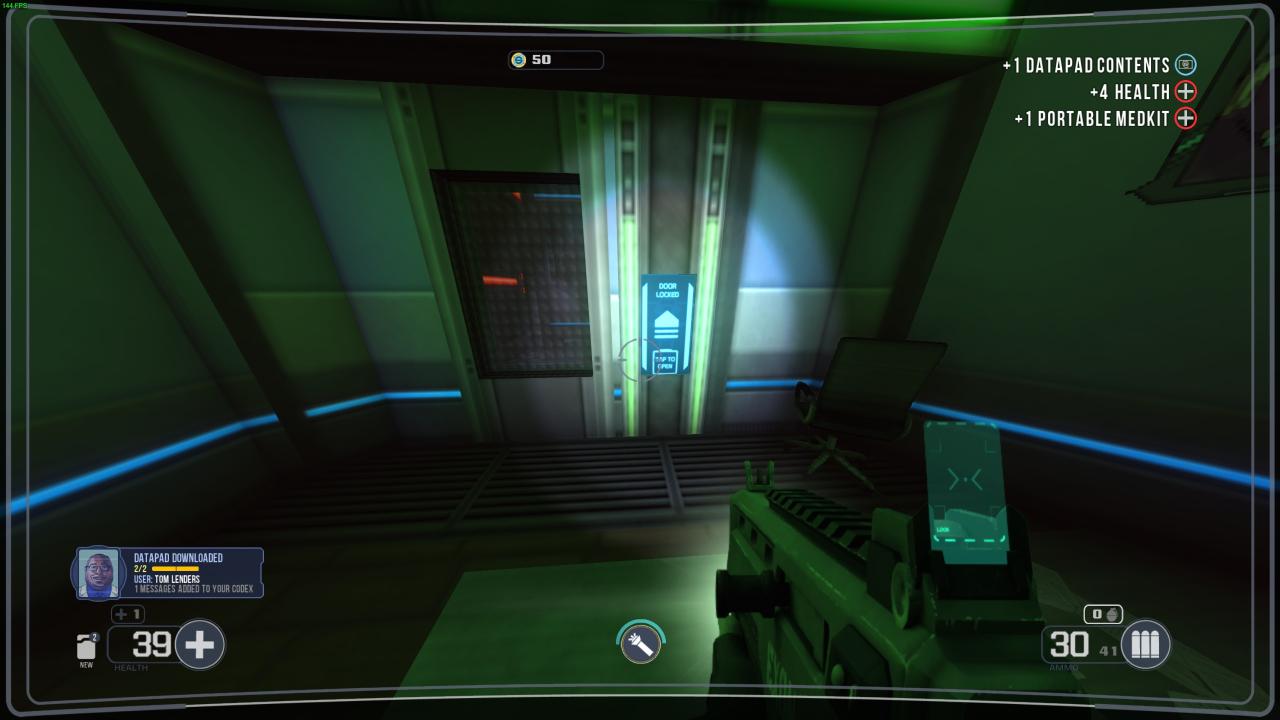
Get the purple keycard and go through the two purple doors. You will then find a door locked by a keypad. Read the PDA for the key and go grab your armor!
Part 3: Getting to the Atrium
The switch is in the room to the right of that door. After flipping the switch kill a few more enemies and head for the loading screen.
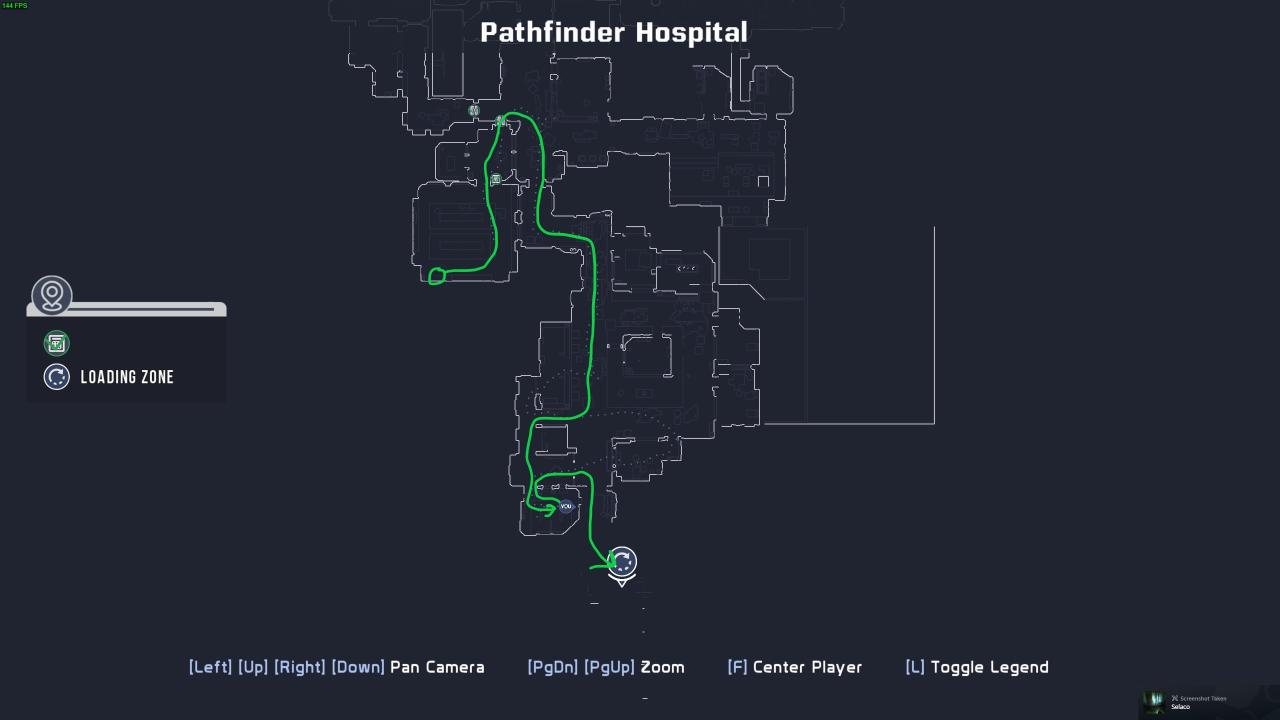
Once you’ve gone through the loading screen head towards the atrium and enter the large office on the left to flip a switch. This should open the doors across from you.
Part 4: Accessing the labs
The entrance to the elevator shaft.
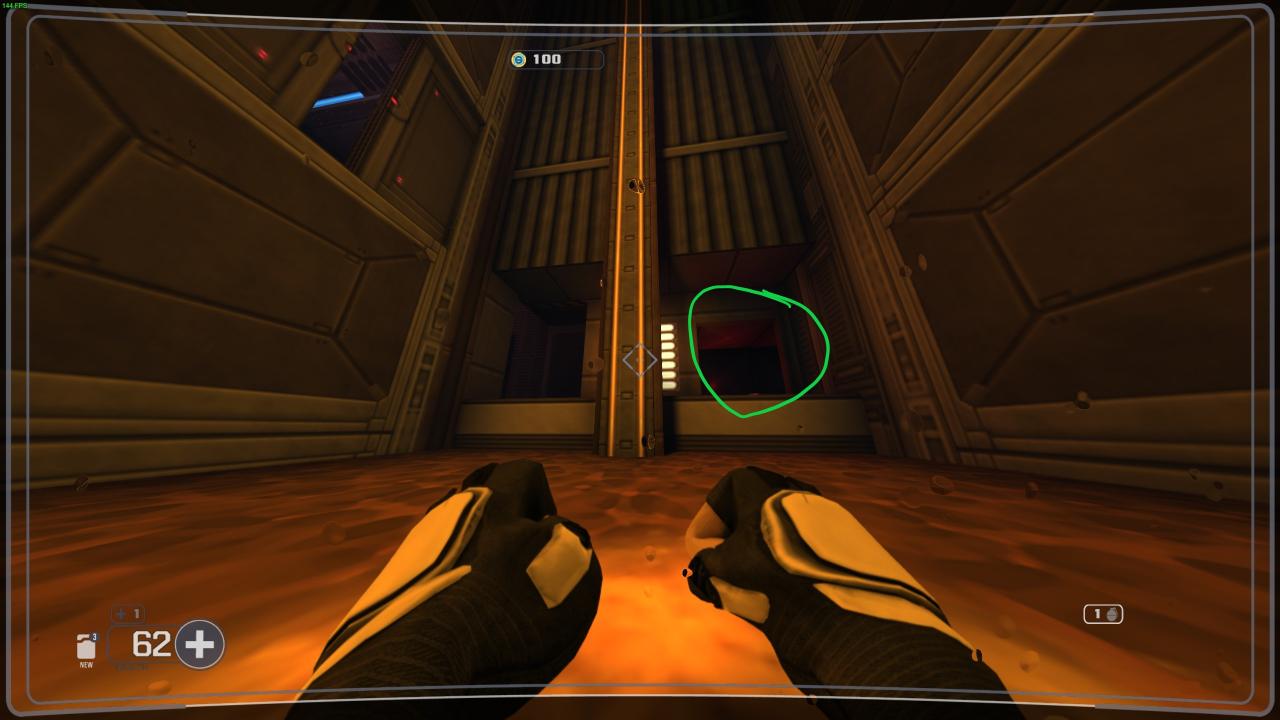
Here is the vent you need.
Finally the route into the labs. You will hit another loading screen here.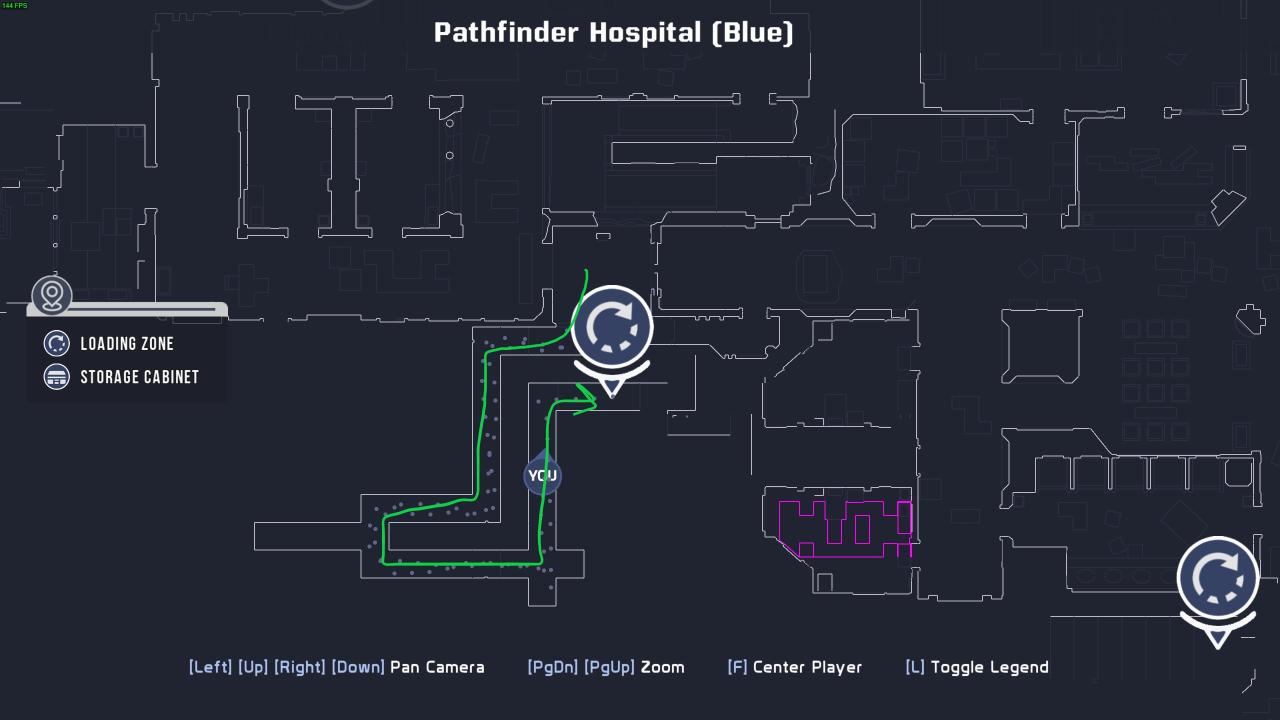
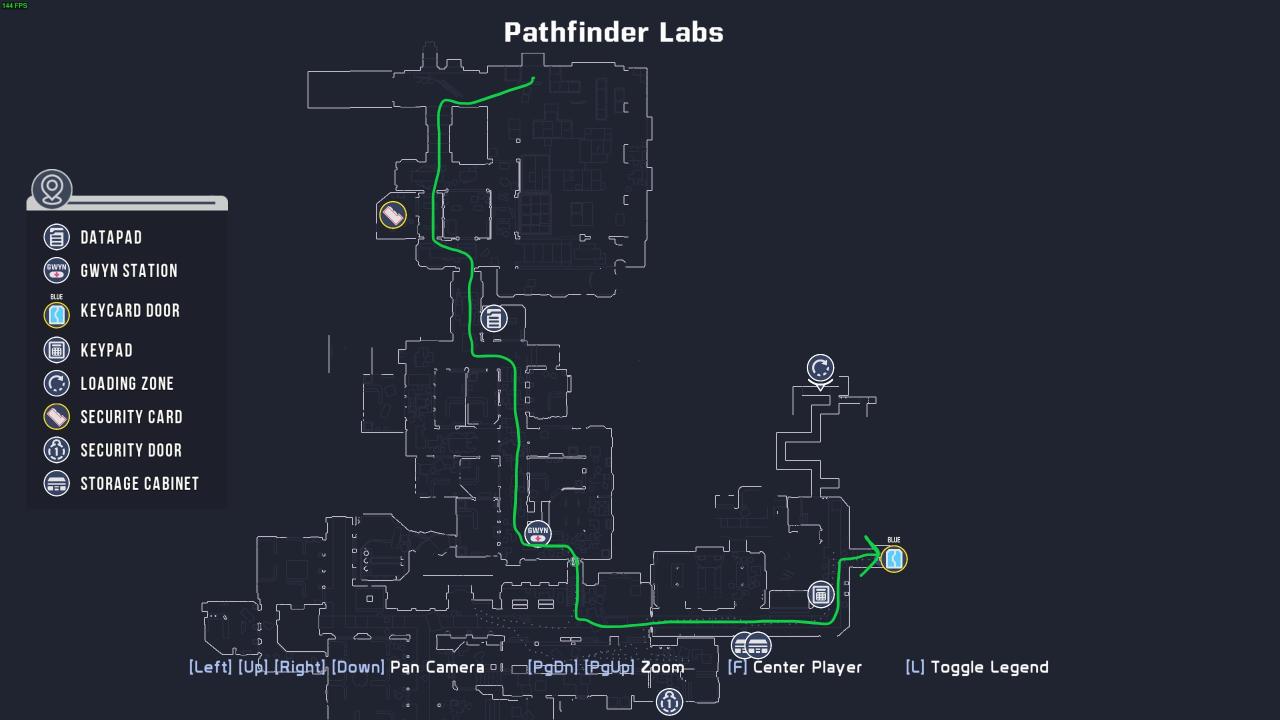
Part 5: the Labs

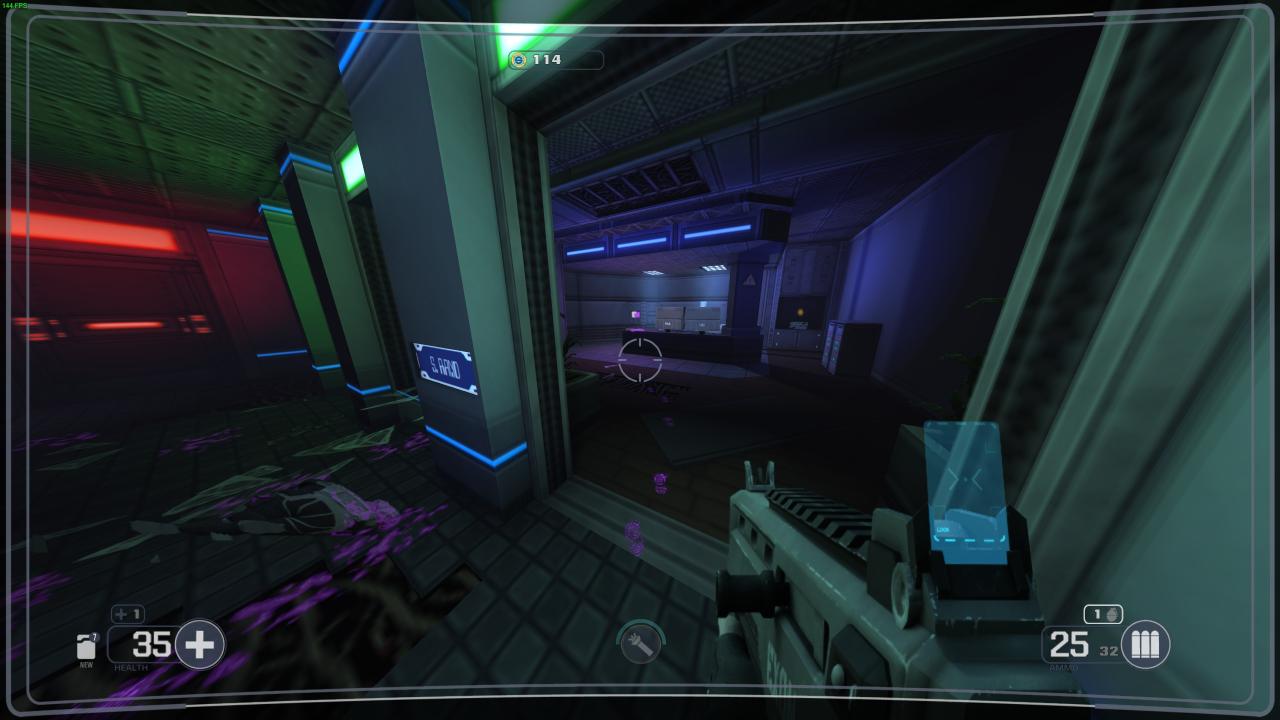
After the loading screen continue through the vents until you drop down into the labs. Once you’ve done so head along the main hallway until you find a purple key in an office.
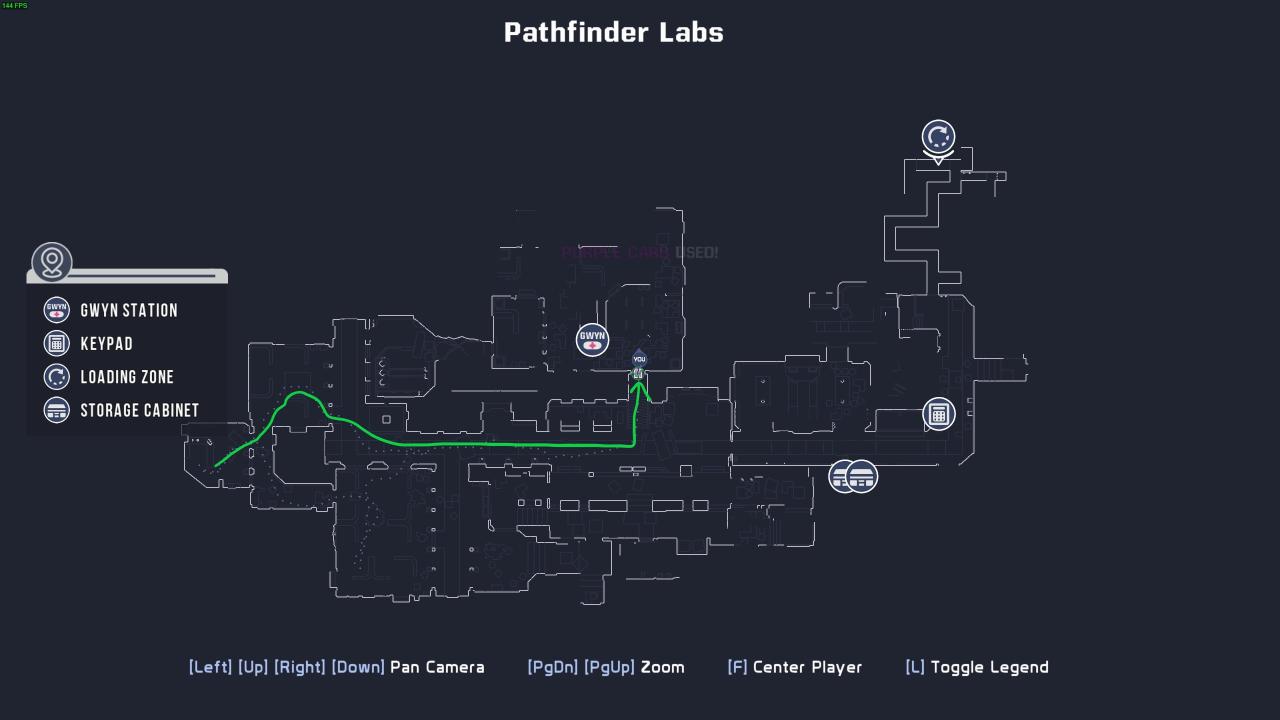 After acquiring the key double back through the purple door about halfway down the main hallway.
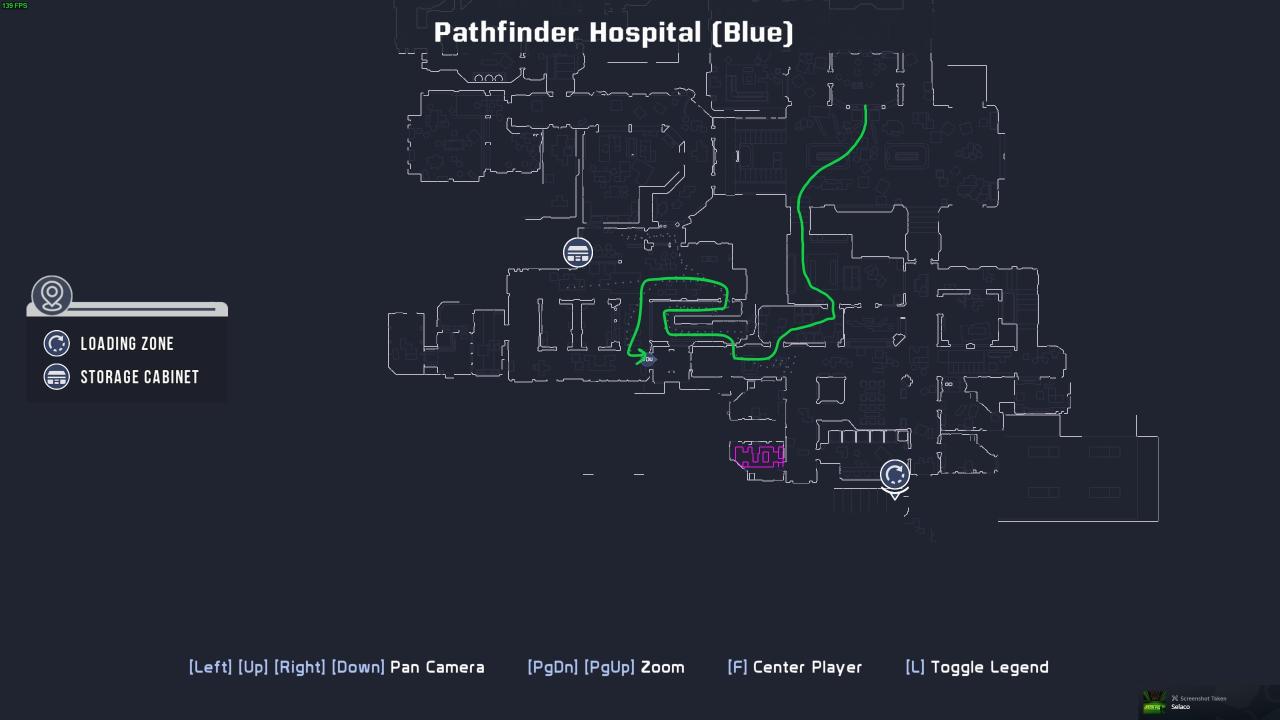
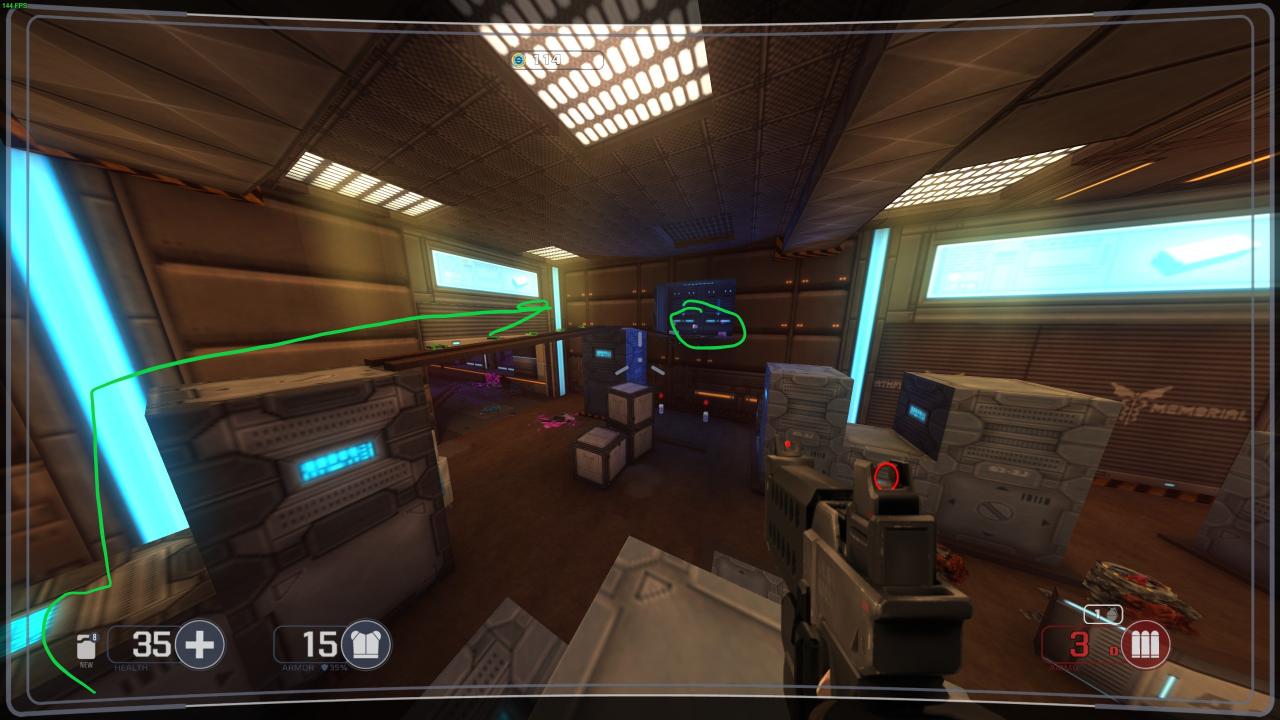
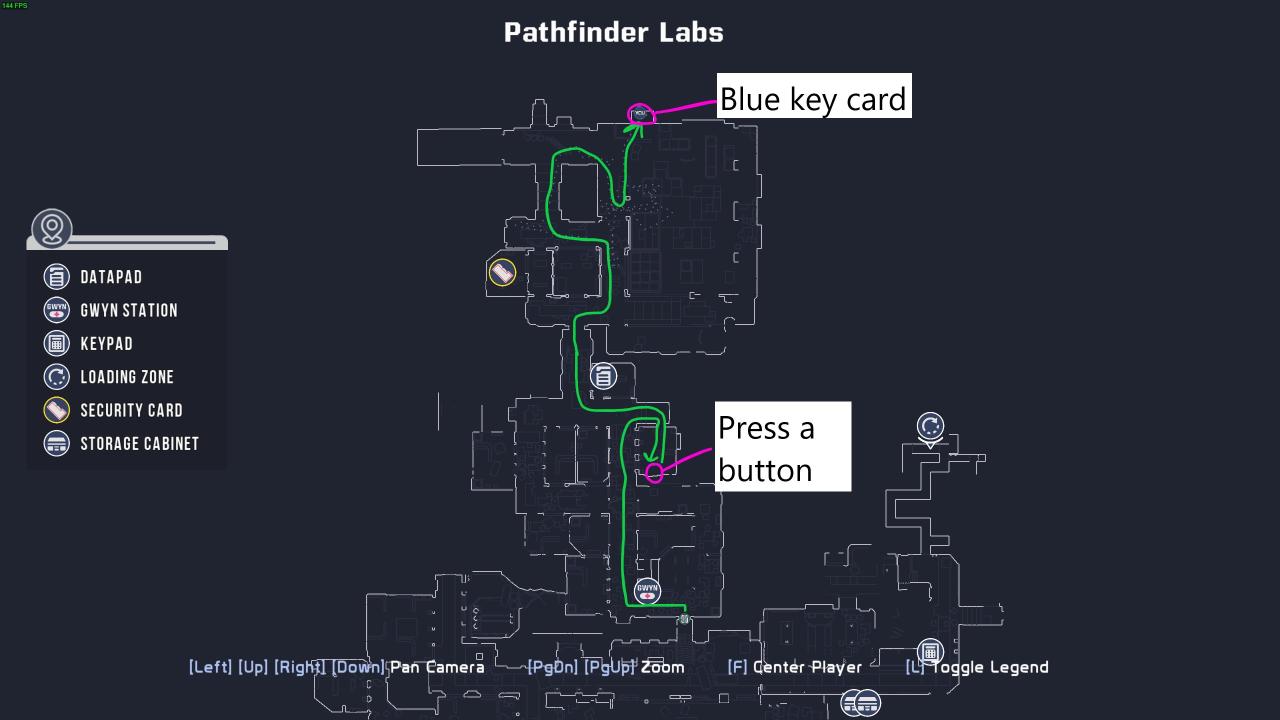 Once you’ve gone through the purple door you’ll find yourself in some offices where a birthday was celebrated. Fight your way to the end and enter the office on the right of the birthday boys. There you will find a switch that will let you into the warehouse area. Inside the warehouse will be a climable route taking you to a blue key. Grab that!
 Once you have the blue key head back to the start of the level where you will find a blue door. Go through there and then up the stairs which will trigger a loading screen.
Almost done!
Part 6: Ending the lockdown and the big fight!
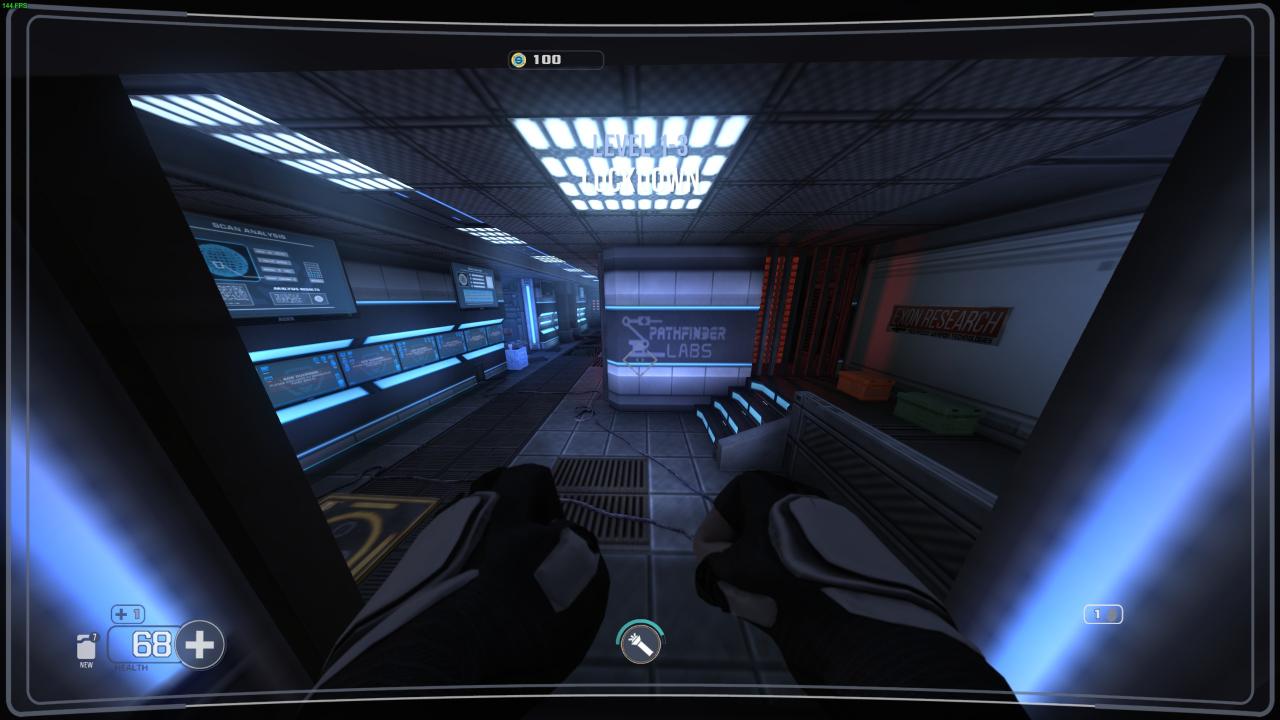
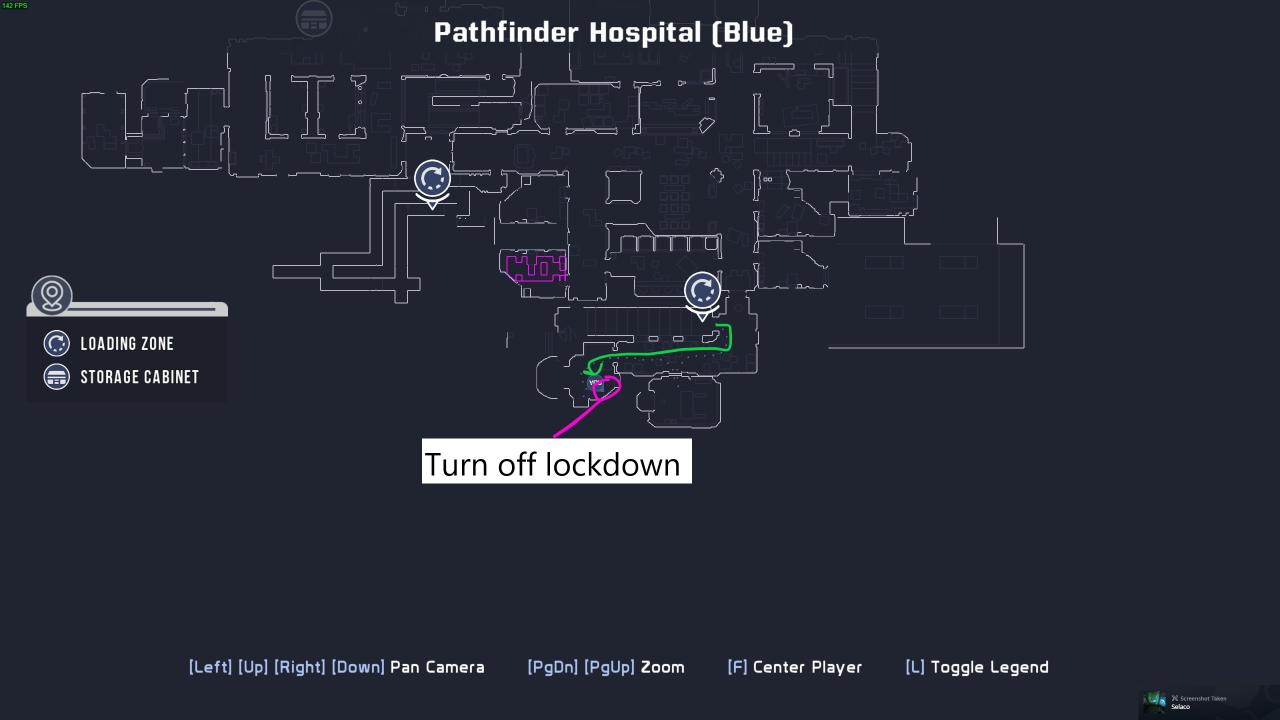 After exiting the loading screen turn to your right to find a room with the lockdown switch. Turn it off!
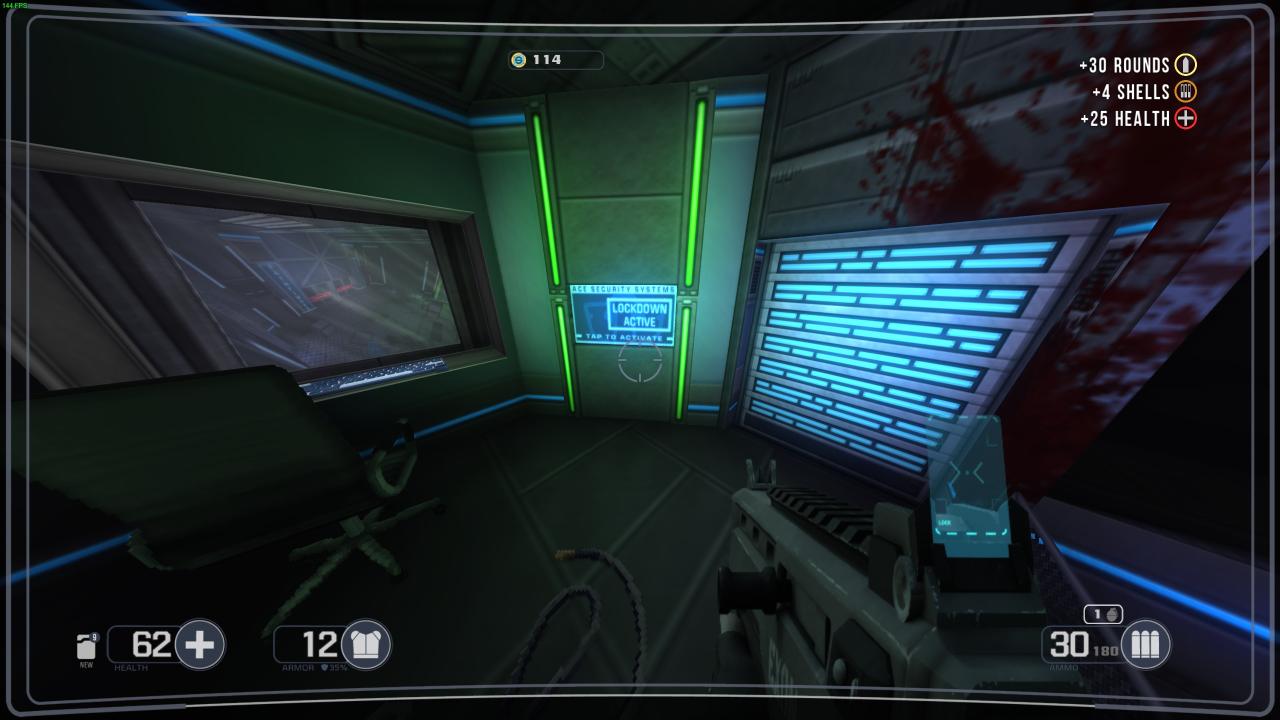
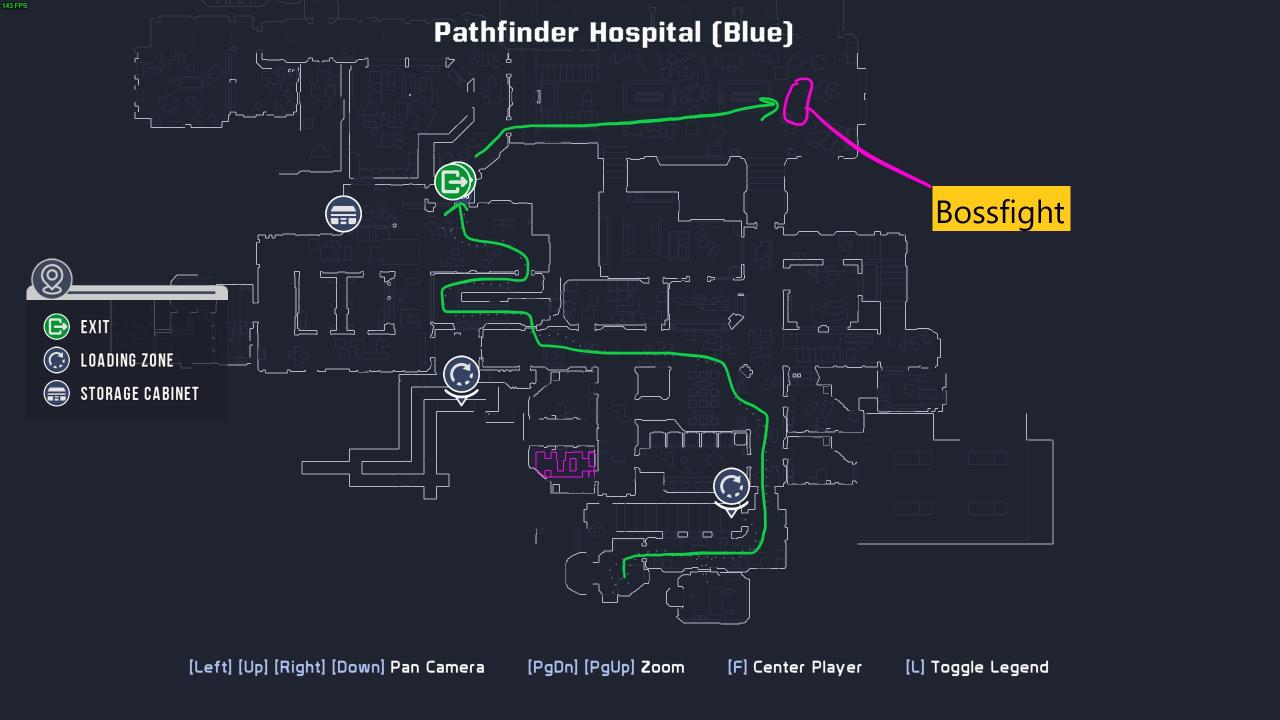 Once the lockdown is lifted head back to the atrium. This route will be new and as you walk it a wall will explode letting you through.
Once you are back in the atrium walk to the far end to trigger the fight. Remember to quick-save! This is also a great time to use that shotgun you found (you did find it, right?).
Part 7: Entering level 2
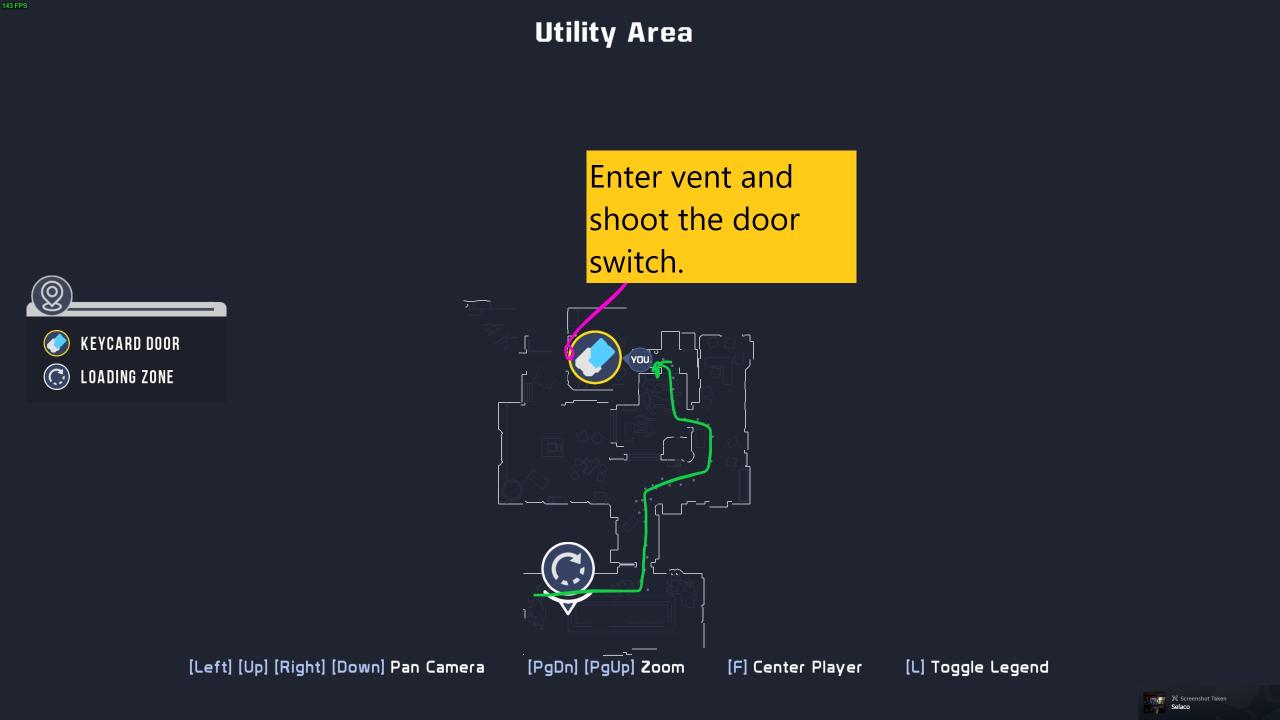
After the bossfight continue forward to get the end of level screen. Afterwards move into this new room and jump into the vent. Heading left in the vent will give you a view of a room with a blue keycard. Here you should shoot the doorswitch.
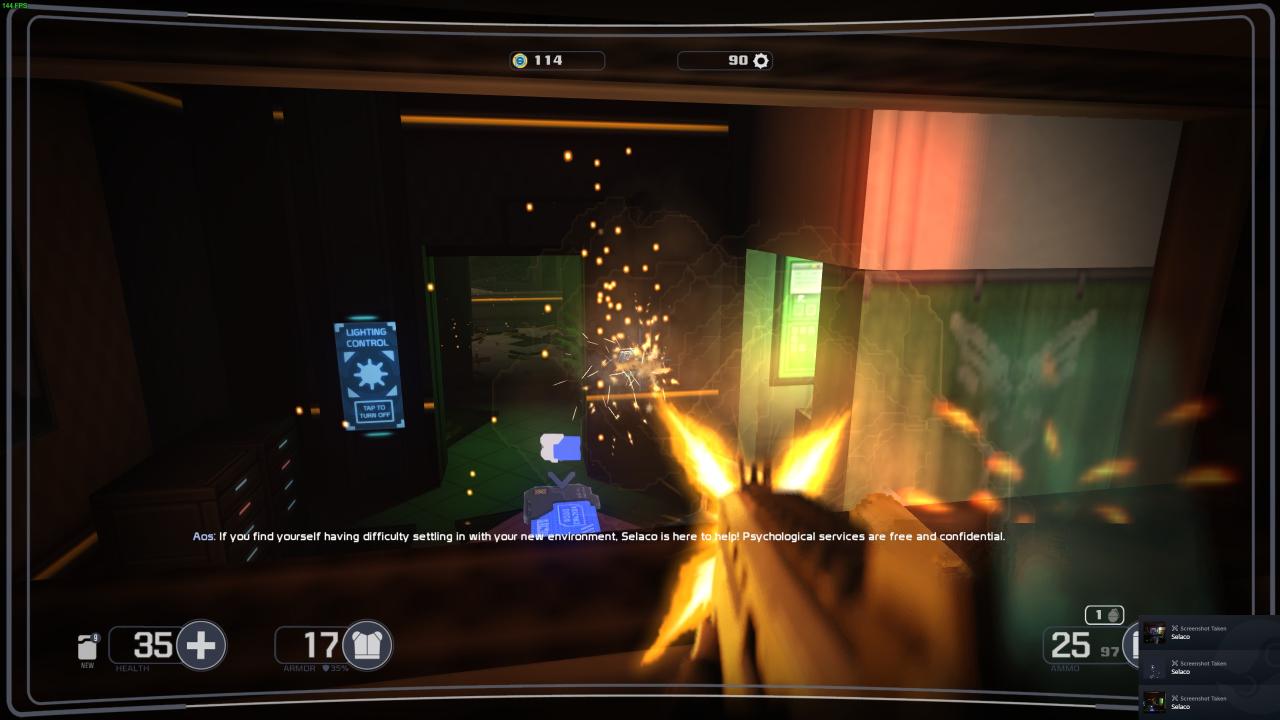
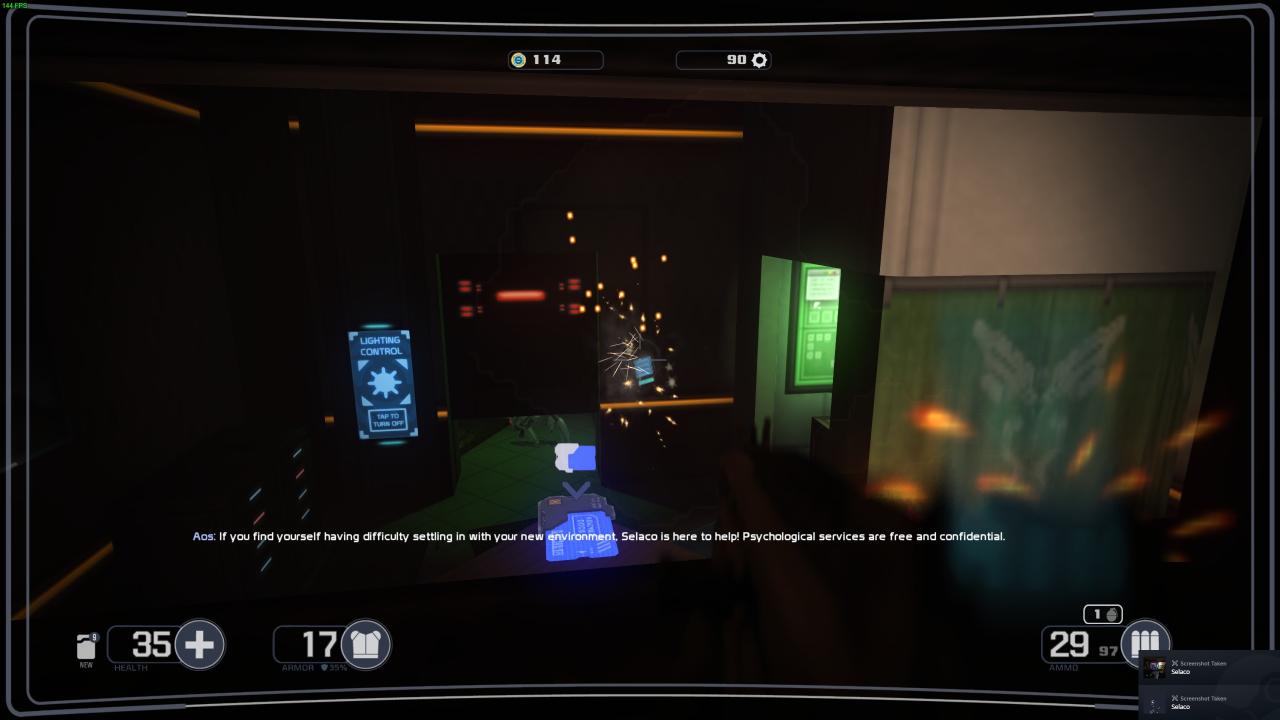
Doing so will open the door. Head in and grab the blue key. Once you’ve done that head to the right side of the area and go through the blue door.
And there you have it! This is easily the most confusing part of the game and things get better from here on out. Also remember that you can head back into the 1st level to collect secrets and resources you missed if you are low on equipment.