
Farming in Dragon Shelter is one of those systems that looks simple until you realize half the crops won’t grow without shade, water, or a specific elemental plot. I put this together for anyone who’s just picked up a Shovel from Rufus and wants to know what actually matters before they waste a whole season on dead seeds. Whether you’re trying to fill standing orders or just keep your kitchen stocked, this covers plots, tools, seasons, crops, foraging, and the seven livestock you can raise.
I wrote this up because a lot of the in-game information is buried in tooltips and scattered shop menus, and it’s easy to plant the wrong thing at the wrong time. I’m not claiming this is the final word on anything — the game has been patched more than once, and prices and recipes shift with updates. Treat this as a starting point and adjust as things change.
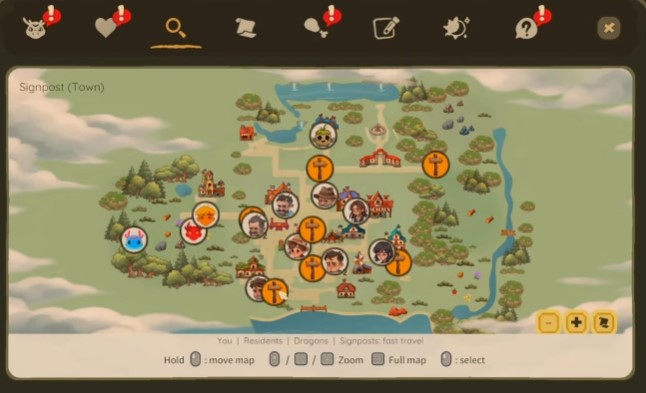
The Basics of Farming
The core loop is simple: dig a plot with your Shovel (or use an existing one), plant a seed, water it every day unless rain or a sprinkler handles it for you, then let it grow and harvest once it’s fully mature.
If you follow the main quest at the start, you’ll be directed to buy a Shovel from the Merchant Rufus. Gardener Leah will hand you a Watering Can so you’re not completely stuck on day one. I’d recommend getting both sorted before you plant anything, because trying to farm without a watering can is just an exercise in frustration.
Plots, Tools, and Gardener Leah
You can dig and un-dig plots freely with your shovel. Leave one fallow and there’s a chance a shrubbery weed will sprout on it. I cut those down with an axe and get Hay out of it, which is a nice little bonus if you’ve got livestock. If that weed growth bothers you, you can ask a dragon with the flute to turn a plot elemental — the weed doesn’t seem to grow on those, but the trade-off is that watering the plot now requires that specific dragon because of the elemental attachment. The plot types are Normal Plot, Water Plot, Fire Plot, Earth Plot, and Air Plot.
Gardener Leah sits in the middle of town. She’ll sell you goods and craft farming-related items, though prices and recipes can change as the game updates. The Vase and Bouquet work together as house decoration if you want something pretty on your shelves.
Seasons and How Crops Behave
There are four seasons, and crops are tied to them — winter is the exception where nothing grows normally. If you hover over seeds in your inventory or in Gardener Leah’s shop, you’ll see tags showing which season a crop will grow in. Each season runs 14 days, tracked as Day 1 through Day 14.
The icons matter here. A crop that can’t grow in the current season will show bubbles — one for Spring, one for Winter, or whichever season it’s incompatible with. Once I learned to check those tags before planting, I stopped wasting seeds entirely.
Fertilizers and Other Growth Aids
Fertilizers let crops grow out of season. As of the 9/30/2026 update they last 2 days and nights instead of 1, which made them considerably more useful. You can craft them at the Gardener, or if you’re lucky you’ll dig some up as treasures in the wilderness area at the far right edge of town.
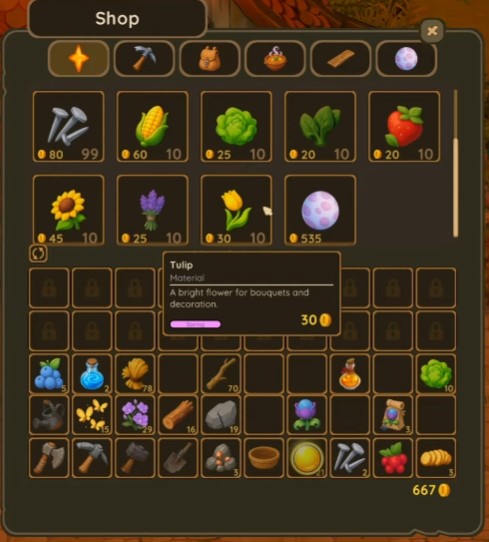
Beyond fertilizers, there are several boons that help crops grow:
- Sprinkler — waters directly adjacent plots automatically. The upgraded Aura Sprinkler also hits diagonally adjacent plots.
- Greenhouse — place it on any plot and the crop there grows year-round. It works on a Water Plot too.
- Awning — provides shade to adjacent plots including diagonals. Required for certain crops like Whispering Moss and a couple of Earth-Plot crops. You’ll see a shade icon when a crop needs it.
- Plant Lantern — during stormy days the whole farm is covered in shade, and most crops need light. This lantern provides light in the same radius as the Aura Sprinkler. The light icon is the opposite of the shade icon.
Full Crop Reference
Below is the complete crop list with seed costs, sell prices, growth times, and season availability. The “Other Req.” column covers elemental plot needs or shade requirements — that’s the column I check first before buying seeds.
| Crop | Seeds ($) | Crop ($ each) | Days to Grow | Spring | Summer | Autumn | Other Req. |
|---|---|---|---|---|---|---|---|
| Cabbage | 35 | 35 | 3 | – | – | x | |
| Carrot | 25 | 20 | 3 | x | x | x | |
| Corn | 30 | 35 | 4 | – | x | – | |
| Honey Melon | 45 | 45 | 3 | – | x | x | |
| Lavender | 15 | 15 | 3 | x | – | – | |
| Leaf Lettuce | 30 | 15 | 2 | x | – | – | |
| Moon Grapes | 55 | 25 | 4 | – | – | x | |
| Potato | 25 | 10 | 3 | x | x | x | |
| Pumpkin | 40 | 25 | 3 | – | – | x | |
| Spinach | 35 | 10 | 3 | x | – | – | |
| Strawberry | 45 | 20 | 4 | – | x | – | |
| Sun Peach | 50 | 25 | 5 | – | x | x | |
| Sunflower | 40 | 25 | 3 | – | x | – | |
| Tomato | 35 | 20 | 3 | – | x | – | |
| Tulip | 30 | 15 | 2 | x | – | – | |
| Wheat | 10 | 10 | 2 | x | – | – | |
| Whispering Moss | 50 | 20 | 3 | x | – | – | Shade-loving |
| Zucchini | 35 | 25 | 4 | – | – | x | |
| Mist Berries | 40 | 20 | 3 | x | – | x | Water |
| Moon Rice | 35 | 15 | 3 | x | – | x | Water |
| Pearl Seaweed | 40 | 20 | 2 | x | – | x | Water |
| Water Flower | 35 | 30 | 2 | x | – | x | Water |
| Flame Rose | 30 | 30 | 2 | x | x | x | Fire |
| Dragon Garlic | 40 | 45 | 3 | x | x | x | Fire |
| Flame Pepper | 40 | 35 | 3 | x | x | x | Fire |
| Magma Bean | 40 | 15 | 3 | x | x | x | Fire |
| Wise Mushrooms | 60 | 30 | 3 | – | x | x | Earth, Shade-loving |
| Emerald Pea | 45 | 10 | 3 | – | x | x | Earth |
| Stone Nut | 85 | – | 4 | – | x | x | Earth |
| Ancient Root | 60 | 80 | 3 | – | x | x | Earth, Shade-loving |
| Cloud Cotton | 45 | 30 | 4 | x | x | – | Air |
| Ether Orchid | 15 | 40 | 2 | x | x | – | Air |
| Skyberry | 55 | 20 | 3 | x | x | – | Air |
| Star Mint | 55 | 20 | 2 | x | x | – | Air |
Foraging Around the Farm and Wild Area
You can find most foraged goods on your own farm until you clear it out. After that, you’ll need to head to the wild area at the bottom-right of town. Here’s what grows where:
- Berry Bush — gives Berries. Eatable or usable in recipes. Wild bushes are in the bottom-right of town, and you can buy seeds after unlocking the Forage Collection at the Museum.
- Memory Nut Bush — gives Memory Nuts. Same idea as berries, but they regrow more slowly, so don’t count on them for constant supply.
- Wilderness Herbs — the purple ones. They grow in wild areas, so once your farm is cleared they’re only in the bottom-right wild area.
- Grasses — whack the twiggy weeds or bigger grasses to get Hay.
- Dragonflies and Others — glowing butterflies and dragonflies found only in the wild area to the bottom-right of town. Just walk up and grab them. As of the Sept 30, 2026 patch, some crops also spawn in this area and give 1-2 when picked.
Livestock and Rancher Konrad
There are 7 livestock you can buy from Animal Keeper/Rancher Konrad. Every one of them except the Caterpillar has an unlock requirement. Livestock need an enclosure to live in and food to produce materials the next day. Each enclosure holds 2 livestock, and Konrad can craft them for you.
Caterpillar (Starting Livestock)
Habitat: Caterpillar Enclosure
- 10x Log
- 10x Stone
| Livestock | Unlock | Price | Food | Product(s) |
|---|---|---|---|---|
| Caterpillar | – | 115 g | Potato (and Empty Flask) | Silk and Caterpillar Light |
Water Livestock: Jellyfish and Axolotl
Habitat: Moon Aquarium
- 2x Plank
- 2x Water Essence
- 2x Pearl Seaweed
| Livestock | Unlock | Price | Food | Product(s) |
|---|---|---|---|---|
| Water Jellyfish | Water Dragon | 225 g | Moon Rice | Sticky Thread |
| Axolotl | Museum Livestock Collection | 225 g | Moon Rice | Dew |
Fire Livestock: Fire Salamander and Magma Beetle
Habitat: Fire Terrarium
- 1x Copper Ingot
- 1x Clay
- 1x Nails
- 2x Fire Essence
- 1x Slime Thread
| Livestock | Unlock | Price | Food | Product(s) |
|---|---|---|---|---|
| Fire Salamander | Fire Dragon | 285 g | Magma Beans | Smoldering Coal |
| Magma Beetle | Museum Livestock Collection | 285 g | Magma Beans | Red-Hot Chitin |
Earth Livestock: Earth Mole and Stone Eater
Habitat: Underground Home
- 3x Hardwood Plank
- 2x Earth Essence
- 2x Ancient Root
| Livestock | Unlock | Price | Food | Product(s) |
|---|---|---|---|---|
| Earth Mole | Earth Dragon | 340 g | Emerald Peas | Bristle |
| Stone Eater | Museum Advanced Livestock Collection | 340 g | Emerald Peas | Stone Oil |
Air Livestock: Hummingbird and Sheep
Habitat: Air Aviary
- 3x Hardwood Plank
- 3x Iron Ingot
- 3x Air Essence
- 3x Cloud Cotton
| Livestock | Unlock | Price | Food | Product(s) |
|---|---|---|---|---|
| Air Hummingbird | Air Dragon | 455 g | Skyberries | Air Hummingbird Feather |
| Cloud Sheep | Museum Advanced Livestock Collection | 455 g | Skyberries | Sky Wool |
Related Posts
Things I Wish I’d Known Sooner
Wheat and Potatoes are the crops I lean on hardest. Wheat especially shows up in a ton of food recipes and orders, and it’s cheap to seed at only 10 g. Potato is similarly versatile at 25 g for seeds, so I keep a steady patch of both running.
Livestock pens take up slightly less space when you face them left or right instead of forward. You can rotate them, so if space is tight, turn them sideways.
If you want to dump an entire stack on a merchant at once, hold Shift while clicking the stack. This saves a ridiculous amount of clicking when you’re clearing out inventory.
Invest in Sprinklers as early as you can. They free up the energy you’d otherwise spend watering every day, and that energy is much better spent in the wilderness gathering wood and other materials for your kitchen and for filling orders. The Aura Sprinkler upgrade is worth it if you’re running a large farm.
Here’s a small trick that saved me from weed headaches: toss a seed onto a plot before the season changes if you don’t plan to grow anything there, or leave a fully-grown crop sitting on the plot. As of right now, seeds and mature plants don’t go bad — which honestly feels refreshing and a bit more casual than most farming games. Thanks, devs.
If you’re chasing the rest of the game’s milestones alongside farming, there’s a 100% achievement guide worth bookmarking so you can plan what to plant and raise with those goals in mind.