A comprehensive guide on a “support” build that will solo-carry games.
tl;dr
You ress who falls
You run while doing damage
You always have a way to ‘insta go to safety’ (“Safety”, but we’ll get there)
How?
Well, that is what this guide is for.
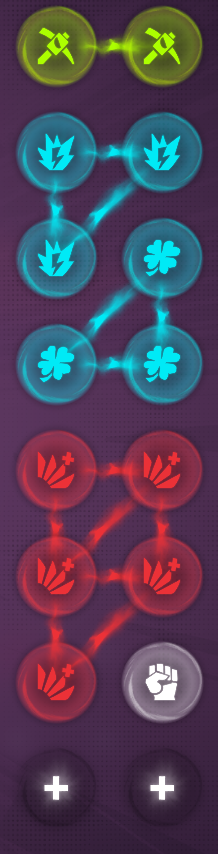
1 Legendary Joker for the character
(Slots for + 2 Fine Jokers for the character are welcome)
Lv 4 Voodoo
Lv 12 Lightning
Lv 4 Cactus (But prefered lv 35)
Why read this
Idk, cuz I’m funny? Why are you here anyway, I’m not forcing you.
However…

I’m currently prestiege 4. But I use this build since before my first prestiege.
So I’ll be toning it down and later giving ideas on how to ‘complete’ the build after prestiege.
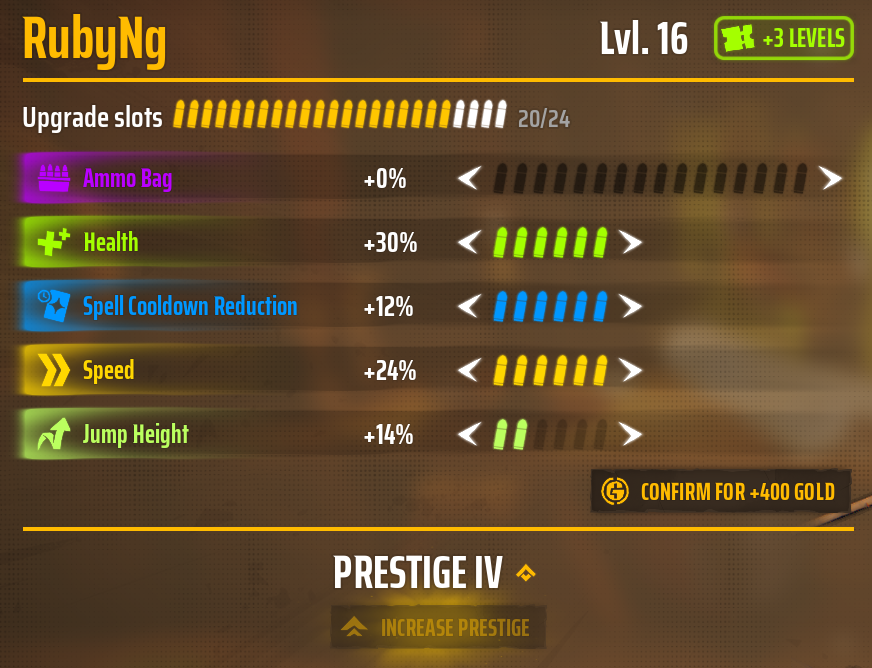
In my opinion:
Speed > Health > Spell Cooldown > Jump Height > Ammo Bag
Let me go by why:
Speed = you keep running, they don’t reach you as easily, you take less damage.
Health = you withstand more mistakes
Spell Cooldown = You revive downed allies faster and summon cactus faster.
Jump Height = You keep your speed in the air, so more air time is better movespeed (but not by much)
I use and highly recomend using Boomerang, so Ammo Bag doesn’t really do anything for this build.
Because of this:
Got it? Good then let’s move on.
“Wait- Ruby.. But why?”
Ok, fine.
 Let me explain like this:
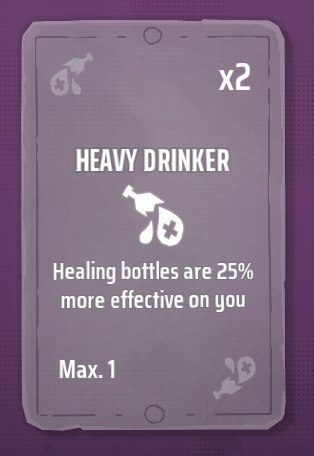
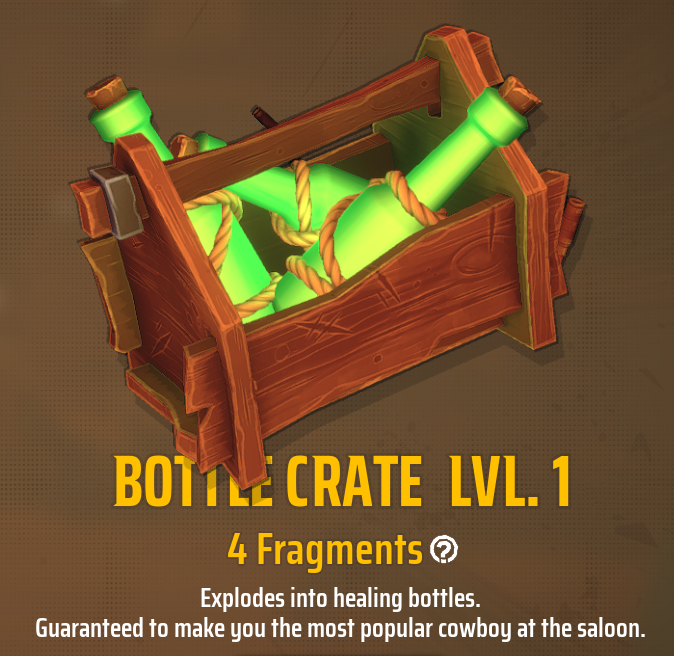
Bottle Crate:
– 3 ‘Healing bottles’ every time you use it.
(From now on I’ll refer to it as ‘Booze’)
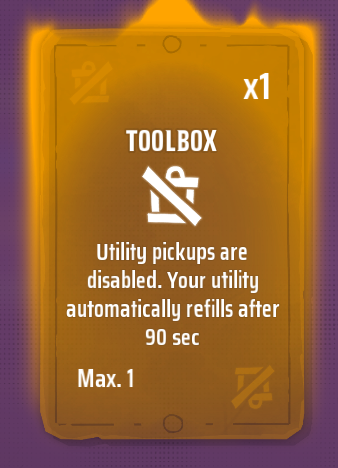
Toolbox:
– As the current build of the game it only starts ticking down the 90s cooldown when you used all your utilities, but you get all utilities back at once.
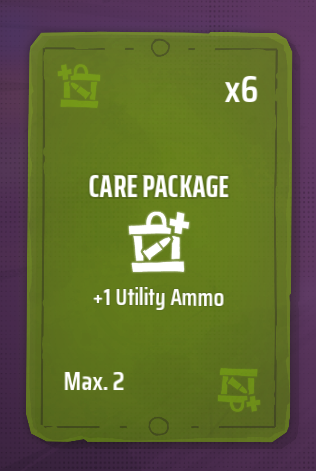
Care Package:
– Start with one extra utility per care package.
(So two extra)
Therefore you have 9 Booze every 90 seconds if you instantly use all 3 charges.
That is the CORE of the build.
“But Ruby, you can’t take the Booze with you and you can’t aways be there..”
Think with portals. We’ll get there, stop rushing me.
Weapon of choice – Ol Reliable
Why? No ammo.
So throw, run. Repeat.
VERY GOOD handling hordes and keeping you safe
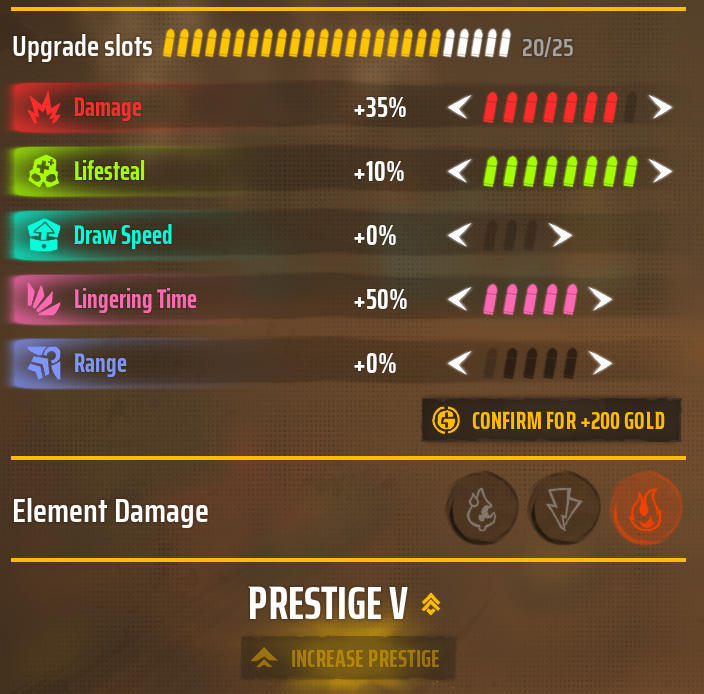
I recomend:
Lifesteal > Linger time > Damage
Since it’s a weapon to handling lots of enemies without ammo limit, you’ll be throwing it basically all the time, and it will be healing you slightly.
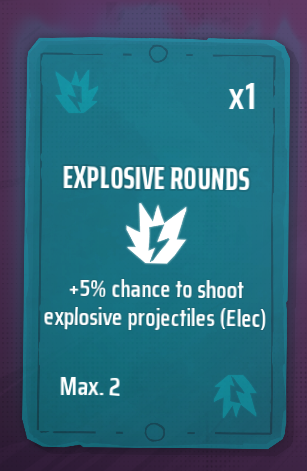
 Explosive Rounds (Elec) for Combo with Fire or Acid base damage on the Boomerang (I use Fire but it doesn’t really matter)
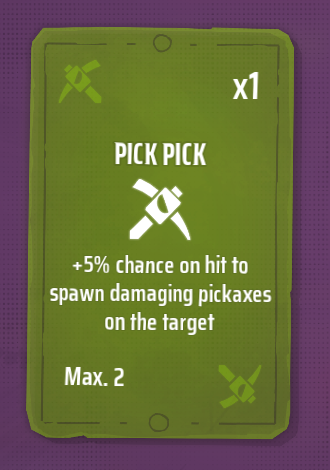
PickPick = More DoT
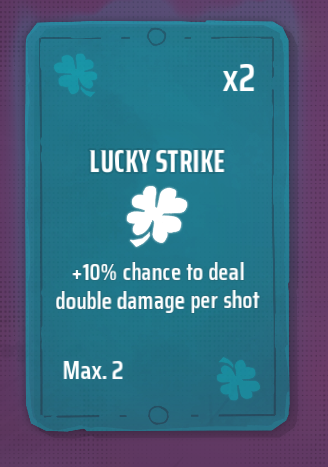
LuckyStrike = Every so often double damage
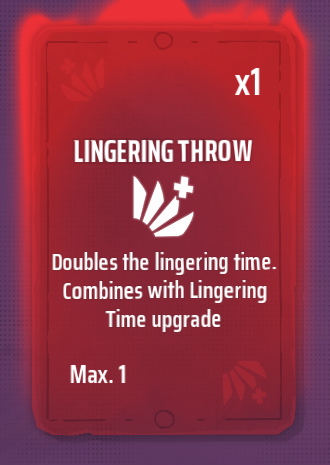
LingeringThrow requires lv 30 with boomerang and is less important anyway
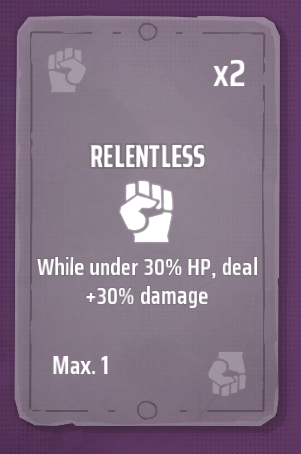
Relentless is just free damage if you get low (And thus, slightly better lifesteal)
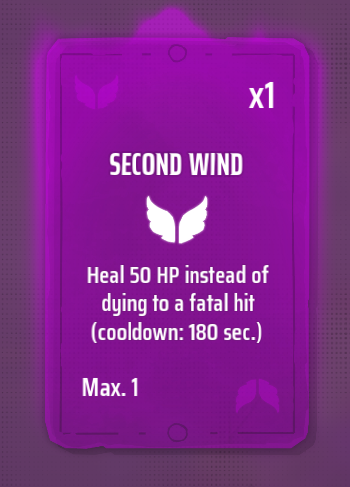
Become a spellslinger!!
It is your safety, it is the reason this build works as well as it does.
It breaks this game open.
My recomended spells would be:


Don’t have 35 Cactus? No problem, this works just as well.

When and how to use it:
Rescue is NOT to heal, it’s to revive allies.
“But they’re dying and..” They’ll die anyway if they don’t get the Booze soon after you heal them.
But if they die, enemies change target, so you revive them and they have some time to get Booze.
So REVIVE, don’t heal.
Any Cactus skill should be primarily used on two ocasions:
– Is your “Safety” no longer safe? Throw it through the portal, so they can keep clearing it while you hop portals.
– Do you REALLY need them somewhere else? Portal, hop in, throw them through the portal, hop back.
So only through the portal. Otherwise you’re halving their utility/damage for no reason.
Portal is the bread and butter of this build, you want to keep track of them, never forget where is portal A, where is portal B.
First, well.. Actually… Let’s go deep on how to use it.
If you’re the only player using the portal skill, that is probably the best skill in the game. If you’re not, well.. You’re gonna have a bad time.
How do you think with portals?
I like to think of portals as: “Portal A, Portal B”
You’ll only be able to spawn 2 portals and they are interchangeable.
So you’ll always place in order. A then B, then A, then B… And so on.
So as soon as you spawn, you’ll throw down a portal and all your bottles. This is your current “home base”, your safety net. Your Portal A.
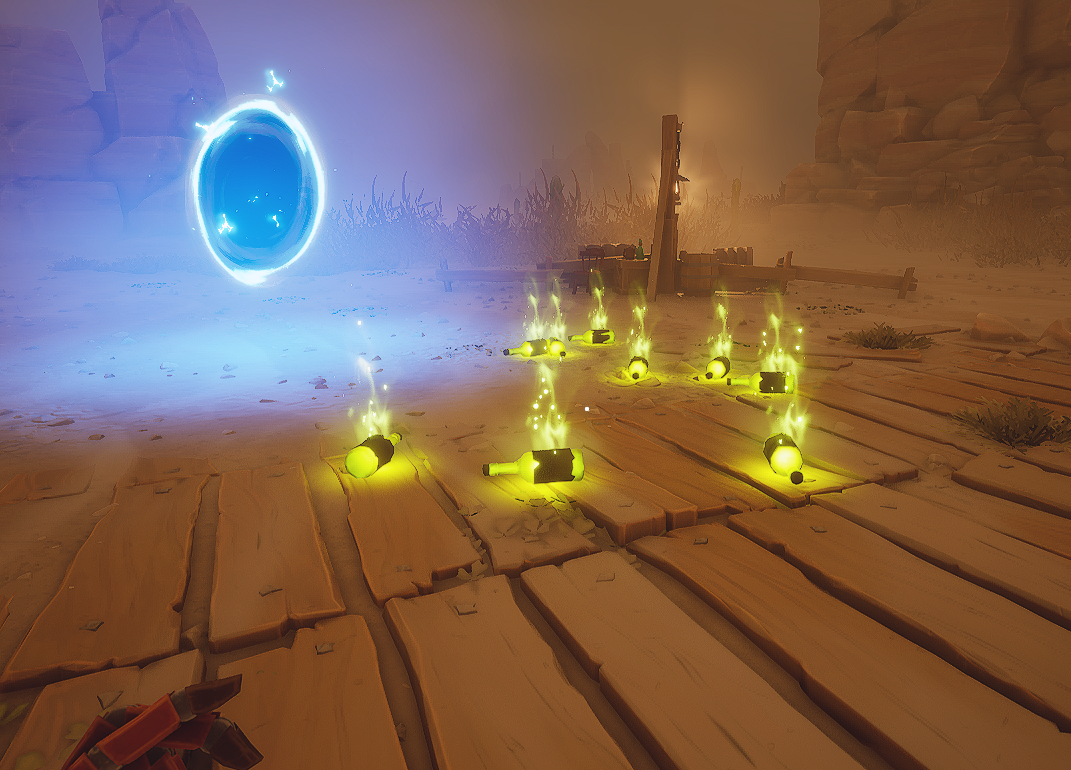
Wherever you are, you can pop up a Portal B and instantly be “Safe” and near 9 Booze, when jumping into it.

FIRST You’ll REPLACE Portal A whenever you place down a Portal B, so the next portal will be a B again.
Ok? Ok.
Let me explain this a bit better, don’t lose portal A’s location. You whenever you use portal B, your next will replace A, so go through portal B and place a portal near A to replace it.
You’ll make your way to the main objective.
There you’ll replace your Portal A while placing down 9 more Booze.
Does it NEED to be on the main objective? Well, no. But there are three places you’ll spend a lot of time per mission, can you guess them?
– Objective
– Boss
– Train Station
So those are good locations for a ‘base’, but I like to go by order anyway.
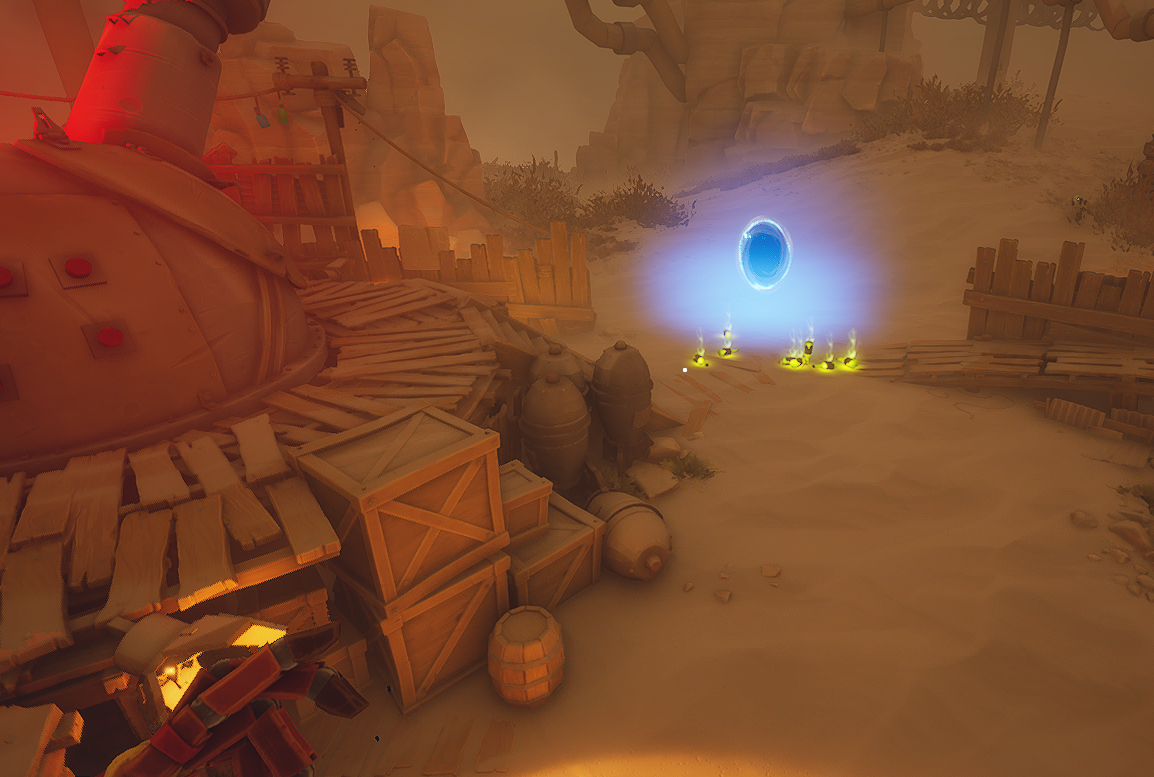
 (Yes, it’s on Easy, but that is just so I can get ScreenShoots without getting destroyed)
Hint: If you don’t have a good memory for WHERE your portals are, you can ping both and both will show on map.
Perfect your movement
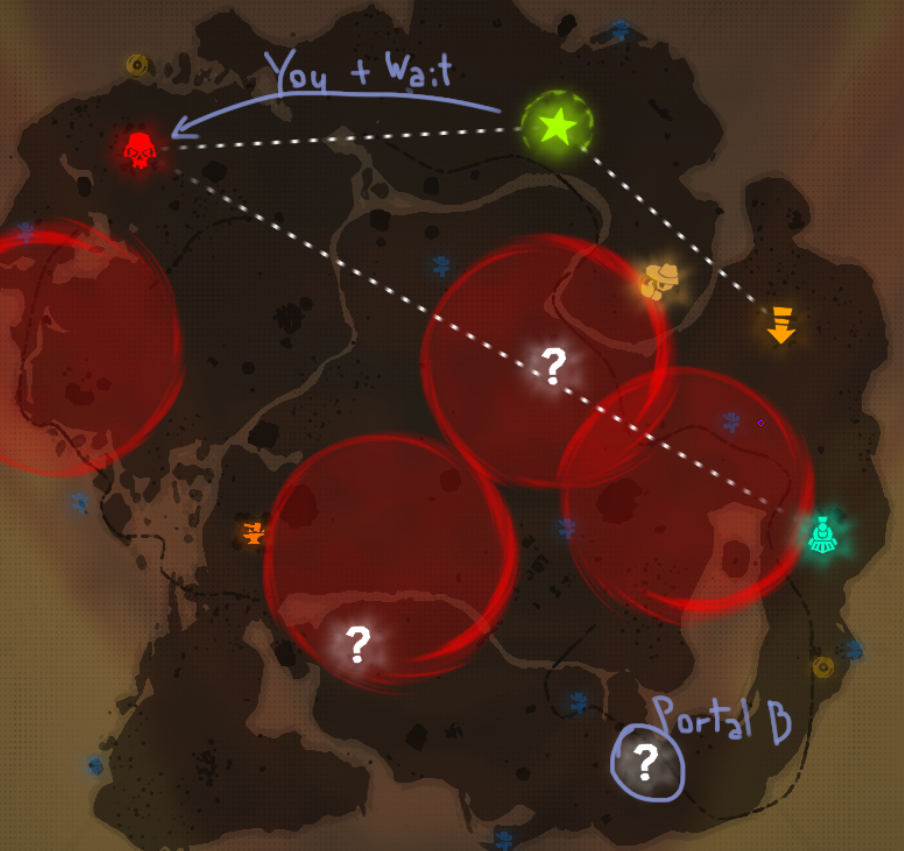
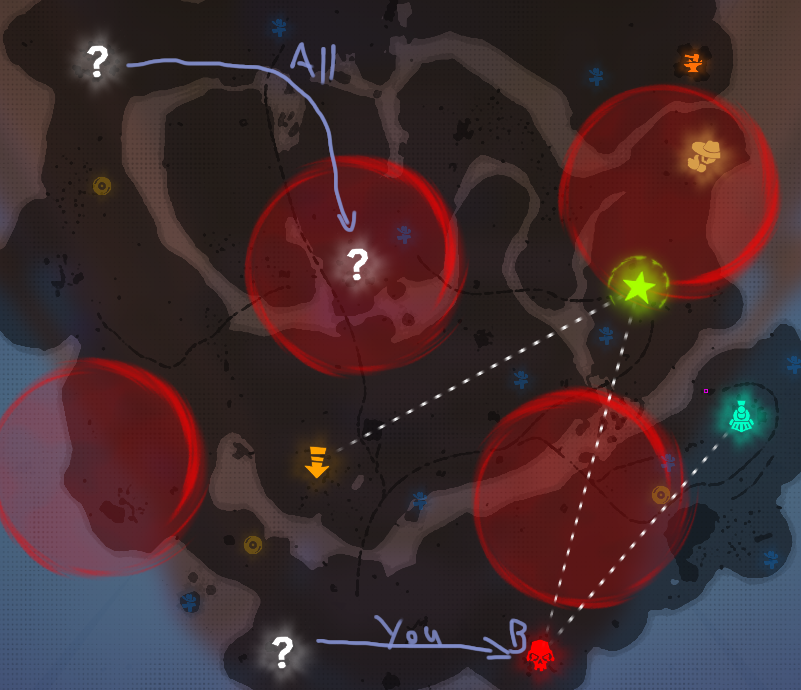
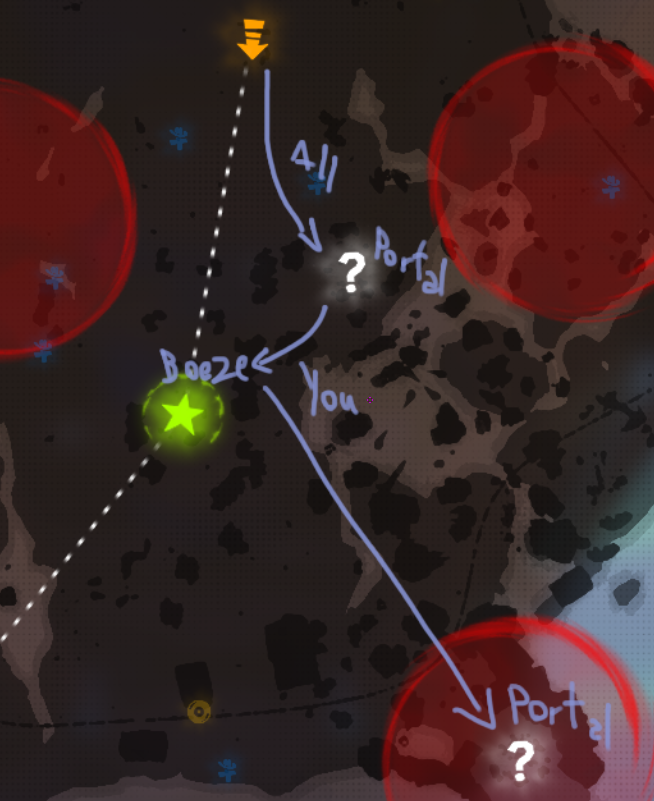
Let’s start with a very simple map, Objective is close, secundaries are far.
 Your team should absolutely go for the secundaries and you should try to start spamming Booze on the objective.
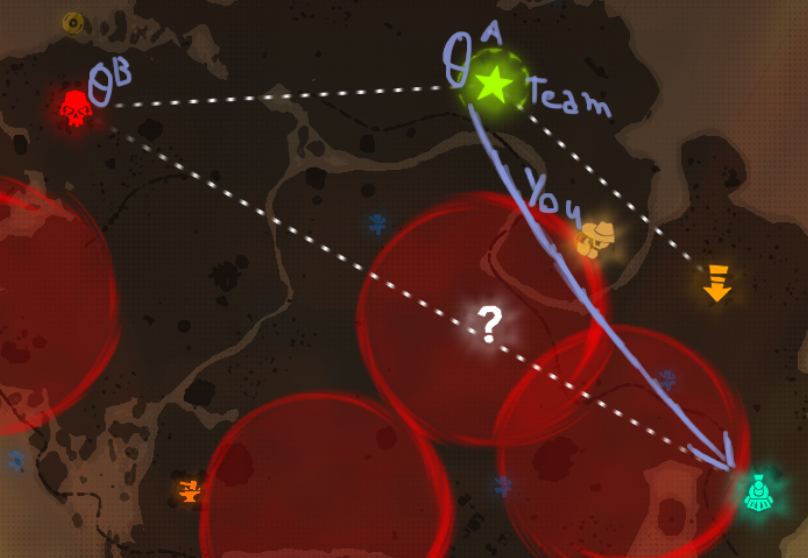
Once you do, you move back to help them in the secundaries and will be with them while keeping Portal A on Objective and Portal B on whatever you all are doing.
 When you all get to this side objective, you should leave the portal there for them, ping it and start moving towards boss and leave B there while A is on objective
From this point, ALL your Booze whenever is off cooldown should be thrown at the boss, you’ll break the Portal A soon.
(If they decided to do the objective before finishing all secundariers, even better. You move portal A to boss)
 And lastly, the risky manouver if you’re confortable moving around the map without needing to instantly go back to the portal.
From this point, your Booze should be thrown at the train station, unless you have too little at the boss. (But the portal B on the boss should stay anyway)
When you see the bar is about at 80% completed on the main objetive, you start moving towards the end. (If you miss this timing, it’s fine. You can go after they started the boss, but it’s better doing it now)
When they’re done with Objective and jump into the portal to get to the boss, you’ll place your Portal A on the end train station and jump on it.
You’ll have it on boss and train station, ready to leave. Cutting your team ‘walking’ to 0.
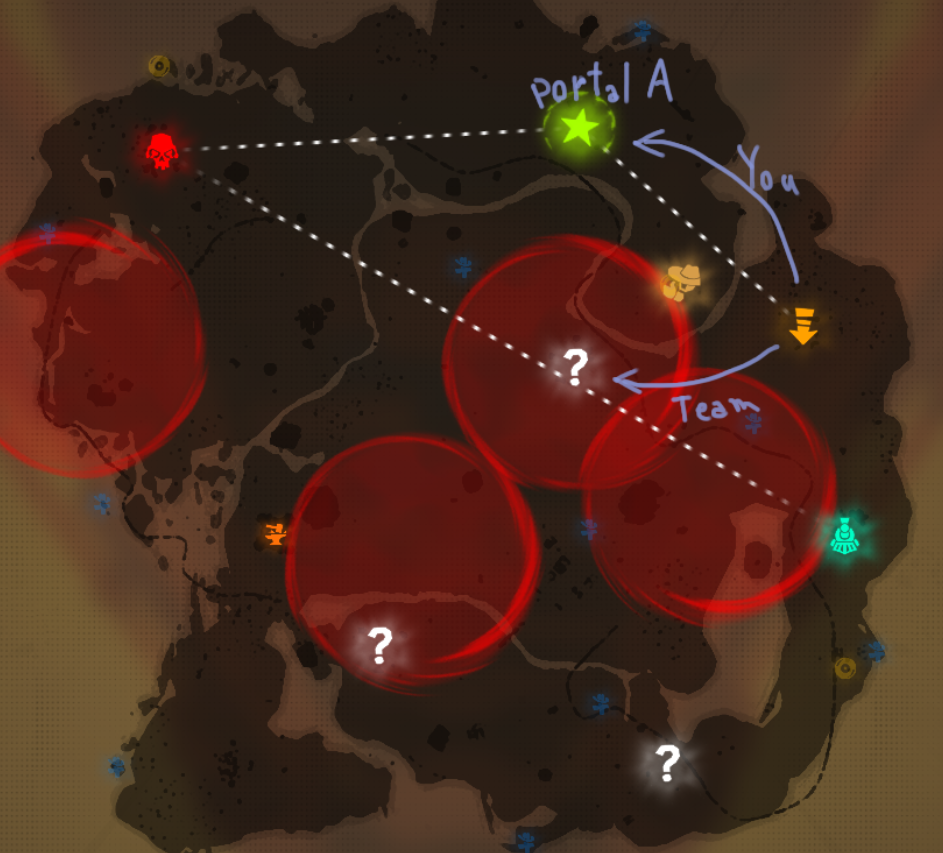
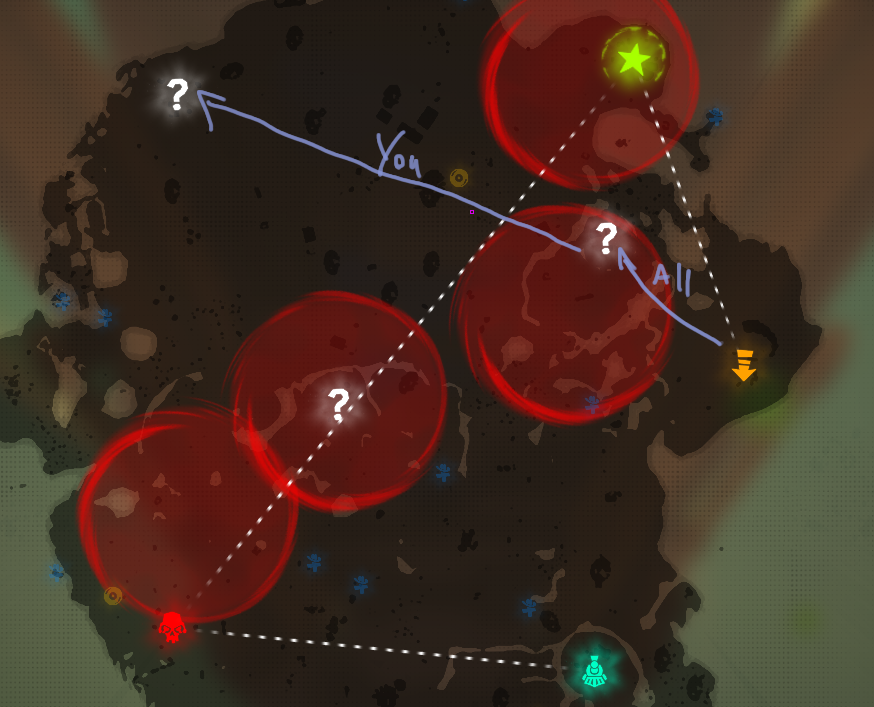
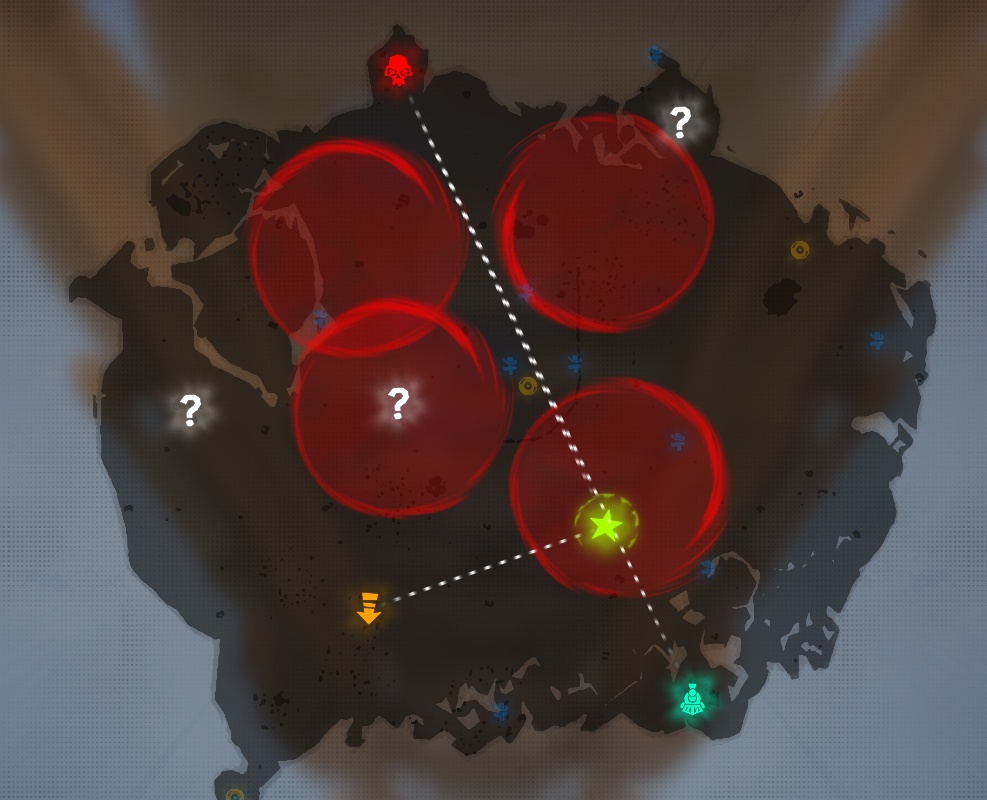
This is a harder map, wanna try figuring it out?
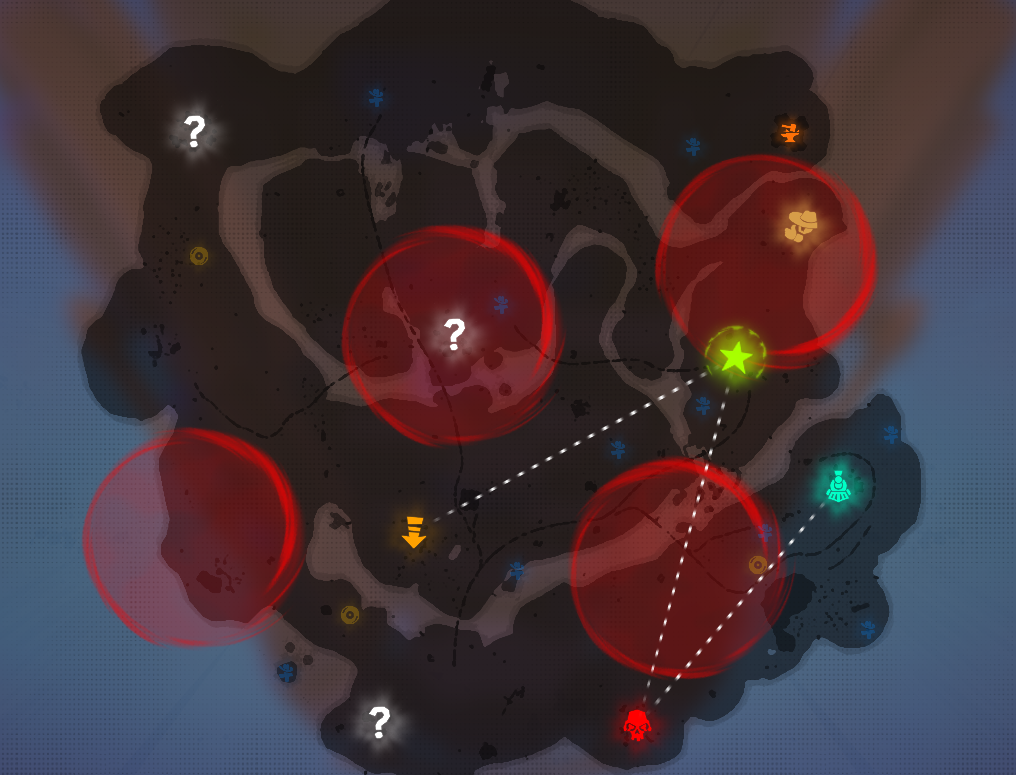 What would you do?
Go for objective then go back? It’s too far.
Go for secundary? You’ll have bad booze location and no safe zone.
Yeah, I said this is harder.
Think for a bit, my personal answer below:
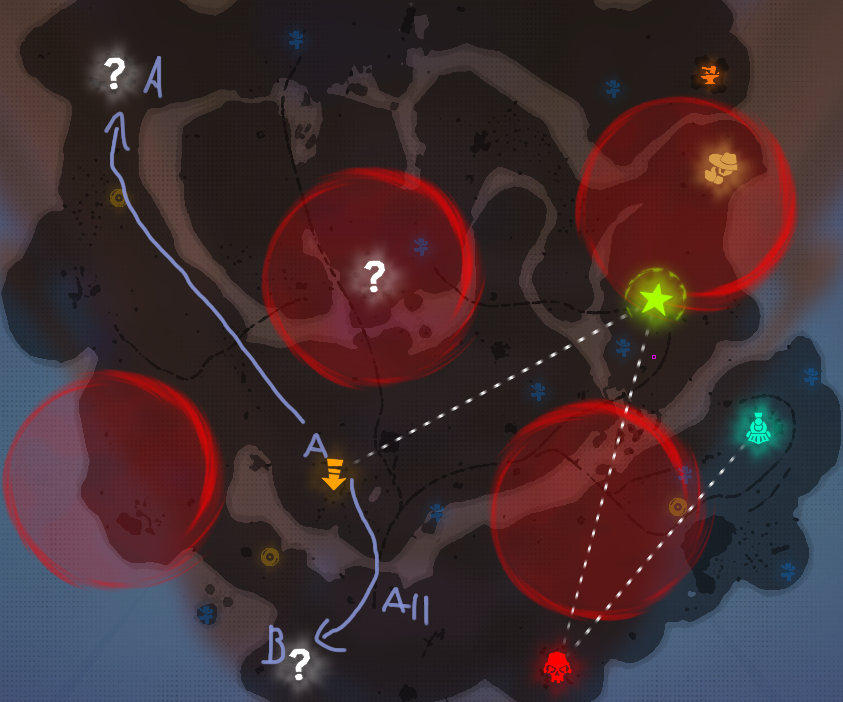
My reason for this is simple, the less ‘everybody’ has to walk somewhere, the better.
So all should go for nearest and you’d leave a portal there for them, leave the Booze for them and start making your way toward the furthest away. When they’re done, they’ll have instant acess to the furthest secundary.
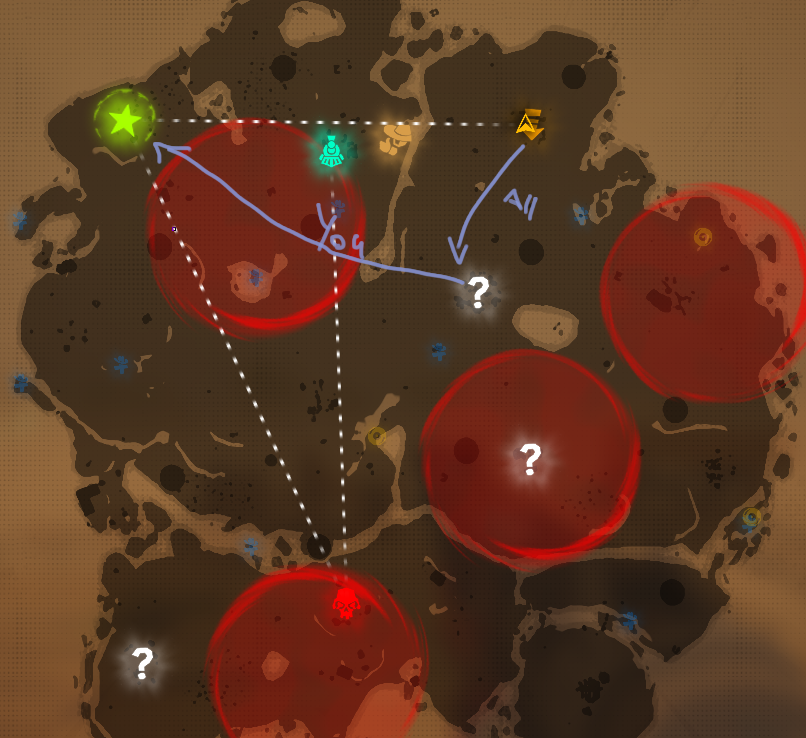
What then? Wanna try to figure it out?
My answer:
 As soon as they start the furthest secundary, you’d move your B portal to boss, in this situation, that’s your “Safe” portal. And start populating it with Booze.
Move together with them to the other secundary and proceed normally,
The objective would have little Booze but the boss would have it all, they can easily get there to heal with you keeping a portal near.
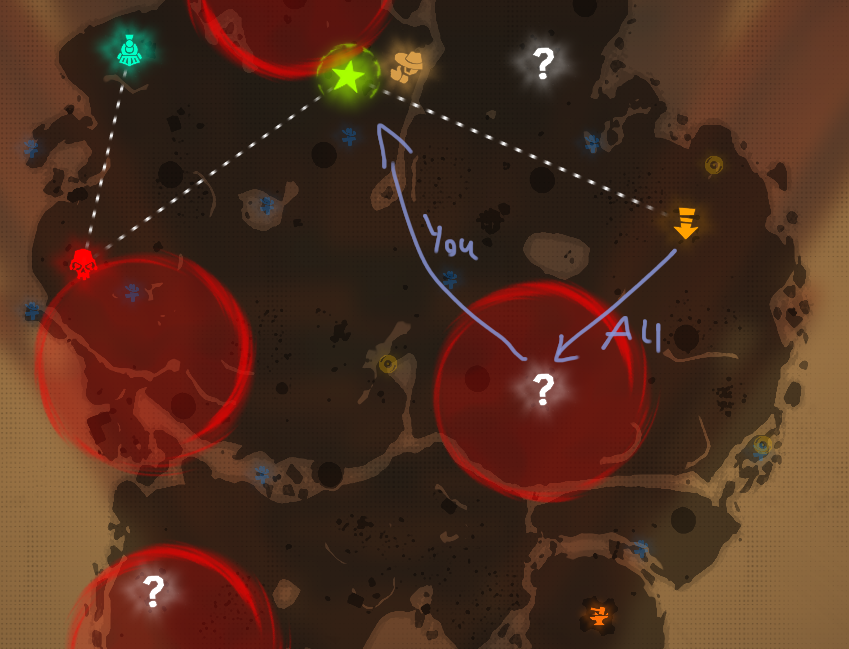
Perfect your movement (Part 2) – Risky behavior
 Move with team, portal on closest secundary.
Move to furthest secundary, leave portal.
From there you can decide what’s best. I would leave the portal at Objective and do the last secundary after it.
 This is back to basics, move with team, portal up.
Portal at objective as a safe spot, move with team.
In this case I would also advise on doing the objetive before the last secundary, since then you can use that time to go back to the station after leaving a portal near the boss.
Let’s talk FAST clear, riskier since you don’t have a dedicated healing place
 Same oh. Move with team, leave portal.
Get to objective, start a safe spot.
In this case I’d advise doing the objetive imediatly after and you’d repeat moving with the team to the closest, leaving the portal and one at the furthest away.
Attention: This is for FAST clear, not for SAFE clear. since you’ll not have a main spot for healings.
If you want to safe clear you should just keep following the team with portal B.
 Still on fast clear, even riskier.
This will only work if there is no horseman on the closest secundary.
If there is, don’t you DARE leave your team without Booze.
If there isn’t, you can trust them to survive and just go Booze the objetive and leave the portal at the furthest secundary.
Once they start the next secundary, you place the safety portal at the objetive.
 This would be the perfect map for a solo excursion.
First let’s think on teamplay.
You should portal at the start, portal the objetive and go back to your team, following them with the other portal.
However, as i said, this is as good as it gets for solo excursion.
Two secundaries are near and objective is near. The only very far away secundary is also prime location to later go to boss and have a portal on objective and one on boss.
Then, let’s talk with arrogance, can you handle yourself solo? Can your team be without you?
If yes to both, then try this:

As your team moves to the secundary, you leave a greedy portal at the objetive and rush to the furthest sedundary away. You can probably do it on the time your team do both others and get to the objetive
Once they start the objetive, you’ll be done with yours and have moved the other portal to the boss.
That’s the best way to “prevent them from moving too much” since the boss is SO far away.
Before you leave, side notes
– Get jokers. Add Bouncy ball.
– Finish points with Jump height, it’s better than ammo because Boomerang.
– Well, another PickPick is welcome.
– Finish points with draw speed, it’s better than more range.
Then ignore every “Good” movement option you have to make the game faster and just stick with the team. Sadly the game does not suport more than two portals and they WILL mess it up (willingly or not)
Yeah absolutely, but I would only advise Nightmare with a trusted team and everyone having Rescue.
I don’t think the hassle is worth the exp anyway.
For me, yes. For many of you might be too.
But I wouldn’t say it’s a META build for everyone, in fact, this is better run in a single person per team since you provide enough healing for everyone, people can focus on damage.
It’s a very safe build that you can carry easily with it, even with bad teams.
If you don’t die, you can’t lose. You might have to solo a lot while waiting for cooldown on ress.
Primary weapon is just preference based.
That being said I found most success with the Sniper (Long Ranger) and the Clutch Rifle (Leveredge). Both focusing on damage to handle bigger mobs.
Leveredge is probably the best DPS in the game if you wanna know, but this build cannot extract that fully, so I’d advise going Sniper. BUT (and let me say this again) IT IS PREFERENCE BASED. This build does not need the primary weapon.
You do damage, yes. Quite a lot even. But YOU ARE THE SUPPORT
Other builds will do more damage by sacrificing survivability. You’re here to ensure they can do that.