
Here’s everything I put together for anyone chasing 100% completion in Can ‘Em All — all 12 Steam achievements, the hidden secret ones, the casino unlock, permanent upgrades, and the ending. I cover the exact steps so you don’t have to guess your way through the email system or lose a save to bad timing.
I wrote this up mainly because the two unlock chains — the casino and the factory sale — are the easiest things to screw up permanently. Get the order wrong and the emails you need may never show. So I’ll lay those out clearly and flag the one section you really don’t want to skim before finishing the game.
Weapons, Machines & the Upgrade Tree
At the end of every day, step into the elevator to open the Upgrade Tree. From there you follow the connected branches to unlock new weapons and ammunition, additional processing machines, conveyor belts and automated production, turrets, and other factory improvements.
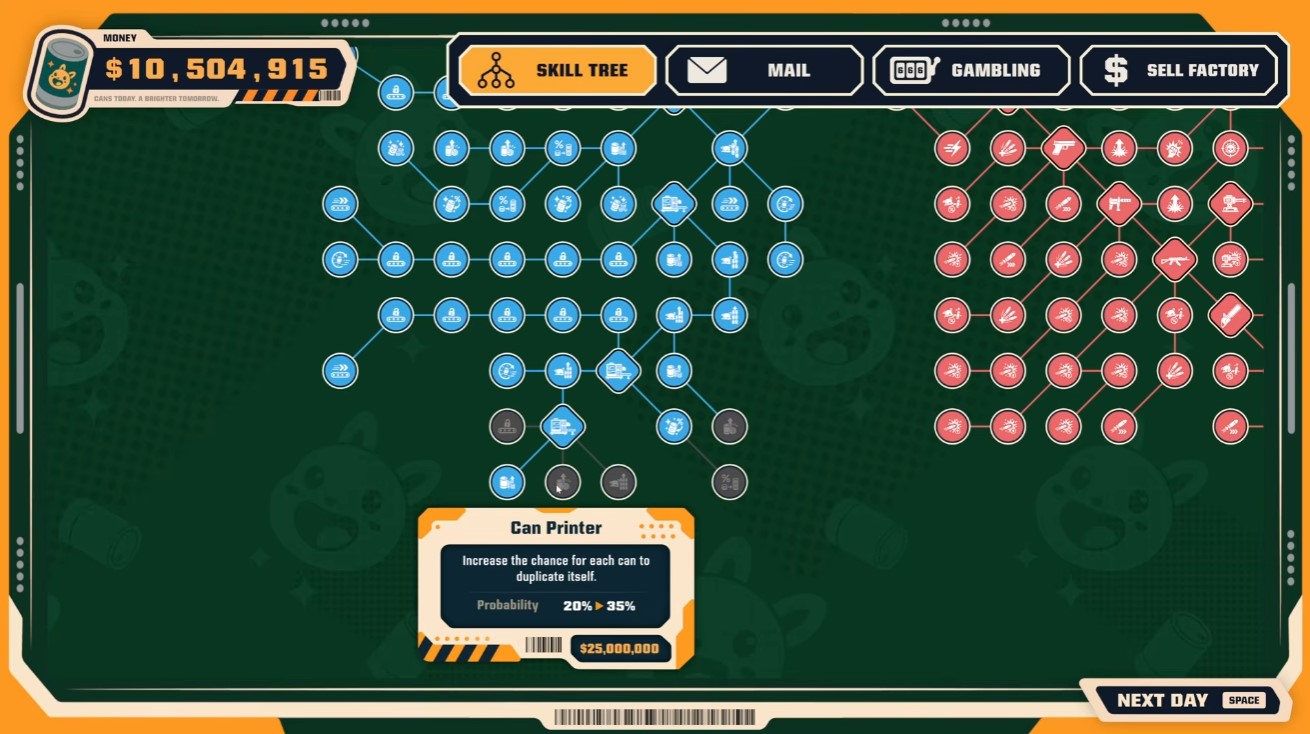
In my experience, the priority order that saves the most pain is can value first, then production speed, then conveyor belts. Once your factory runs automatically, money stops being the bottleneck and the rest of the tree opens up much faster. One thing I’d double-check: finish every conveyor route you build. An unfinished conveyor won’t automatically deliver your cans to the selling tube, so you end up with a stalled line and no idea why.
How to Unlock the Casino
The casino opens through the in-game email system, and the order matters. Progress the Upgrade Tree until you’ve unlocked the Bat, Knife, and Pistol, then keep working through the story emails. After the “Today’s Special” email, wait for the “Feeling Lucky” email to arrive. Open it on your computer and click Accept — the casino button then unlocks.
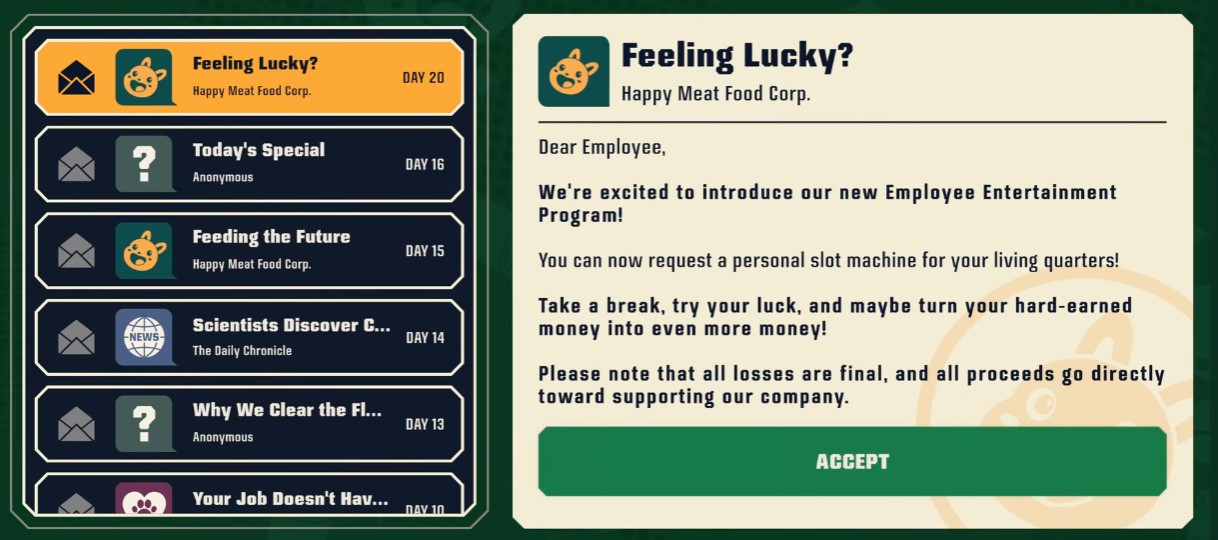
The catch that trips people up: you have to actually accept the email. Just buying the Pistol is not enough. Worth knowing too that the casino is entirely optional — it isn’t tied to any Steam achievement, so if you’re only here for the completions you can skip it.
How to Unlock “Sell Your Factory”
You can’t sell your factory until a specific company email lands, and no amount of upgrade purchasing speeds that up. Work through the story emails, unlock the Uzi to push past “When Money Was the Problem”, then unlock the AK-47 to receive the “Excellent Work” email. Keep going until “An Offer You Can’t Refuse” appears, open it, and click Accept. The Sell Your Factory option then becomes available.
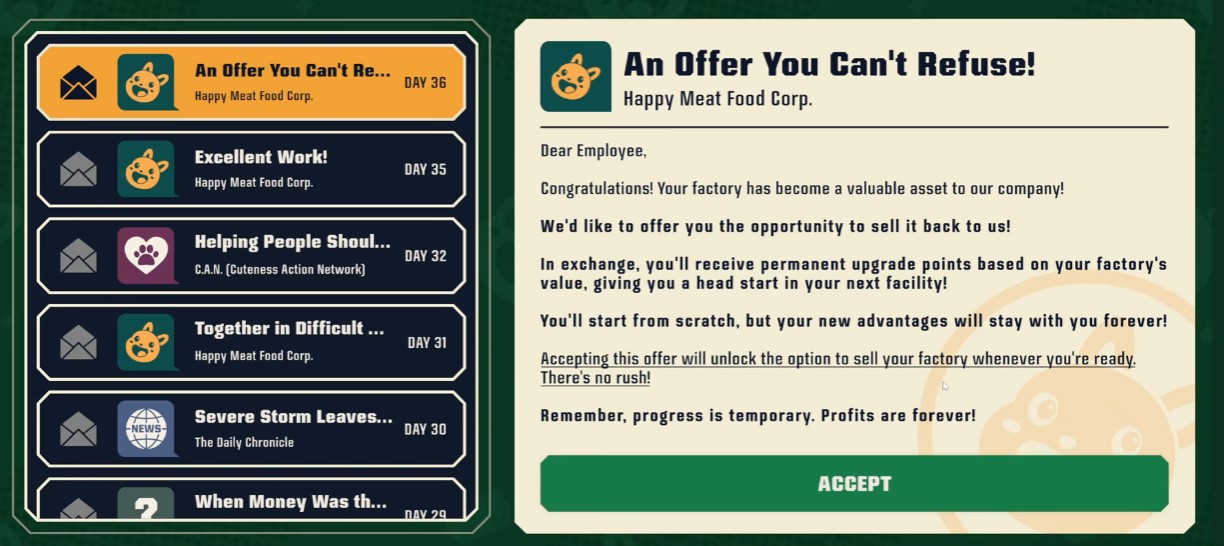
I want to be clear on this because it’s a common assumption: buying every upgrade does not auto-unlock the sale. You have to move the email storyline forward and accept that factory offer. Selling your factory kicks off a Prestige run and unlocks the “A Fresh Start” achievement.
Hidden Achievements (4 of 12)
These four are the sneaky ones, and two of them will cut your current day short — so plan for that.
- Not a Can — throw a creature’s dead body into the transport tube instead of a can.
- Fresh Meat — grind a creature while it’s still alive.
- Human Meat — jump into the processor yourself.
- Special Delivery — jump into the transport tube yourself.
Keep in mind that Human Meat and Special Delivery end your current day when you trigger them, so don’t do those two mid-run when you’re trying to bank progress.
Permanent Upgrades & Prestige
Once Sell Your Factory is unlocked, you can start banking permanent upgrade points. Open the Sell Your Factory menu, check how many points you’ll receive, then confirm the sale to restart your factory. Spend those points on Permanent Upgrades and repeat the cycle until you’ve bought them all — they survive future factory resets.
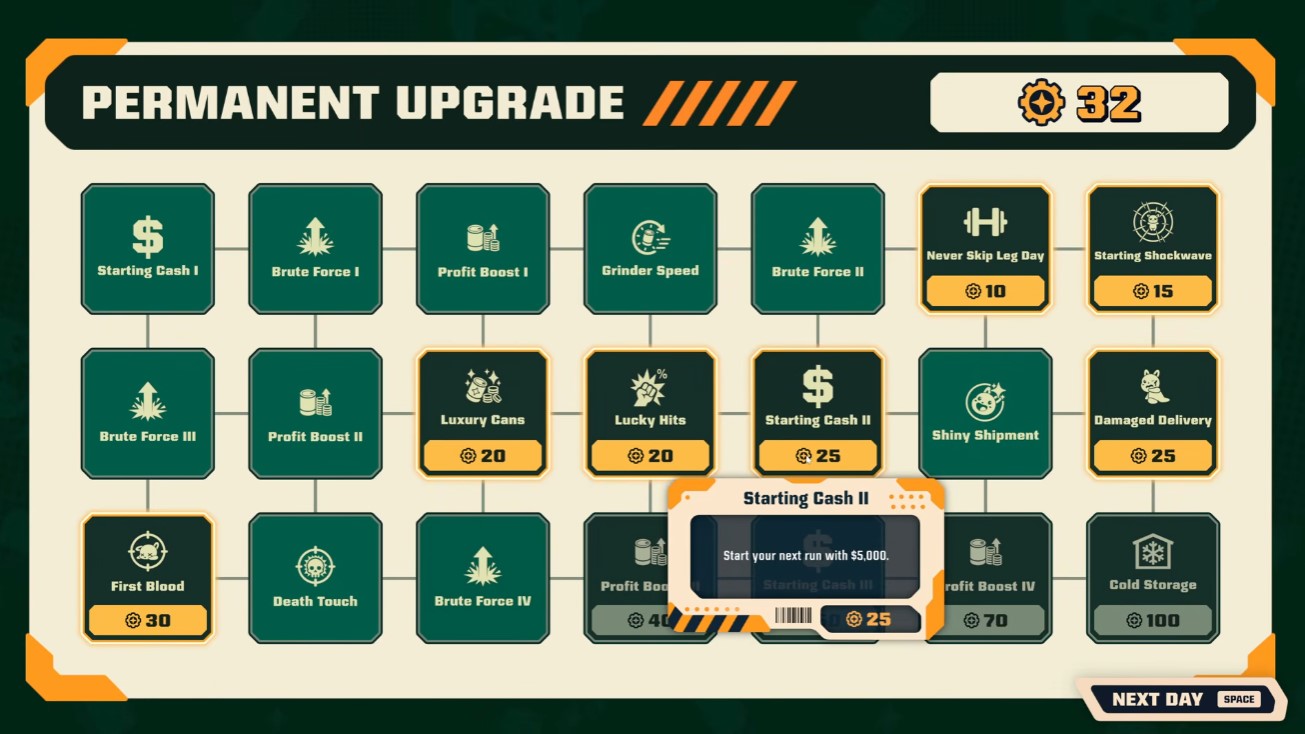
Buying every permanent upgrade unlocks The Perfect Employee. One piece of advice I’d pass along: try to hit 100,000 children fed before your first factory sale, since Prestige wipes your current progress toward that achievement. For anyone mapping out the reset loop, this permanent upgrades guide lays out the point math in more depth.
The Warning You Should Read Before the Ending
This is the part I’d underline twice. The game’s code switches to a different email sequence once you’ve discovered the ending, and that switch can stop you from ever receiving the casino and factory sale emails if you haven’t unlocked them yet. So finish both unlock chains first.
A safe order to work in: unlock the casino through “Feeling Lucky”, unlock the factory sale through “An Offer You Can’t Refuse”, then mop up your remaining achievements and Prestige upgrades, and only discover the ending when you’re genuinely ready.
If you’ve already finished the game and those emails never showed up, you may need to restore a pre-ending save or start a fresh game to run through the normal progression again. Frustrating, I know, but better to know it now than after a wasted evening.
Unlocking the Ending
The ending can be reached without selling your factory first. Purchase every regular upgrade in the factory’s Upgrade Tree, then wait for the message confirming you can repay your debt. That unlocks the final upgrade, Freedom at Last — save up $666,666,666 and actually purchase it. Then head back upstairs, go through the previously locked exit door, and use the elevator to finish the game.
Here’s the detail that matters: having the Freedom upgrade unlocked in the tree isn’t enough. You must purchase it to receive the exit key. Doing so unlocks the Freedom at Last Steam achievement.
Conclusion
That’s the whole path to 100%. Nail down the two unlock chains early, keep your conveyor routes finished, and you’ll cruise through the Prestige grind without a save-killing surprise.