This is a guide to use if you get stuck on one of the puzzles! I will explain how each puzzle can be solved, as well as give a screenshot of what the correct completed puzzle should look like.
Introduction
I recommend attempting each puzzle yourself before referring to my guide. Grimoire and Sally will give you hints on how to complete the puzzle in-game, so try following their advice first. I did struggle with a couple of these puzzles a lot though, so I thought it would be useful to make a guide.
!!! SPOILERS FOR *THE MERMAID MASK* AHEAD !!!
Serpent Statue Cabinet (Mess Hall)
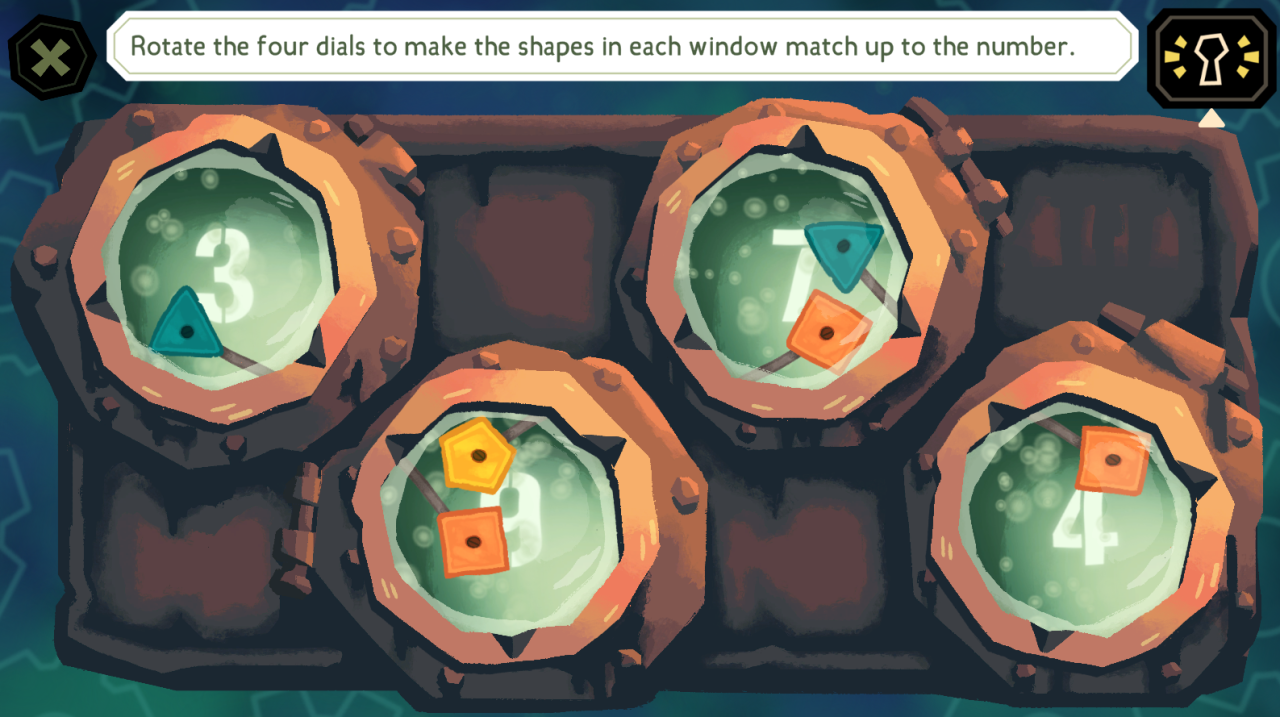
To solve this puzzle, you have to rotate each dial until the shapes inside have the correct number of sides that match each number. For example, the first window (3) should only have a triangle inside.
Move the first dial so that a square appears in the second window.
Move the second dial so that a triangle appears in the first window, and a square appears in the third window.
Move the third dial so that a pentagon appears in the second window, and a square appears in the fourth window.
Move the fourth dial so that a triangle appears in the third window.
This unlocks the Sun Tablets.
Perfume Shelf (Dream Chamber)
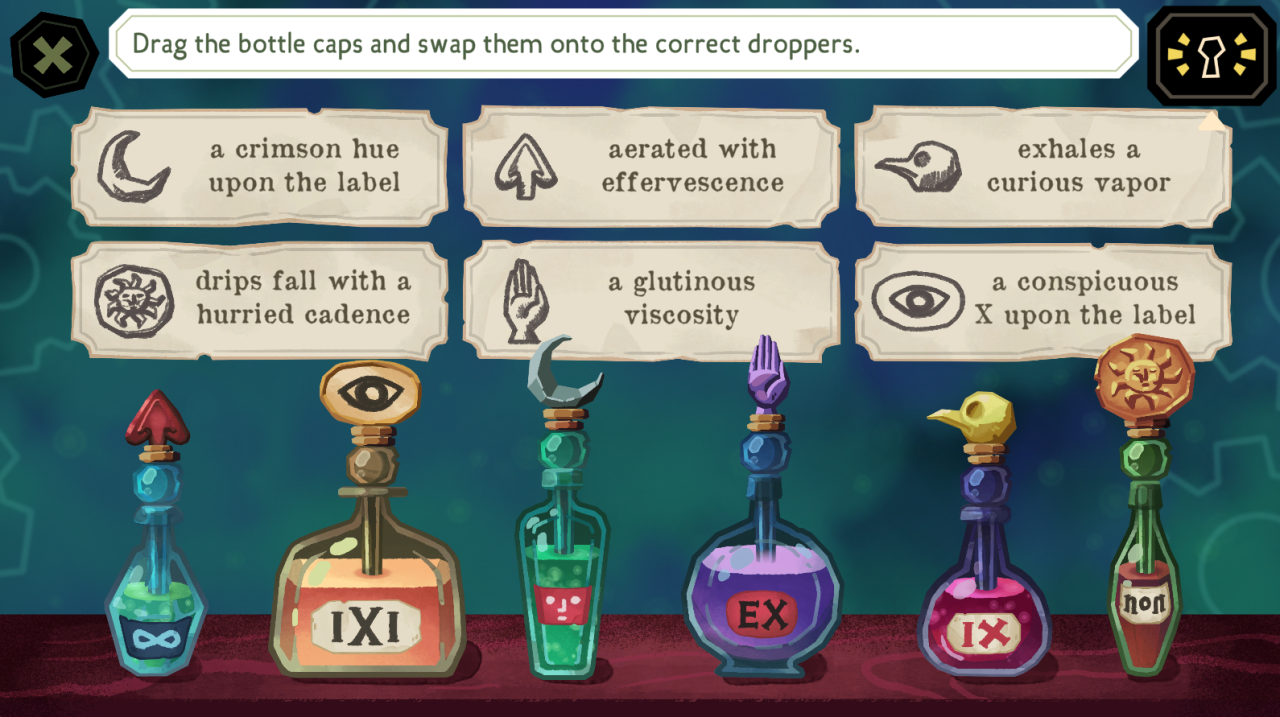
To solve this puzzle, you need to match the droppers with the correct perfume bottles. To do this, read the labels that describe the consistency of its corresponding bottle. You can click on the bottles to see characteristics of the liquid.
The first bottle is aerated with effervescence.
The second bottle has a conspicuous X upon the label.
The third bottle has a crimson hue upon the label.
The fourth bottle has a glutinous viscosity.
The fifth bottle exhales a curious vapor.
The sixth bottle drips with a hurried cadence.
This unlocks the bookshelf.
Wooden Chest (Child’s Room)
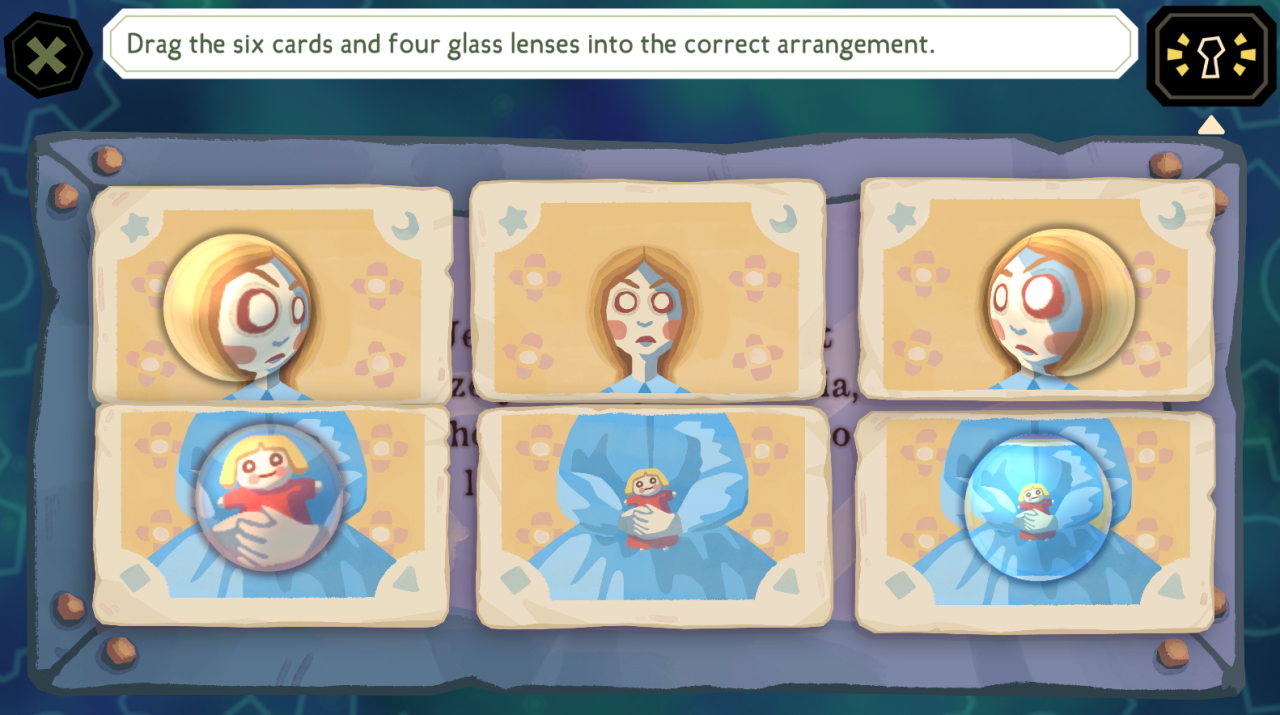
To solve this puzzle, you need to follow the clue carved in the box: “Jennifer and Margaret gaze jealously at Patricia, whose doll is neither too large nor too small.” Each of the cards follow the same two designs with no variations. The glass lenses, either shrink, enlarge, or warp what it is placed upon.
Arrange all three cards so that they make up three girls.
Place the two warping lenses so that they make the girls on the left and right look at the girl in the middle.
Then, place the shrink and enlarging lenses on the left and right girls’ doll. It doesn’t matter which goes on the left or right.
This unlocks the Glass Eyeball.
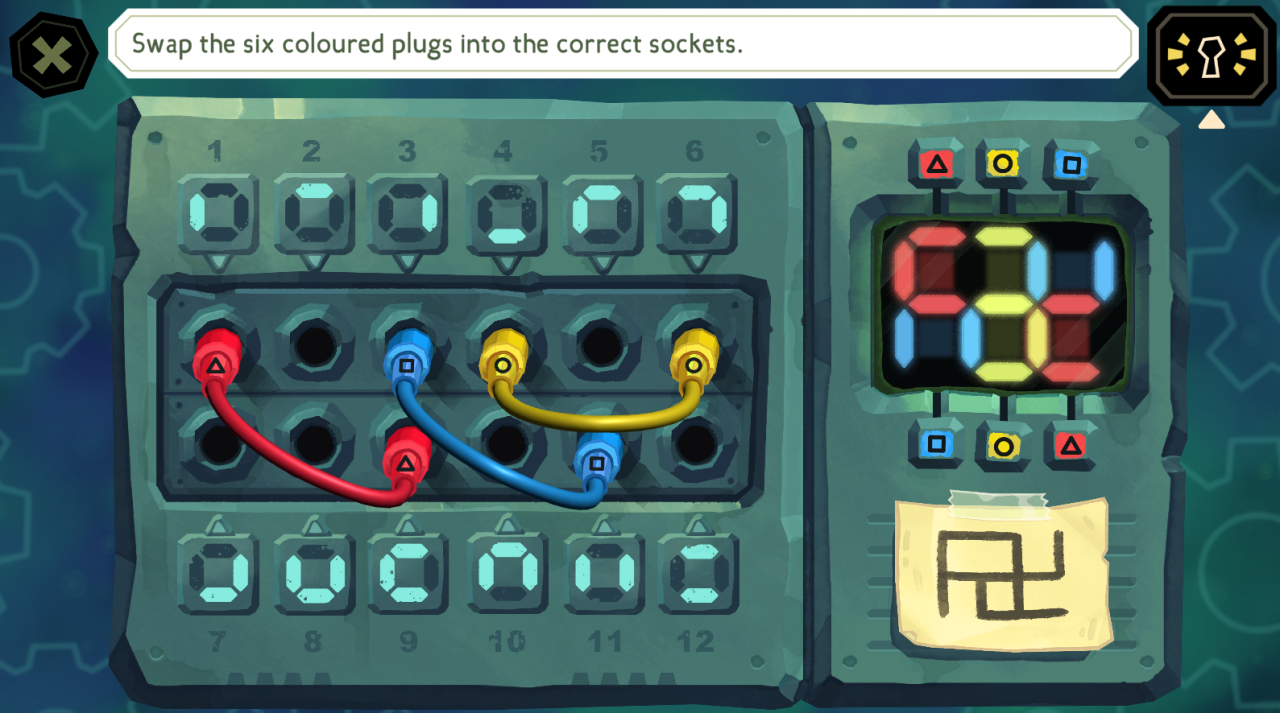
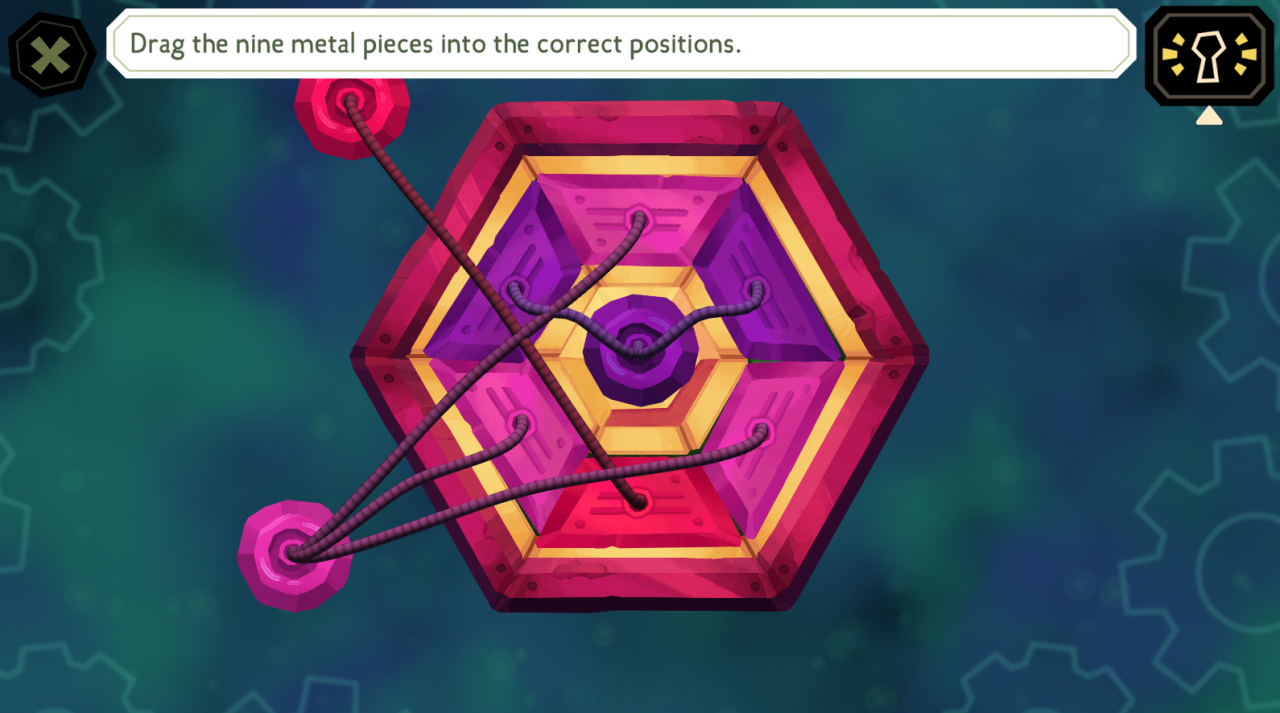
To solve this puzzle, you need to arrange the plugs so that they light up the pattern on the sticky note. Each socket has a unique pattern. Each plug goes into two sockets, and they share the pattern you plug them into.
The Red Plug (triangle) needs to be placed in Sockets 1 and 9.
The Yellow Plug (circle) needs to be placed in Sockets 4 and 6.
The Blue Plug (square) needs to be placed in Sockets 3 and 11.
This unlocks the Captain’s Log.
Model Town (Captain’s Quarters)
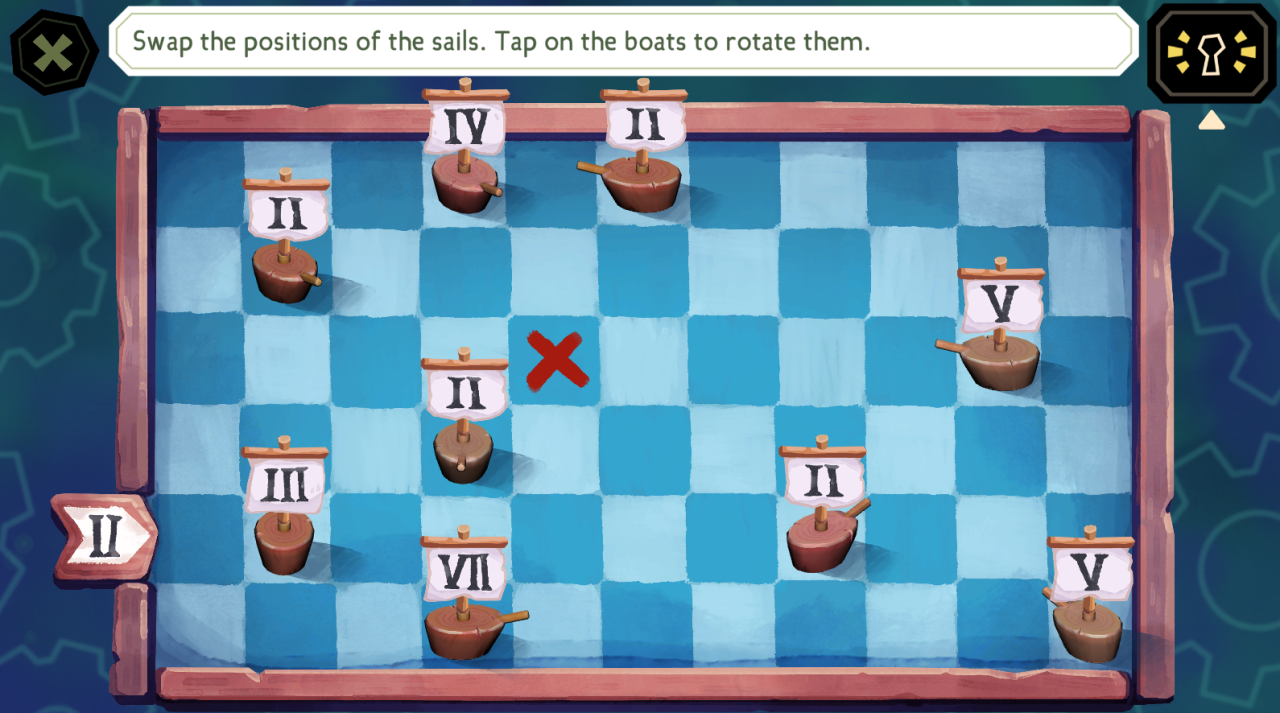
To solve this puzzle, you need to rotate the boats and move the sails in a way that makes a path around the board, eventually ending up at the red X. The roman numerals on the sails indicate how many tiles across the board until it reaches another boat.
This unlocks the Film Reel.
Pig Safe (Sym & Sinthia’s Bunk)
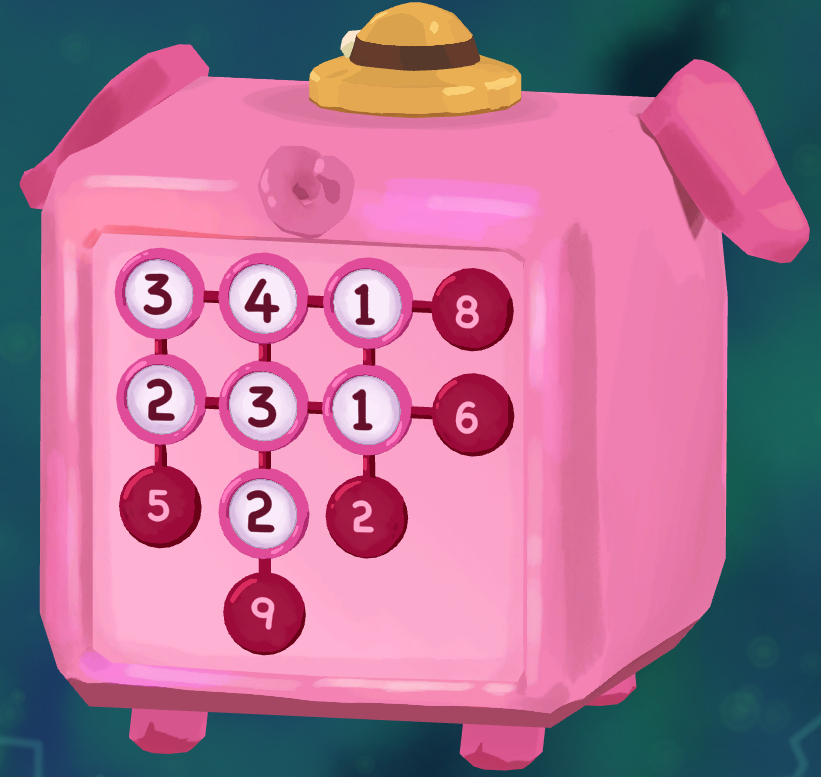
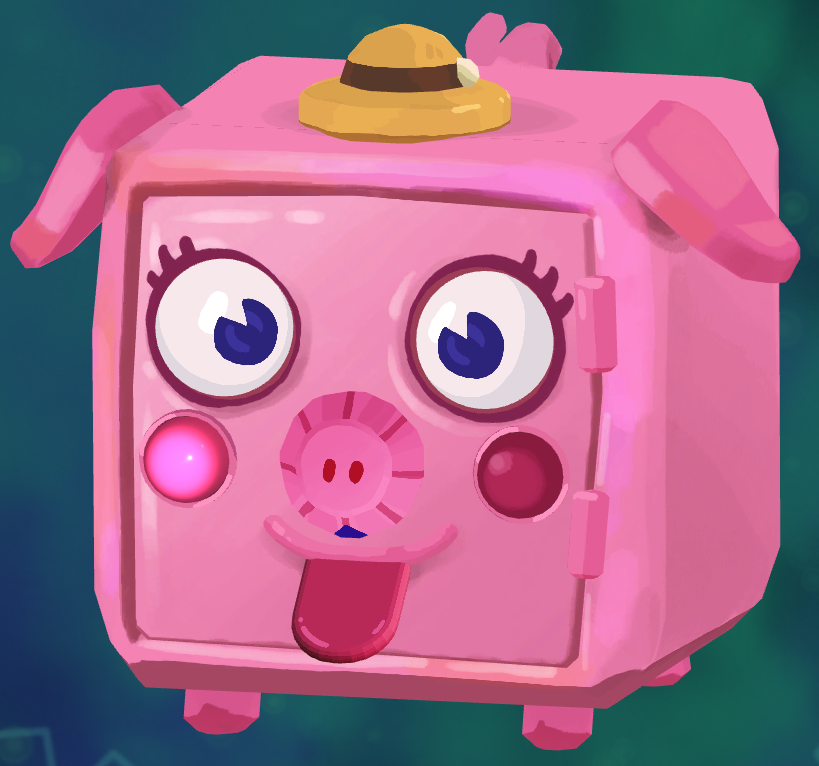
To solve this puzzle, you need to rotate/interact with the parts of the pig (hat, eyes, cheeks, nose, and tongue) to change the number counter on the back of the pig. The numbers must add up to the numbers at the ends of the numbers’ columns and rows.
From their starting positions:
Click on the hat three times.
Click on the left eye two times.
Do NOT click on the right eye.
Click on the left cheek once.
Do NOT click on the right cheek.
Click on the nose two times.
Click the tongue once.
This unlocks the Underwater Photo.
Phone (Dirk & Wirman’s Bunk)
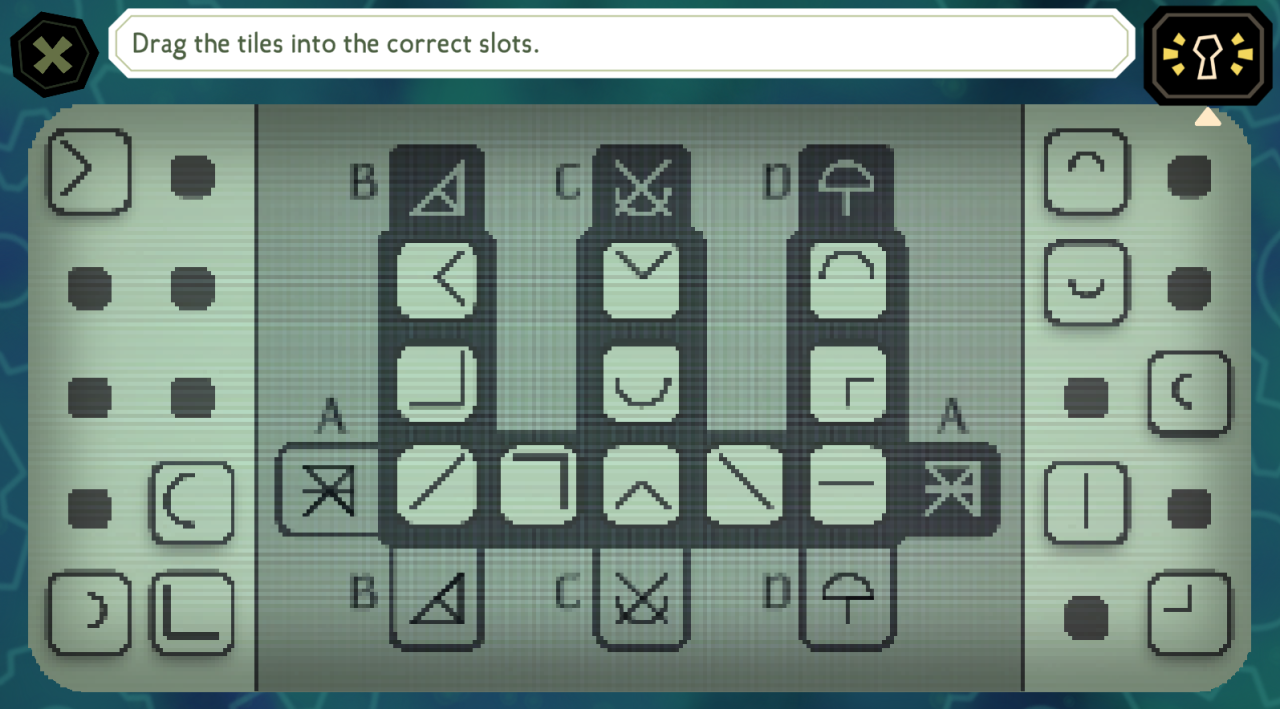
To solve this puzzle, you need to drag symbols into each slot to build the symbol indicated at the bottom of each column. There are shared symbols between them to make up the row symbol as well.
This unlocks access to the phone.
Typewriter (Dirk & Wirman’s Bunk)
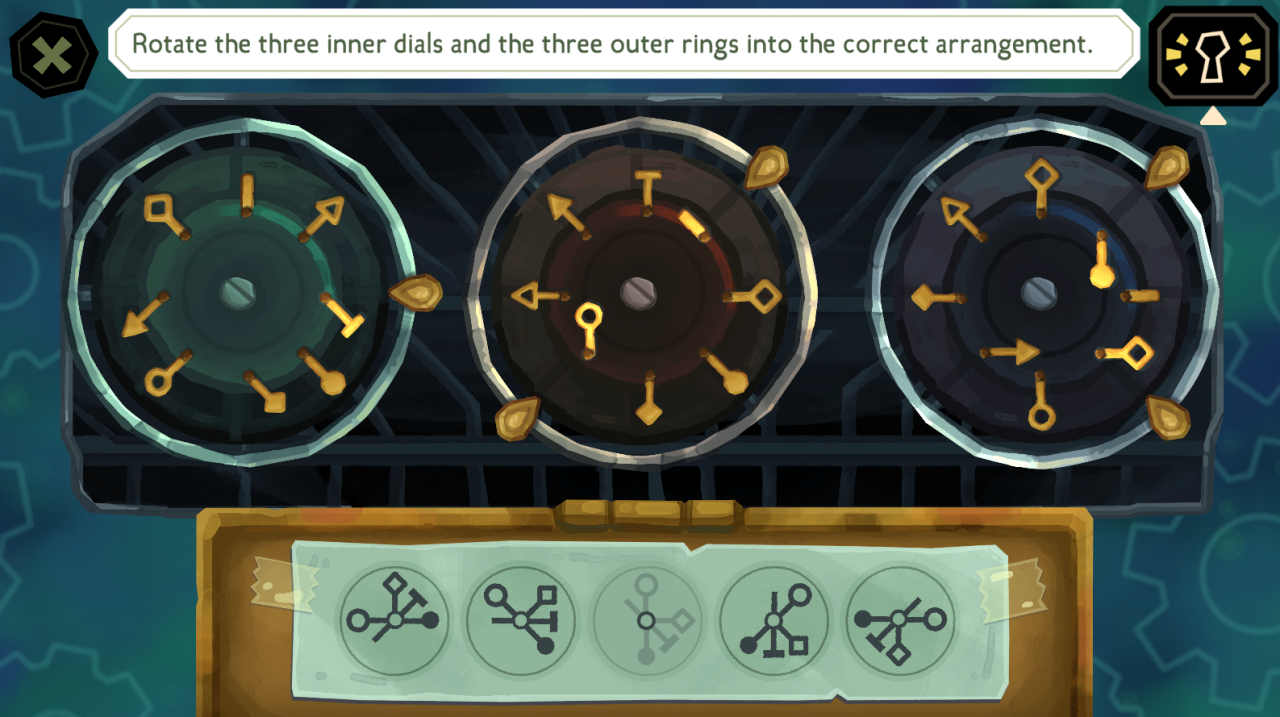
To solve this puzzle, you need to mimic the pattern shown for the symbols at the bottom. However, each pattern is slightly rotated clockwise from the previous. For this puzzle, you have to make the same pattern, but rotated so that your pattern at the bottom has the open circle at 12 o’clock, the diamond at 3 o’clock, the T at 5 o’clock, and the closed circle at 6 o’clock. To achieve this, you need to rotate the symbols on all three dials, as well as the outer notches on each dial.
This unlocks the Handwritten Letter.
Compasses (Engine Room)
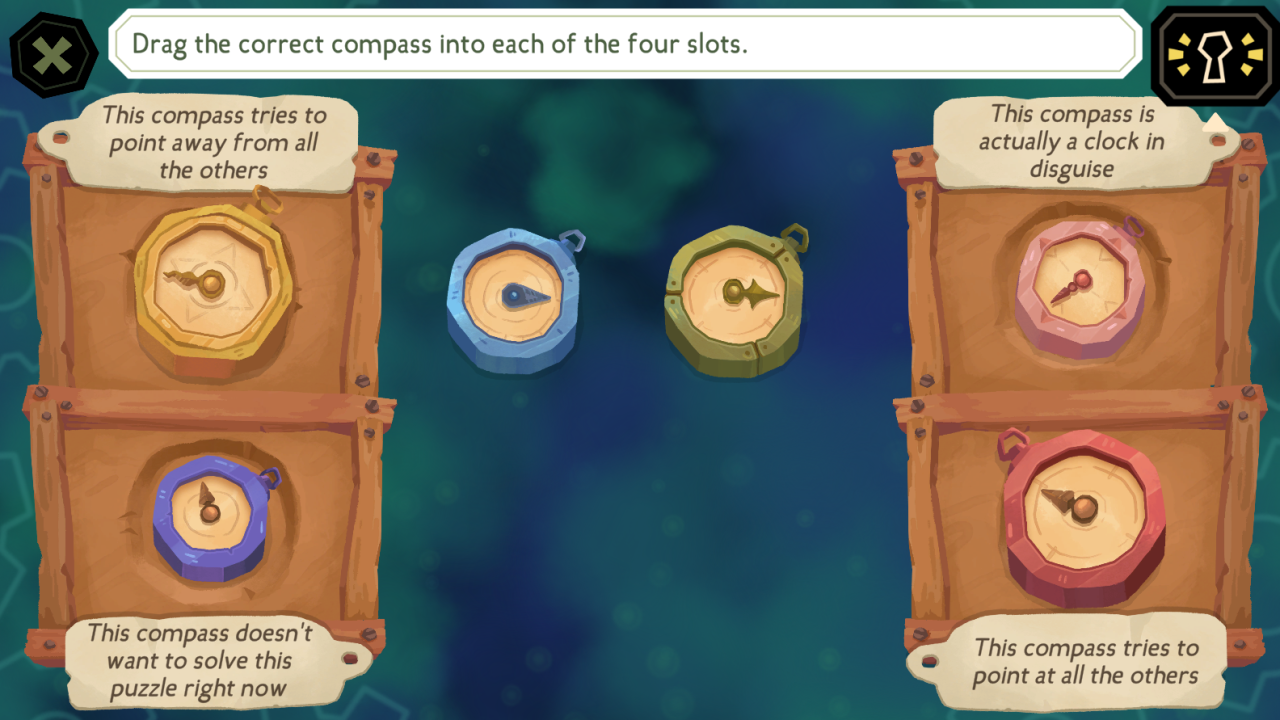
To solve this puzzle, you need to match a colored compass with the correct description.
The Yellow compass tries to point away from all the others.
The Purple compass doesn’t want to solve this puzzle right now.
The Pink compass is actually a clock in disguise.
The Red compass tries to point at all the others.
This unlocks the Ocean Map.
Pin Board (Cargo Hold)
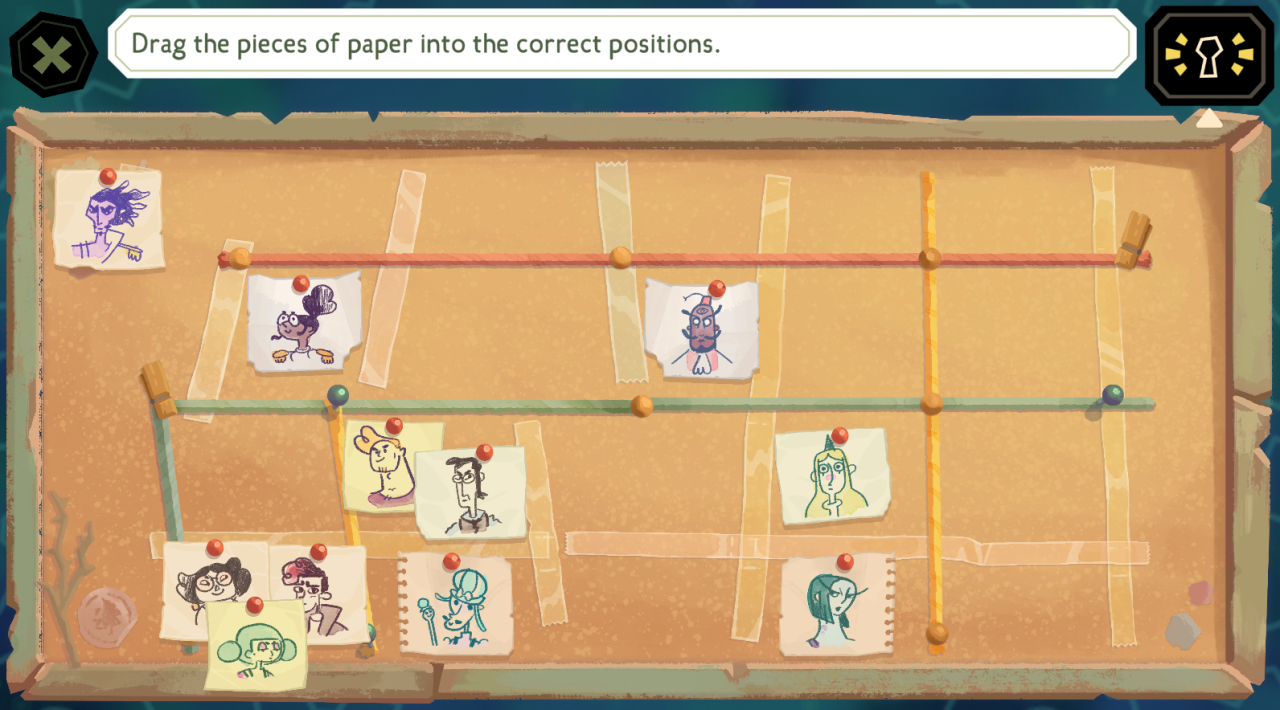
To solve this puzzle, you need to move each character portrait into their current position. Sally and Grimoire should be with Mariana in the Cargo Hold. Magnus should not be in any of the squares, placed off the map.
This unlocks the Moon Photo.
Diving Helmet (Airlock Grotto)
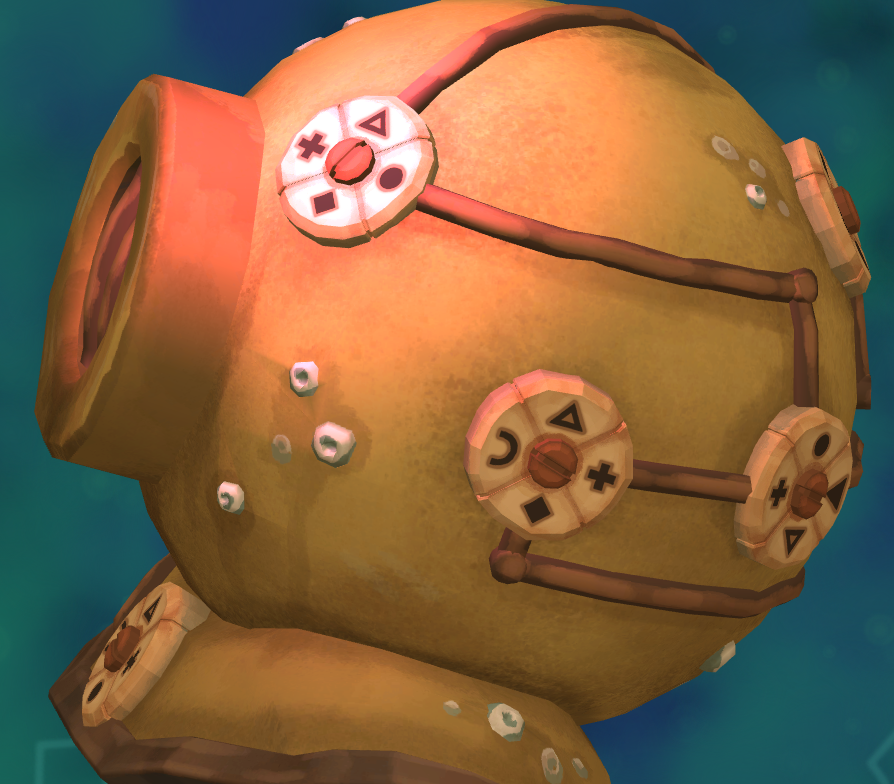
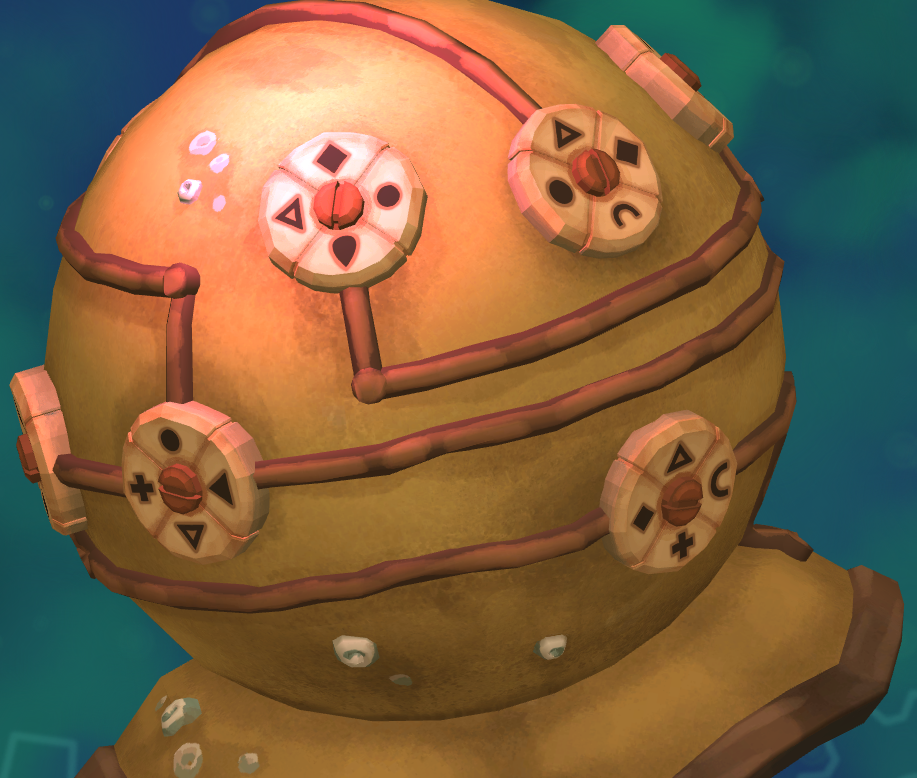
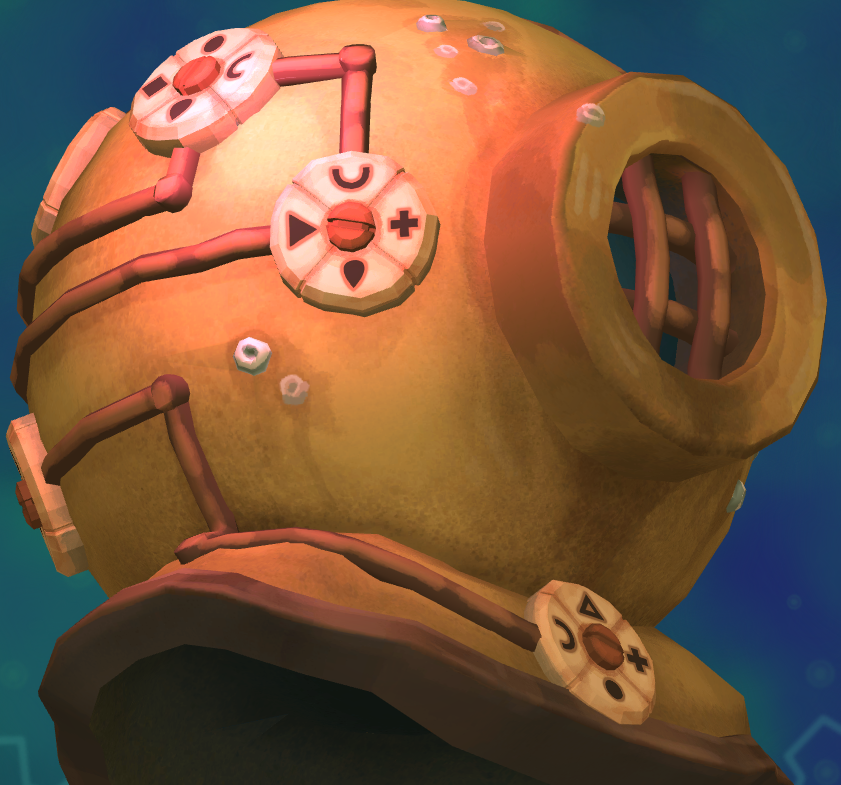
To solve this puzzle, you need to rotate the dials so that they match the other dials at their connecting points.
This unlocks the Pocketbook.
Switch (Bilge)
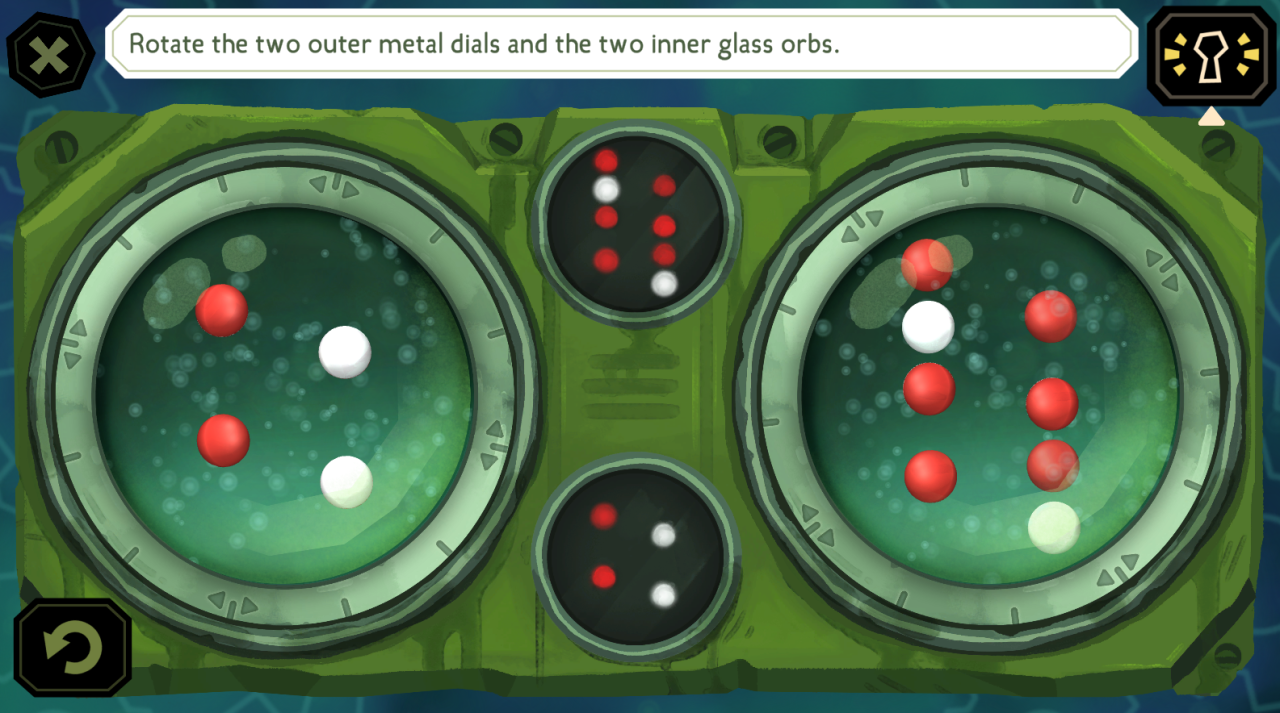
To solve this puzzle, it’s mostly just trial and error. You need to move the orbs in each dial to correspond to one of the patterns it shows in the middle. You can rotate the orbs as well as rotate the dials in order to get the orbs into the correct positions.
This unlocks the Bilge.
Wooden Panel (Illusion Theater)
To solve this puzzle, you need to arrange the suits so that they match the orientation indicated at the top of the tiles.
This unlocks the Lifesize Doll & Film Projector.
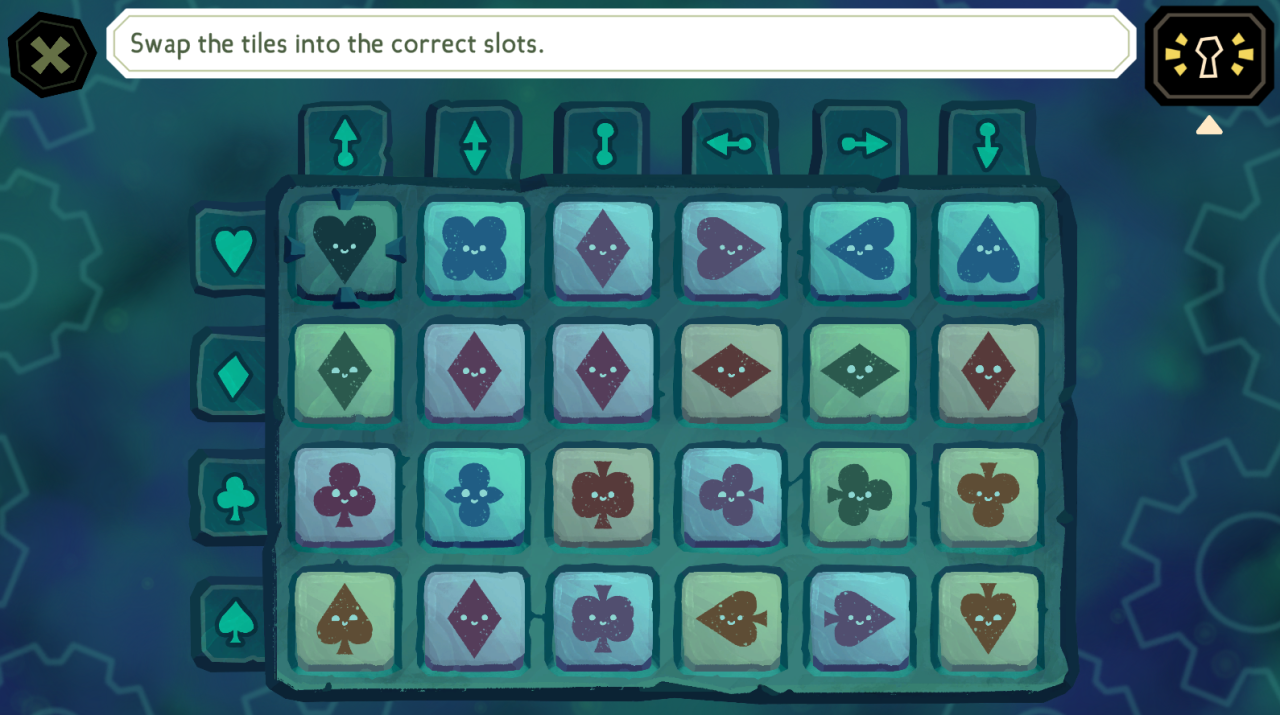
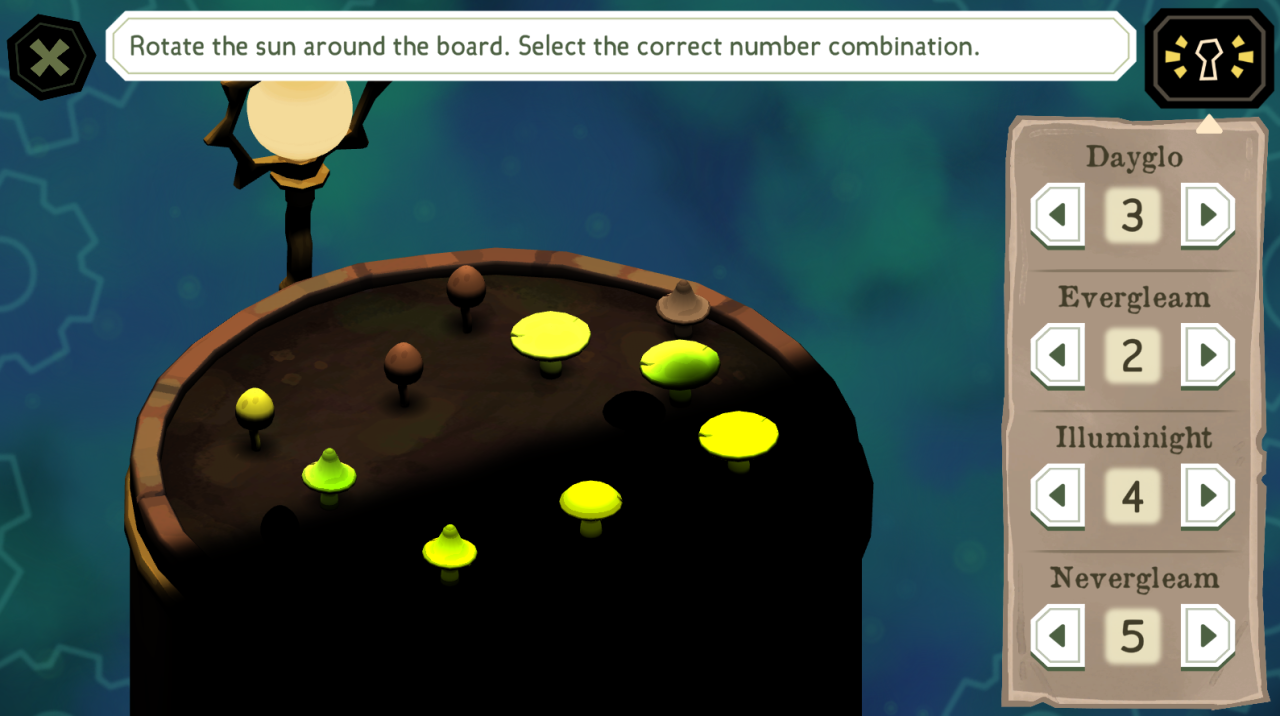
Mushroom Puzzle Box (Cargo Hold)
Located in the tent of the Cargo Hold.
To solve this puzzle, you need to rotate the sun in order to identify how each mushroom interacts with the light, and count how many of each mushroom there are. Dayglo mushrooms only glow when the sun touches it. Evergleam mushrooms are always glowing, no matter if it is day or night. Illuminight mushrooms are dark during the day and glow at night. Nevergleam mushrooms don’t glow at night or day.
Dayglo: 3
Evergleam: 2
Illuminight: 4
Nevergleam: 5
This unlocks another tape for the dictaphone.
Electronic Panel (Control Room)
Located on the wall of the Control Room next to the jacket display.
To solve this puzzle, you need to drag the tiles into the correct positions. This one requires a bit of trial and error. You can move the weights of the tiles around to change its angle. If you listen carefully, there is a faint buzzing that lets you know if a tile is in a good position.
This unlocks the other Handheld Radio.
Treasure Chest (Dome Tank)
Located atop the rocks in the center of the Dome Tank.
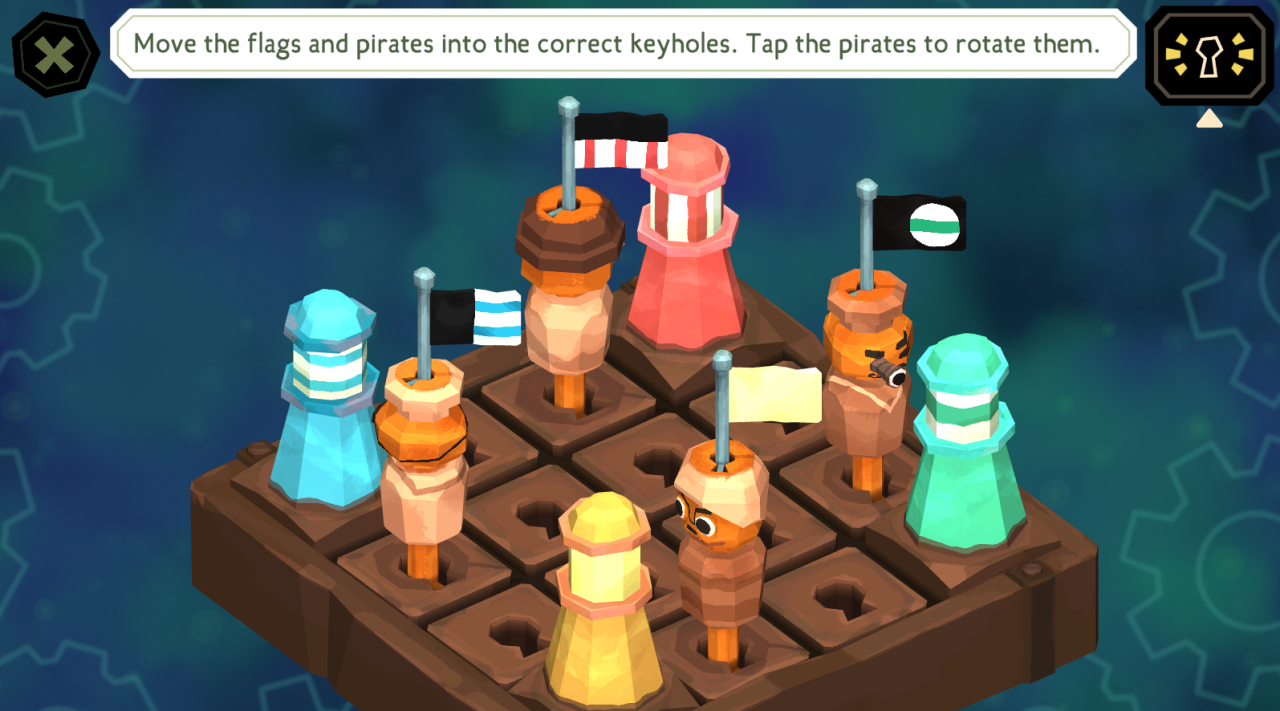
To solve this puzzle, you need to match the flags with the pirates based on their range of vision. Then, position those pirates so they are looking at the tower with the corresponding color of their flag. You will need to rotate the pirates to be looking at their tower.
Blue Tower: Pirate with an eyepatch
Red Tower: Pirate wearing a hat
Yellow Tower: Pirate with a clear field of vision
Green Tower: Pirate with spyglass
This unlocks the Ocean Treasure.
Skull Shelf (Cabinet of Curiosities)
Located in the Cabinet of Curiosities, which can be accessed after clicking on the back of the bookshelf in the Dream Chamber.
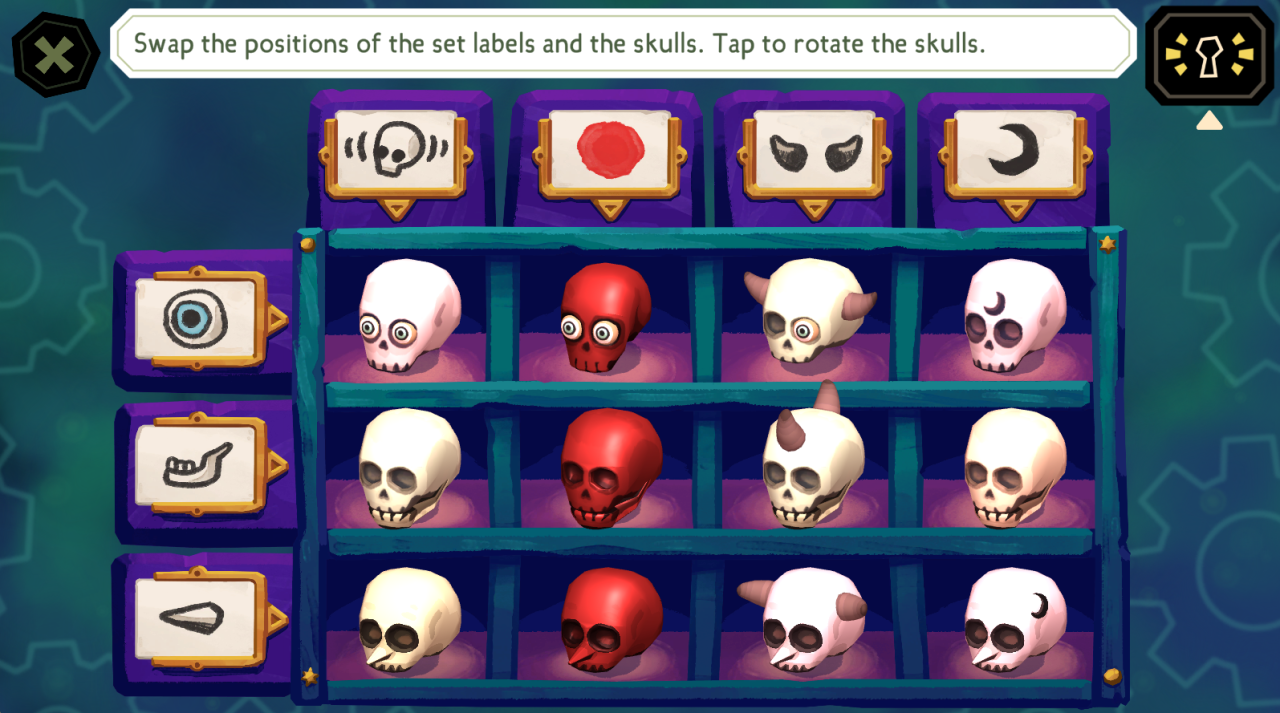
To solve this puzzle, you need to move the labels and the skulls around to create an accurate grid. There are four skulls with eyes, jaws, and noses. The rest of the characteristics should be labeled at the top.
This unlocks the Mermaid’s Tongue.